
Beginner Guide to Growing Cherry Tomatoes in Containers
Why Cherry Tomatoes are the Ultimate Beginner Crop
Bridging the gap between indoor and outdoor living, container gardening allows anyone to cultivate fresh, garden-to-table produce regardless of yard size. For beginners, cherry tomatoes are the undisputed champions of the patio garden. They are prolific, relatively forgiving, and offer a continuous harvest from midsummer right up to the first frost. Unlike their larger beefsteak cousins, cherry tomatoes ripen quickly, suffer less from blossom end rot, and are less prone to splitting. Whether you have a sprawling backyard deck or a modest apartment balcony, growing cherry tomatoes in containers is a highly rewarding DIY project that yields delicious, homegrown results.
Determinate vs. Indeterminate: Understanding Growth Habits
Before purchasing seeds or starter plants, it is crucial to understand the two primary growth habits of tomato plants. This distinction will dictate the size of your container and the type of support structure you will need.
- Determinate (Bush) Varieties: These plants grow to a compact height (usually 3 to 4 feet), produce their fruit all at once, and then decline. They are ideal for smaller spaces and require minimal pruning.
- Indeterminate (Vining) Varieties: These plants continue to grow, flower, and produce fruit until killed by frost. They can easily reach 6 to 10 feet in height and require robust staking or caging, as well as regular pruning of 'suckers' to maintain airflow and direct energy toward fruit production.
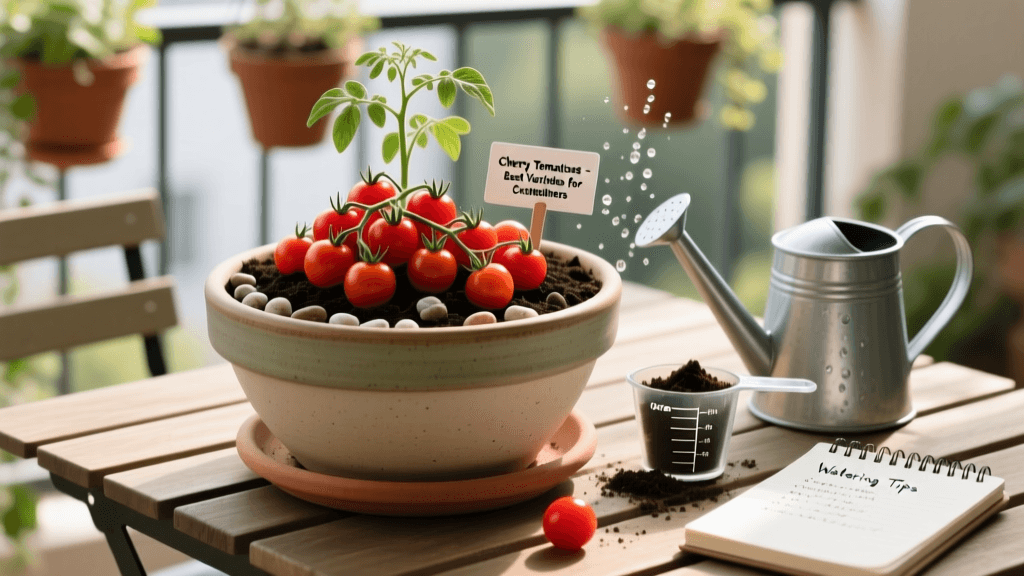
Top Cherry Tomato Varieties for Container Gardening
Selecting the right cultivar is half the battle. Below is a comparison chart of the most reliable, beginner-friendly cherry tomato varieties suited for container life.
| Variety Name | Growth Habit | Days to Harvest | Minimum Pot Size | Flavor Profile |
|---|---|---|---|---|
| Tiny Tim | Determinate | 45-55 Days | 2 Gallon | Sweet, mild, classic tomato taste |
| Patio Princess | Determinate | 55-65 Days | 3 Gallon | Rich, balanced, slightly tart |
| Sweet 100 | Indeterminate | 65-70 Days | 5 Gallon | Exceptionally sweet, candy-like |
| Sun Gold | Indeterminate | 57-65 Days | 5 Gallon | Tropical, intensely sweet, low acid |
| Black Cherry | Indeterminate | 65-75 Days | 5 Gallon | Earthy, smoky, complex, savory |
Choosing the Right Container: Size, Material, and Costs
Tomatoes have extensive, deep root systems. A common beginner mistake is using pots that are too small, which leads to stunted growth and rapid soil drying. For indeterminate varieties, a minimum container size of 5 gallons (roughly 18 inches deep and 14 inches wide) is mandatory. Determinate dwarf varieties can thrive in 2 to 3-gallon pots.
When it comes to materials, fabric grow bags (such as the VIVOSUN 5-Gallon Fabric Pots) are highly recommended for beginners. Costing approximately $15 to $20 for a multi-pack, fabric pots provide superior drainage and promote 'air pruning' of the roots, preventing the plant from becoming root-bound. Traditional terracotta pots are beautiful but heavy and wick moisture away from the soil quickly, requiring much more frequent watering. Food-grade plastic buckets or resin planters (around $10 to $25 each) are also excellent, cost-effective alternatives, provided you drill at least four to six drainage holes in the bottom.
Formulating the Ideal Potting Soil
Never use garden soil or topsoil in containers. These heavy soils compact easily in pots, suffocating roots and introducing soil-borne diseases. Instead, invest in a high-quality, well-draining potting mix. A premium commercial option like FoxFarm Ocean Forest Potting Soil (approximately $20 for a 1.5 cubic foot bag) provides excellent aeration and comes pre-loaded with organic nutrients.
If you prefer a DIY approach to save money on a larger garden, mix the following ingredients in a large wheelbarrow or tub:
- 1 part high-quality sphagnum peat moss or coco coir (for moisture retention)
- 1 part perlite or coarse vermiculite (for drainage and aeration)
- 1 part organic compost (for slow-release nutrients)
- 1/2 cup of granular bone meal (for phosphorus and calcium)
Step-by-Step Planting Instructions
Timing is everything. Wait until all danger of frost has passed and the soil temperature consistently stays above 60°F (15°C) before moving your plants outdoors. Follow these steps for transplanting:
- Prepare the Pot: Fill your container with potting mix, leaving about 2 inches of space from the rim to allow for watering.
- Plant Deeply: Tomatoes have the unique ability to grow adventitious roots from their buried stems. Pinch off the lowest sets of leaves and bury the plant deep, up to the remaining top leaves. This creates a massive, resilient root system.
- Add Calcium: To prevent Blossom End Rot, sprinkle a handful of garden gypsum or bone meal into the planting hole before setting the root ball.
- Water Thoroughly: Water the newly planted tomato until moisture flows freely from the drainage holes, settling the soil around the roots.
Watering and Fertilizing for Maximum Yield
Container tomatoes require vigilant watering. Because pots are exposed to ambient air on all sides, they dry out much faster than in-ground gardens. During the heat of summer, you may need to water your plants daily, or even twice a day. The goal is consistent moisture; fluctuating between bone-dry and waterlogged soil causes fruit splitting and stress. A 2-inch layer of organic mulch, such as straw or shredded bark, on top of the soil will drastically reduce evaporation.
Because frequent watering leaches nutrients from the potting mix, a strict feeding schedule is necessary. Use a dedicated tomato fertilizer like Espoma Tomato-tone, which features a 3-4-6 NPK ratio and essential calcium. Apply 3 tablespoons per plant at the time of transplanting. Once the plant begins to flower, side-dress with 1 tablespoon every two weeks, scratching it lightly into the top inch of soil before watering.
Staking, Caging, and Pruning Techniques
Do not wait until the plant is sprawling to install support. Insert a sturdy 5-foot wooden stake, a heavy-duty steel cage, or a trellis system into the pot at the time of planting to avoid damaging the roots later. As the indeterminate plant grows, secure the main stem to the stake using soft garden twine or velcro plant ties, looping the tie in a figure-eight pattern to prevent stem abrasion.
For indeterminate varieties, pruning 'suckers' (the small shoots that grow in the 'V' intersection between the main stem and the branches) is vital. Pinch these off with your fingers when they are 2 to 3 inches long. This directs the plant's energy into producing fruit rather than excessive foliage and improves air circulation, which is critical for disease prevention.
Troubleshooting Common Pests and Diseases
Even with perfect care, container tomatoes can face challenges. Here is how to handle the most common issues:
- Blossom End Rot: Characterized by a dark, sunken, leathery spot on the bottom of the fruit. This is a physiological disorder caused by a calcium deficiency in the developing fruit, often triggered by uneven watering. Maintain consistent soil moisture and ensure your fertilizer contains calcium.
- Aphids and Whiteflies: These sap-sucking insects cluster on the undersides of leaves. Knock them off with a strong blast of water or apply an organic insecticidal soap or Neem oil spray in the early evening to avoid harming beneficial pollinators.
- Fungal Blights: Early and late blight cause yellowing, spotting, and rapid defoliation. Prevent this by watering at the base of the plant to keep foliage dry, pruning lower leaves to improve airflow, and rotating crops annually.
Expert Insight: According to the Cornell University College of Agriculture and Life Sciences (CALS), maintaining uniform soil moisture is the most effective cultural control for Blossom End Rot. They emphasize that 'calcium moves with water in the plant, so a lack of water in the soil means a lack of calcium in the fruit, regardless of how much calcium is present in the soil.' Therefore, utilizing mulch and self-watering containers can be highly beneficial for beginners struggling with moisture consistency.
Harvesting and Garden-to-Table Enjoyment
Cherry tomatoes are ready to harvest when they reach their mature color (red, orange, yellow, or deep purple, depending on the variety) and yield slightly to a gentle squeeze. The best indicator of ripeness is the 'abscission layer' at the top of the fruit stem; when fully ripe, the tomato will detach effortlessly with a light upward twist. If a stubborn fruit refuses to let go, use a pair of sterilized micro-snips to avoid tearing the delicate vine.
For the ultimate garden-to-table experience, harvest your cherry tomatoes in the late afternoon when their sugar content is at its peak. Store them at room temperature on your kitchen counter; refrigeration alters their cellular structure, resulting in a mealy texture and diminished flavor. Toss them whole into summer salads, roast them in the oven with olive oil and garlic for a rich pasta sauce, or freeze them whole in airtight bags for hearty winter stews.
End-of-Season Container Cleanup
Once the first hard frost kills the foliage, your growing season has concluded. Pull the entire plant, including the root ball, and dispose of it in your municipal green waste bin. Do not compost diseased tomato foliage. Empty the spent soil from your containers. While you can reuse potting soil the following year, it must be amended with fresh compost and a slow-release organic fertilizer to replenish the depleted nutrient profile. Scrub your empty containers with a solution of one part bleach to nine parts water to eliminate any lingering fungal spores, ensuring a clean, disease-free slate for next spring's planting.

