
Gardening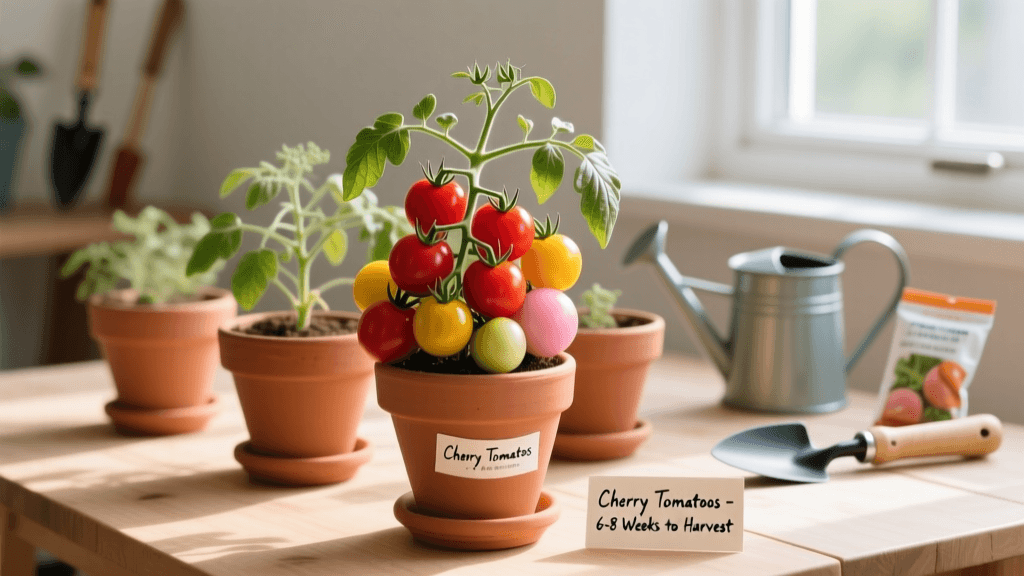
The Beginner's Guide to Growing Cherry Tomatoes in Pots
Why Cherry Tomatoes are Perfect for Beginners
Growing your own food is one of the most rewarding hobbies you can take up, and cherry tomatoes are widely considered the ultimate gateway crop. Unlike their larger, more finicky relatives, cherry tomatoes are prolific producers, highly resistant to many common diseases, and perfectly suited for small spaces. Whether you have a sprawling backyard or just a modest apartment balcony, growing cherry tomatoes in pots allows you to control the soil quality, manage pests more easily, and move the plants to chase the sun.
This beginner-friendly guide will walk you through every step of the process, from selecting the right container and soil to harvesting your very first sweet, sun-warmed tomato. With a few basic supplies and some consistent care, you can expect a continuous harvest from midsummer all the way to the first autumn frost.
Choosing the Right Container for Tomatoes
Tomatoes have vigorous, deep root systems. The most common mistake beginners make is choosing a pot that is too small, which leads to stunted growth and rapid soil drying. When shopping for containers, keep these guidelines in mind:
- Size Matters: A single cherry tomato plant requires a minimum of a 5-gallon container (roughly 12 inches deep and wide). However, a 10-gallon to 15-gallon pot is highly recommended for indeterminate varieties to provide enough room for root expansion and moisture retention.
- Drainage is Non-Negotiable: Tomatoes hate 'wet feet.' Ensure your pot has at least four to six drainage holes at the bottom. If you are upcycling a bucket or storage bin, drill 1/2-inch holes in the base.
- Material Choices:
- Plastic/Resin ($15-$30): Lightweight, retains moisture well, and budget-friendly.
- Terracotta/Clay ($25-$50): Heavy and porous. They provide excellent stability for top-heavy plants but dry out very quickly in the summer heat.
- Fabric Grow Bags ($10-$20 for a multi-pack): Excellent for root aeration and preventing root circling. They dry out faster than plastic but are incredibly cheap and easy to store in the off-season.
Selecting Beginner-Friendly Tomato Varieties
When buying seeds or nursery transplants, you will encounter two main growth habits: determinate (bush) and indeterminate (vining). For container gardening, determinate or dwarf varieties are generally easier to manage, though indeterminate types will yield more fruit over a longer period if properly supported.
Top Container Varieties for Beginners
- Patio Princess (Determinate): Specifically bred for containers. It stays compact (about 2 feet tall) and produces sweet, bite-sized fruit without needing a massive cage.
- Tumbling Tom (Determinate): A trailing variety perfect for hanging baskets or the edges of large whiskey barrel planters.
- Sweet 100 or Sweet Million (Indeterminate): These are vining giants that will require a tall, sturdy stake or a heavy-duty tomato cage. They produce hundreds of tomatoes per plant and are incredibly disease-resistant.
Formulating the Ideal Potting Soil
Never use garden soil or topsoil in your containers. Garden soil is too dense, will compact in a pot, and can introduce soil-borne diseases and weed seeds. You need a light, fluffy, and nutrient-rich potting mix that retains moisture but drains freely.
The Ultimate DIY Tomato Potting Recipe
If you want to save money and control your ingredients, mix the following in a large wheelbarrow or tote:
- 1/3 Coco Coir or Peat Moss: For moisture retention and a light texture.
- 1/3 High-Quality Compost: Provides a slow-release base of nutrients and beneficial microbes.
- 1/3 Coarse Perlite or Pumice: Ensures aeration and prevents the soil from compacting.
- Amendments: Add 1 cup of worm castings and 1/2 cup of bone meal (for phosphorus and calcium) per 5 gallons of soil mix.
Store-Bought Alternative: If you prefer to buy a pre-made mix, look for premium organic options like FoxFarm Ocean Forest or Espoma Organic Potting Mix, which are fortified with the necessary nutrients for heavy feeders like tomatoes.
Step-by-Step Planting Guide
Timing is crucial. Wait until all danger of frost has passed and nighttime temperatures consistently stay above 50°F (10°C). Before planting nursery-bought seedlings outdoors, you must 'harden them off' by placing them outside in a shaded, sheltered spot for a few hours a day, gradually increasing their sun exposure over 7 to 10 days.
- Prepare the Pot: Fill your container with your potting mix, leaving about 3 inches of space at the top to allow for watering.
- Dig a Deep Hole: Tomatoes have a unique ability to grow roots from their stems. Pinch off the lower leaves of your seedling and dig a hole deep enough to bury the plant up to its top set of true leaves.
- Plant and Backfill: Place the seedling in the hole, gently backfill with soil, and press down lightly to remove large air pockets.
- Water In: Water deeply immediately after planting until water runs freely out of the bottom drainage holes.
Watering, Feeding, and Support
Consistent care is where the battle for a bumper crop is won or lost. Container tomatoes dry out much faster than those in the ground.
Watering Rules
Check your pots daily by sticking your finger two inches into the soil. If it feels dry, it is time to water. Water at the base of the plant in the early morning. Avoid overhead watering, as wet foliage invites fungal diseases like early blight and powdery mildew.
Fertilizing Schedule
Tomatoes are heavy feeders. The frequent watering required for pots washes nutrients out of the soil rapidly.
- At Planting: Mix a granular organic fertilizer like Espoma Organic Tomato-tone (NPK 3-4-6) into the top few inches of soil.
- Every 2 Weeks: Once the plant begins to flower, supplement with a liquid fertilizer, such as a fish emulsion or liquid kelp, to support fruit set.
Supporting the Plant
Install your stakes or cages at the time of planting to avoid damaging the root system later. For indeterminate varieties, a sturdy 6-foot wooden stake or a heavy-duty metal Texas Tomato Cage is necessary. Gently tie the main stem to the stake using soft garden twine or Velcro plant ties in a figure-eight pattern to prevent chafing.
Container Tomato Care Chart
Use this quick-reference chart to tailor your care routine to your specific tomato type and container setup.
| Tomato Type | Min. Pot Size | Support Needed | Watering Frequency (Peak Summer) | Pruning Required? |
|---|---|---|---|---|
| Determinate (Bush) | 5 Gallons | Short Cage (3 ft) | Every 1-2 Days | No (Leave suckers alone) |
| Indeterminate (Vining) | 10-15 Gallons | Tall Stake / Heavy Cage (6 ft) | Daily (Sometimes twice a day) | Yes (Remove suckers) |
| Dwarf / Patio | 3-5 Gallons | Small Stake or None | Every 1-2 Days | No |
Companion Planting in Your Tomato Pot
Maximize your container space and deter pests by underplanting your tomatoes with beneficial companions. Basil is the classic partner; it is believed to improve the flavor of tomatoes and helps repel thrips and tomato hornworms. Marigolds are another excellent addition, as their roots exude compounds that deter harmful root-knot nematodes, while their bright flowers attract vital pollinators to your patio.
Troubleshooting Common Issues
Even with the best care, you may encounter a few hurdles. Here is how to handle the most common beginner problems:
Blossom End Rot (BER)
If you notice the bottom of your green or ripening tomatoes turning black and leathery, your plant has Blossom End Rot. This is a calcium deficiency, but it is almost always caused by inconsistent watering, which prevents the plant from transporting calcium from the soil to the fruit. Maintain a strict watering schedule and apply a layer of organic mulch (like straw or shredded leaves) to the top of your soil to retain moisture.
Fruit Splitting
Split skins occur when a dry period is suddenly followed by heavy watering or a massive rainstorm. The plant rapidly absorbs water, causing the fruit interior to expand faster than the skin can stretch. Keep soil moisture even and harvest promptly after heavy rains.
Aphids and Whiteflies
These tiny sap-sucking insects congregate on the undersides of leaves and new growth. For a mild, organic treatment, spray the affected areas with a mixture of 1 tablespoon of mild liquid Castile soap per quart of water, or use a ready-to-use Neem Oil spray in the early evening to avoid harming beneficial bees.
Expert Insights on Container Tomatoes
According to the University of Minnesota Extension, 'Tomatoes require consistent moisture to prevent physiological disorders like blossom end rot. Container plants may need watering once or even twice a day during hot, windy weather. Using a drip irrigation system or self-watering containers can help maintain the even soil moisture that tomatoes demand.'
Investing in a simple drip irrigation kit with a battery-operated timer (costing around $40-$60) can completely automate this process, taking the guesswork out of daily watering and ensuring your plants thrive even if you are away for the weekend.
Harvesting and Enjoying Your Crop
The best part of growing cherry tomatoes is the harvest. Pick the fruit when it is fully colored but still has a slight 'give' when gently squeezed. Use a pair of clean pruning snips or pinch the fruit off carefully at the joint to avoid tearing the delicate vine. Check your plants daily during peak season, as a single cherry tomato plant can produce dozens of ripe fruits every week. Enjoy them straight off the vine, tossed in summer salads, or roasted in the oven with olive oil and garlic for a spectacular side dish.

