
Gardening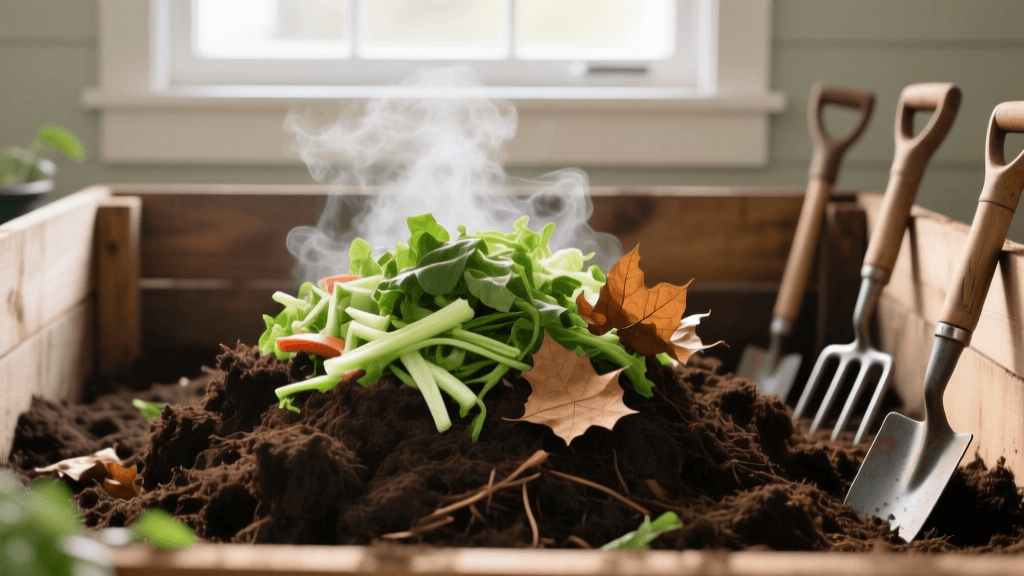
Master Hot Composting: Expert Ratios & Temperature Guide
The Science Behind Hot Composting
Hot composting is not merely a routine gardening chore; it is a highly managed biological process driven by thermophilic (heat-loving) bacteria and actinomycetes. Unlike passive cold composting, which can take a year or more to break down organic matter, hot composting accelerates decomposition, yielding finished, nutrient-dense humus in as little as 18 to 21 days. Furthermore, the intense heat generated during this process—typically between 135°F and 160°F (57°C to 71°C)—is essential for destroying soil-borne pathogens, fungal spores, and stubborn weed seeds that would otherwise survive and infest your garden beds.
For the serious home gardener or small-scale market grower, mastering hot composting transforms yard waste and kitchen scraps into a premium, biologically active soil amendment that would cost upwards of $40 to $60 per cubic yard to purchase from a commercial landscape supplier. However, achieving these temperatures requires strict adherence to specific carbon-to-nitrogen ratios, moisture levels, and aeration schedules.
Achieving the Perfect Carbon-to-Nitrogen (C:N) Ratio
The most common reason a compost pile fails to heat up is an imbalance in the Carbon-to-Nitrogen (C:N) ratio. Carbon-rich materials (browns) provide the energy source for microbes, while nitrogen-rich materials (greens) supply the protein necessary for rapid microbial reproduction. The ideal starting C:N ratio for a hot compost pile is between 25:1 and 30:1 by weight.
Because calculating exact weights in the garden is impractical, experts recommend mixing materials by volume. A reliable rule of thumb is to use roughly two to three parts browns to one part greens by volume, adjusting based on the specific density and moisture content of your materials.
| Material Type | Category | Approximate C:N Ratio | Expert Preparation Tip |
|---|---|---|---|
| Dry Autumn Leaves | Brown (Carbon) | 40:1 to 60:1 | Shred with a lawnmower before adding to increase surface area. |
| Wood Chips / Sawdust | Brown (Carbon) | 200:1 to 500:1 | Use sparingly; limit to 10% of total volume to prevent nitrogen lockout. |
| Alfalfa Pellets | Green (Nitrogen) | 12:1 | An excellent, fast-acting nitrogen booster (Costs approx. $25 per 50lb bag). |
| Fresh Grass Clippings | Green (Nitrogen) | 15:1 to 20:1 | Mix thoroughly with browns to prevent anaerobic matting and odor. |
| Coffee Grounds | Green (Nitrogen) | 20:1 | Despite their brown color, they are highly nitrogenous. Break up clumps. |
Sizing and Building Your Hot Compost Pile
Thermal mass is the critical factor in retaining compost heat. A pile that is too small will lose heat to the surrounding air faster than the microbes can generate it. The minimum required volume for a hot compost pile is one cubic yard (3 feet wide x 3 feet long x 3 feet high). For optimal results, especially in cooler climates, aim for a pile that is 4x4x4 feet.
Construct your pile directly on bare soil to allow beneficial earthworms and indigenous microbes to migrate upward into the organic matter. Avoid using solid-bottom plastic tumblers for hot composting, as they lack the necessary thermal mass and aeration footprint. Instead, use a three-bin system built from untreated wooden pallets or heavy-duty wire mesh enclosures. To ensure basal airflow, lay down a 4-inch base of bulky, coarse twigs or a wooden shipping pallet before adding your mixed materials.
The 18-Day Berkeley Hot Composting Method
Developed by researchers at the University of California, Berkeley, this method relies on frequent turning to maintain oxygen levels and distribute heat evenly. It requires all materials to be gathered and mixed at once, rather than adding scraps continuously over time.
Days 1 to 4: Initial Assembly and Rest
Chop all materials into 1-inch to 2-inch pieces using a machete, chipper-shredder, or lawnmower. Mix your browns and greens thoroughly on a tarp before building the pile to ensure an even distribution of nitrogen. As you build, water the pile layer by layer. The target moisture content is 50-60%. Use the 'sponge test': grab a handful of compost (wearing gloves) and squeeze it firmly. It should yield one or two drops of water. If it streams, it is too wet; if it crumbles and yields no moisture, it is too dry. Cover the pile with a breathable material, such as burlap or a specialized compost fleece, to retain moisture while allowing gas exchange. Let the pile rest for four days as the mesophilic bacteria initiate the breakdown and temperatures begin to spike.
Day 4: The First Critical Turn
On the fourth day, use a sturdy, long-handled garden fork (such as a True Temper 4-tine forged fork) to turn the pile completely. Move the outer, cooler layers of the pile into the center of the new pile, and place the hot, steaming core material on the outside. This redistribution ensures that all organic matter is exposed to the pathogen-killing temperatures of the core. You should see steam rising and smell a rich, earthy aroma reminiscent of a forest floor.
Days 6 to 18: The 48-Hour Turning Schedule
From day six onward, turn the pile every 48 hours. This frequent aeration prevents the pile from becoming anaerobic and supplies the continuous oxygen required by thermophilic bacteria. During each turn, check the moisture levels. If the pile appears ashy or dry, mist it lightly with a garden hose as you turn. By day 14, the pile will begin to cool, and the original materials will be largely unrecognizable, replaced by a dark, crumbly texture.
Temperature Tracking and Moisture Management
You cannot manage what you do not measure. Investing in a high-quality, long-stem compost thermometer is non-negotiable for the hot composting practitioner. The REOTEMP Backyard Compost Thermometer (with a 20-inch stem and 2-inch dial) is an industry standard, costing around $35, and allows you to read the core temperature without dismantling the pile.
Insert the thermometer probe into the center of the pile. You are looking for core temperatures between 135°F and 160°F. If the temperature exceeds 165°F, the pile is at risk of killing off beneficial microbes and, in extreme cases with dry, high-carbon materials, spontaneously combusting. Turn the pile immediately to cool it down.
Authoritative Citation: According to the Cornell Waste Management Institute, maintaining compost temperatures at or above 131°F (55°C) for a minimum of three consecutive days is scientifically proven to destroy human and plant pathogens, including E. coli and Salmonella. Furthermore, most common weed seeds, such as crabgrass and pigweed, are rendered non-viable when exposed to temperatures of 145°F (62°C) for several days.
Expert Troubleshooting Chart
Even with meticulous planning, environmental variables can disrupt the composting process. Use this diagnostic chart to correct common issues.
| Symptom | Probable Cause | Expert Solution |
|---|---|---|
| Pile smells like ammonia or rotting garbage | Too much nitrogen (low C:N ratio); anaerobic conditions | Turn the pile immediately and mix in 3-4 parts dry, shredded leaves or straw to absorb excess moisture and balance carbon. |
| Pile fails to heat up past ambient air temperature | Insufficient nitrogen, lack of moisture, or pile is too small | Verify pile is at least 3x3x3 ft. Add a nitrogen boost like blood meal or alfalfa pellets, water thoroughly, and turn. |
| Core is hot, but outer edges are cold and dry | Normal thermal gradient; poor insulation | Turn the pile to move outer material to the center. In winter, insulate the bin exterior with straw bales or rigid foam boards. |
| White, ashy substance coating materials | Ashy mold due to excessive dryness and overheating | Douse the pile with water during the next turn. Ensure the 'sponge test' yields a drop of water when squeezed. |
Curing and Application Best Practices
Once the 18-day turning cycle is complete and the pile's temperature drops to match the ambient air temperature, the active composting phase is over. However, the compost is not yet ready for the garden. It must undergo a 'curing' phase for 2 to 4 weeks. During curing, the microbial population stabilizes, and the pH levels neutralize. Applying uncured, 'hot' compost directly to plant roots can cause nitrogen immobilization and root burn.
After curing, screen your compost through a 1/2-inch hardware cloth sieve to remove any large, undecomposed woody pieces. Toss these pieces back into your next compost pile as an inoculant. The resulting fine, dark humus is teeming with beneficial biology. Apply it as a 1/2-inch top dressing to your lawn, mix it into raised beds at a 20% volume ratio with native soil and aeration materials (like pumice or perlite), or brew it into compost tea for a potent, liquid foliar feed. By mastering these expert techniques, you close the nutrient loop in your garden, ensuring vibrant, disease-resistant plants season after season.

