
Gardening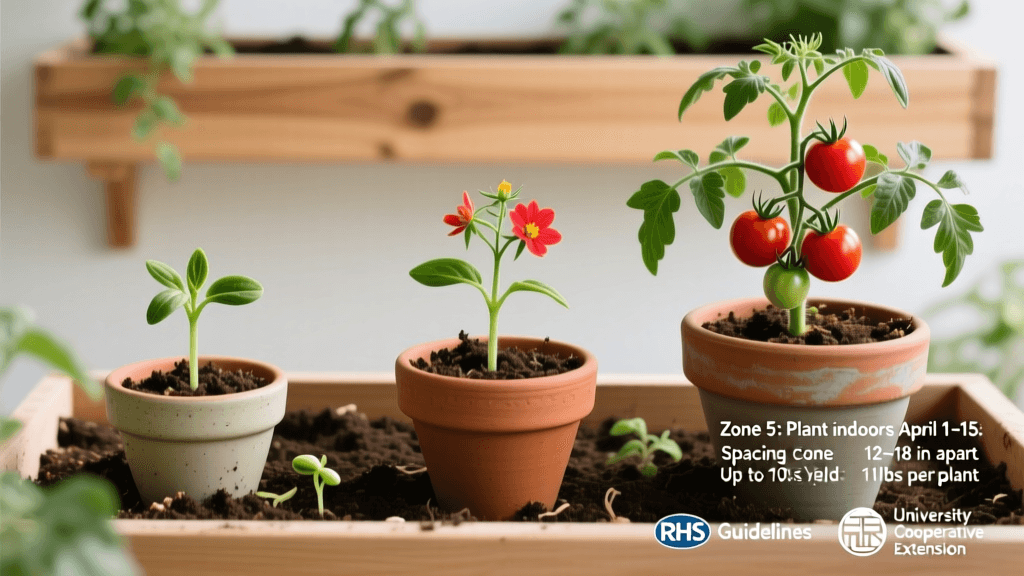
How To Grow Tomatoes In Containers
Getting Started with Container Tomatoes
Growing tomatoes in containers puts fresh fruit within reach of anyone with a balcony, patio, or even a sunny doorstep. It does take more attention than in-ground growing — containers dry out faster, nutrients run low quicker, and roots can’t escape summer heat — but the payoff is real. A single well-managed 15-gallon container can yield 10 to 15 pounds of fruit over a season, about as much as a small garden bed. You also get full control over soil, drainage, and where the plant sits.
The University of California Cooperative Extension ran container tomato trials showing that determinate varieties in 10-gallon or larger pots consistently outperform smaller containers. Fruit set dropped by roughly 40% in pots under 5 gallons due to root restriction and moisture stress. So choosing the right container size is the first thing to get right — before you even sow a seed.
Choosing the Right Container
Start with volume. Tomatoes are heavy feeders with deep, spreading roots. For compact or determinate varieties like 'Patio', 'Bush Early Girl', or 'Tumbling Tom', 5 gallons will work, but 10 gallons gives noticeably better results. Indeterminate varieties — 'Sungold', 'Cherokee Purple', 'Brandywine' — need at least 15 to 20 gallons to thrive.
Material affects how hot the roots get. Black plastic pots heat up fast, and root-zone temperatures above 85°F (29°C) can cut back on fruit set. Light-colored fabric grow bags or glazed ceramic pots handle temperature swings better. Fabric bags also encourage air-pruning, which keeps roots from circling and becoming tangled like they do in rigid pots.
Drainage is non-negotiable. Every container must have multiple holes at the base. A 15-gallon pot should have at least four to six holes, each at least half an inch across. Set the container on pot feet or bricks so air circulates underneath and the holes don’t get blocked against a flat surface.
Container Size Reference
| Variety Type | Minimum Container Size | Recommended Container Size | Expected Yield per Plant |
|---|---|---|---|
| Compact/Dwarf Determinate | 5 gallons | 7–10 gallons | 4–8 lbs |
| Standard Determinate | 10 gallons | 15 gallons | 8–15 lbs |
| Indeterminate | 15 gallons | 20–25 gallons | 12–20+ lbs |
| Cherry/Trailing | 5 gallons | 10 gallons | 6–12 lbs |
Soil Mix and Fertility
Garden soil doesn’t work well in containers. It compacts when watered, chokes roots of oxygen, and may carry diseases. Use a good potting mix — either store-bought or one you blend yourself. The Royal Horticultural Society (RHS, 2023) suggests 60% peat-free compost, 30% perlite or coarse grit, and 10% well-rotted organic matter. That balance holds water without staying soggy.
Mix in slow-release granular fertilizer when you fill the container. Once flowers appear, switch to a high-potassium liquid feed once a week. Container tomatoes use up nutrients faster than garden plants. Without feeding starting around week four, leaves yellow and fruit shrinks. Look for a feed with an NPK ratio like 4-5-8 during fruiting.
Blossom end rot shows up as dark, leathery spots on the bottom of fruit. It’s usually tied to uneven watering — not a lack of calcium. When moisture levels swing, calcium doesn’t move well into developing fruit. Keeping the soil evenly moist — never letting it dry out completely — works better than spraying calcium.
Building a DIY Potting Mix
If you’d rather mix your own, try these proportions for tomatoes:
- 3 parts peat-free multipurpose compost or coir
- 1 part perlite (for drainage and air)
- 1 part composted bark or aged wood chip (adds texture and slow-release nutrients)
- A handful of slow-release granular fertilizer per 10-gallon volume
- A tablespoon of ground limestone per 10-gallon volume if using coir, since coir tends to be slightly acidic
Aim for a soil pH between 6.0 and 6.8. Outside that range, nutrients stay locked up even if they’re in the mix. A basic pH test kit from any garden center takes five minutes and tells you exactly where you stand.
Planting Dates by USDA Hardiness Zone
Tomatoes need warmth. Growth slows below 50°F (10°C), and frost below 40°F (4°C) can damage them. Containers let you move plants indoors if a late frost hits, but timing still depends on local conditions. These dates assume you started seedlings indoors six to eight weeks earlier.
- Zones 3–4 (Minnesota, northern Maine, Montana): Transplant outdoors late May to early June. First frost returns in September, giving about 90–100 productive days.
- Zones 5–6 (Ohio, Virginia, Kansas, Oregon coast): Transplant mid-April to mid-May after the last frost. In many places, the season stretches into October.
- Zones 7–8 (Georgia, Texas, Pacific Northwest lowlands): Transplant late March to mid-April. A second round planted in late July often yields a fall crop before November frost.
- Zones 9–10 (Southern California, Arizona, Florida): Plant February to March for spring tomatoes; for fall, plant August to September to avoid summer heat over 95°F (35°C), which stalls fruit set.
- Zone 11+ (Hawaii, southernmost Florida): You can grow year-round — just watch for heat and humidity instead of frost.
North Carolina State University Cooperative Extension (2022) points out that soil temperature matters more than the calendar: wait until the soil in your container reads 60°F (15°C) or warmer at a 4-inch depth before moving seedlings outside for good.
Starting Seeds Indoors
Count back six to eight weeks from your transplant date to know when to sow. Put two seeds per cell in a 72-cell tray, then thin to one healthy seedling after they sprout. Keep the soil between 70°F and 80°F (21–27°C) — germination usually happens in five to ten days. If you’re starting in late winter, use LED grow lights for 14 to 16 hours a day, keeping them 2 to 4 inches above the seedlings. Windowsills rarely give enough light, and weak, leggy stems are the result.
Hardening off takes seven to ten days. Start with one to two hours outside in a sheltered spot, then increase daily. Skipping this step shocks the plants and can delay growth by two or three weeks.
Spacing, Support, and Pruning
Don’t crowd containers together. Even though each plant is in its own pot, tight spacing cuts airflow, raises humidity around the leaves, and encourages fungal disease. Leave at least 24 inches (60 cm) between container edges on patios or balconies.
Indeterminate tomatoes need support from day one — adding it later risks damaging roots. A sturdy tomato cage at least 54 inches (137 cm) tall, or a single stake of the same height driven all the way to the bottom of the pot, handles most varieties. Tie stems loosely with soft twine or silicone clips every 8 to 10 inches as the plant grows.
Pinch out side shoots (suckers) that pop up where leaves meet the main stem. This keeps indeterminate plants compact in containers and sends energy into fruit instead of extra leaves. Remove suckers when they’re under 2 inches long — pinch them cleanly with your fingers. Wait longer than 4 inches and the wound is bigger, slower to heal, and more likely to invite disease. Determinate types don’t need much pruning and do fine left alone.
"Container-grown tomatoes pruned to a single or double leader consistently produced fruit 15–20% larger than unpruned controls in the same pot size, though total fruit count per plant was lower. For gardeners prioritizing fruit quality over quantity, single-leader training is the recommended approach."
— University of Florida IFAS Extension, Container Vegetable Gardening Series, 2021
Watering and Feeding Through the Season
In full sun during summer, containers may need watering once or twice a day. Stick your finger 2 inches into the mix — if it feels dry, water thoroughly until water runs freely from the bottom. Shallow watering only wets the top inch and pushes roots upward, making plants more vulnerable to drying out.
Self-watering containers with built-in reservoirs cut down on daily trips with the hose and smooth out moisture swings that lead to blossom end rot and cracked fruit. They’re especially handy if you travel or work long hours. Refill the reservoir every two to four days in hot weather instead of topping it off daily — that lets the soil draw moisture up naturally.
Start liquid feeding three to four weeks after transplanting, once the slow-release fertilizer begins to fade. Use a balanced feed (like 10-10-10) once a week for the first two weeks, then switch to a high-potassium tomato feed as soon as flower clusters appear. Keep feeding weekly until the season ends. Stop if temperatures stay below 50°F (10°C) for several days — the plant won’t absorb much, and salts can build up in the soil.
Pest and Disease Management
Container tomatoes face the same pests as garden-grown ones, but you can move them. If aphids show up on a neighbor’s plant, slide yours a few feet away. If leaves look damp and mildewy, shift it to a breezier spot. Check plants at least twice a week, especially the undersides of leaves where spider mites and aphids gather.
Early blight and septoria leaf spot are common in humid areas. Both start on lower leaves and move upward. Snip off any yellowing or spotted leaves as soon as you see them, and throw them in the trash — don’t compost diseased material. During wet spells, a copper-based fungicide applied every ten to fourteen days helps keep things in check.
Tomato hornworms are big and easy to spot. Their dark green droppings on leaves below are often the first clue. Pick them off by hand. If there are lots, Bacillus thuringiensis (Bt) spray works well and stays organic.
Harvesting and End-of-Season Care
Most tomatoes ripen 60 to 85 days after transplanting, depending on the variety. Pick them when they’ve reached full color and give slightly to gentle pressure. Harvesting at peak color — rather than leaving fruit on the vine too long — lowers the chance of cracking and pest damage, and often prompts the plant to set more fruit.
As autumn cools, green tomatoes won’t ripen outdoors in zones 5 and colder. Bring the whole container inside to a warm room, or pick the green fruit and ripen it indoors at 65–70°F (18–21°C), away from direct sun. Tomatoes give off ethylene gas, which triggers ripening — putting them in a paper bag with a ripe apple speeds it up.
At season’s end, empty the container completely. Don’t reuse the same potting mix for tomatoes next year unless you sterilize it first. Fusarium and Verticillium fungi stick around in used soil. Fresh mix each season is the easiest way to dodge disease. Wash containers with a 10% bleach solution, rinse well, and store them dry to keep algae and pathogens from building up over winter.

