
How to Install a Smart Drip Irrigation System for Raised Beds
Why Upgrade to a Smart Drip Irrigation System?
Transitioning from a traditional garden hose to a smart drip irrigation system is one of the most impactful upgrades you can make to your outdoor living space. For garden-to-table enthusiasts, consistent moisture is the secret to crisp lettuce, juicy tomatoes, and robust root vegetables. Hand-watering raised beds is not only time-consuming but also highly inefficient, often leading to overwatering, fungal diseases on wet foliage, and excessive water runoff.
By integrating a smart Wi-Fi-enabled controller with a drip irrigation network, you deliver water precisely where it is needed: the root zone. Smart controllers utilize local weather data, evapotranspiration (ET) rates, and soil moisture levels to automatically adjust watering schedules. This means your garden gets exactly what it needs, whether you are dealing with a mid-summer heatwave or an unexpected spring rainstorm, all while reducing your outdoor water consumption by up to 50 percent.
Tools and Materials Needed
Before beginning your installation, gather the following components. This setup is designed for a standard 4x8-foot raised garden bed, but it can easily be scaled up by adding more mainline tubing and emitters.
- Smart Irrigation Controller: Rachio 3 or Orbit B-hyve (Cost: $100 - $200)
- 3/4-inch Hose to 3/4-inch Pipe Thread Adapter: Connects to your outdoor spigot (Cost: $5)
- Backflow Preventer (Vacuum Breaker): Protects your home drinking water from contamination (Cost: $15)
- 200-Mesh Water Filter: Prevents debris from clogging the micro-drippers (Cost: $15)
- 30 PSI Pressure Regulator: Drip systems require low pressure; standard home pressure (60+ PSI) will blow the fittings apart (Cost: $12)
- 1/2-inch Polyethylene Mainline Tubing: 50 feet roll (Cost: $20)
- 1/4-inch Vinyl Micro-Tubing: 50 feet roll (Cost: $15)
- 1/2-inch to 1/4-inch Barbed Connectors: Pack of 20 (Cost: $8)
- 0.9 GPH (Gallons Per Hour) Pressure-Compensating Drippers: Pack of 30 (Cost: $12)
- 1/2-inch End Caps and Landscape Staples: To secure and seal the mainline (Cost: $10)
- Tools: Tubing cutter or heavy-duty scissors, hole punch tool for 1/4-inch barbs, Teflon tape, and a screwdriver.
Estimated Total Cost: $210 - $310 depending on the smart controller selected.
Step-by-Step Installation Guide
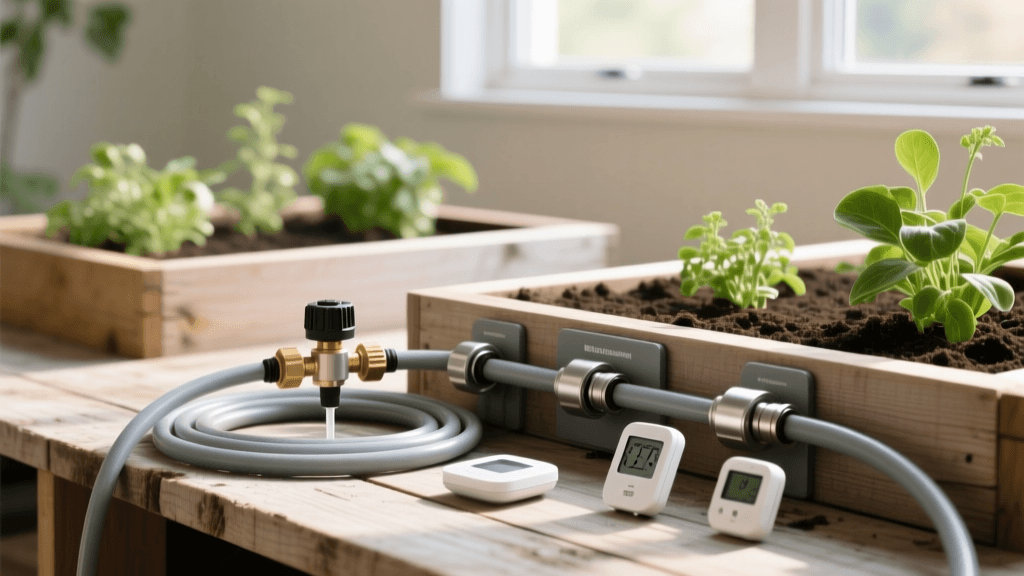
Step 1: Assemble the Head Assembly
The head assembly connects your high-pressure home water supply to the low-pressure drip system. The order of the components is critical for the system to function correctly and safely.
- Wrap Teflon tape clockwise around the threads of your outdoor spigot.
- Screw on the 3/4-inch adapter.
- Attach the backflow preventer to the adapter.
- Screw the 200-mesh filter onto the backflow preventer.
- Attach the 30 PSI pressure regulator to the filter.
- Finally, connect the 1/2-inch tubing adapter to the pressure regulator.
Pro Tip: Never use metal wrenches to tighten plastic irrigation fittings, as they will easily crack. Hand-tighten them firmly to ensure a watertight seal.
Step 2: Lay the Mainline Tubing
Unroll the 1/2-inch polyethylene tubing and let it sit in the sun for about 30 minutes. The heat will soften the plastic, making it pliable and removing the memory of the coil. Lay the tubing along the perimeter of your raised bed or down the center, depending on your plant layout. Secure the tubing to the soil using metal landscape staples every 3 feet to prevent it from shifting when the water pressure turns on. Cap the end of the mainline with a figure-8 end cap.
Step 3: Run Drip Lines to Your Plants
For raised beds filled with a mix of heavy feeders (like tomatoes) and shallow-rooted crops (like radishes), point-source emitters are ideal.
- Use the specialized hole punch tool to puncture the 1/2-inch mainline tubing near the base of each plant.
- Insert a 1/4-inch barbed connector into the hole until it clicks or seats firmly.
- Attach a length of 1/4-inch micro-tubing to the barb, cutting it to the exact length needed to reach the plant's base.
- Attach a 0.9 GPH pressure-compensating dripper to the end of the micro-tubing and stake it directly into the soil next to the plant stem.
Step 4: Connect and Program the Smart Controller
Mount your smart controller on an exterior wall or inside your garage near a power outlet, following the manufacturer's wiring diagram to connect the main irrigation valve wires. Once powered on, download the corresponding app (e.g., the Rachio app) and connect the device to your home Wi-Fi network. Input your garden's specific details: soil type (e.g., loamy raised bed mix), plant type (vegetables), and sun exposure. The app will automatically generate a baseline watering schedule utilizing local meteorological data.
Smart Controller Comparison Chart
Choosing the right brain for your irrigation system is crucial. Below is a comparison of top-tier smart controllers suited for residential garden integration.
| Controller Model | Max Zones | Weather Intelligence Features | Estimated Cost |
|---|---|---|---|
| Rachio 3 Smart Sprinkler Controller | 8 or 16 | WeatherIQ (Freeze, Wind, Saturation, Seasonal Shift) | $170 - $230 |
| Orbit B-hyve Smart Controller | 6 or 12 | WeatherSense (Local weather station integration) | $100 - $140 |
| Rain Bird ESP-TM2 + WiFi Module | 4 to 12 | Basic seasonal adjust via app | $150 - $180 |
Calculating Run Times for Raised Beds
A common mistake DIYers make is running drip systems for the same duration as traditional sprinklers. Because 0.9 GPH drippers emit water very slowly, run times must be longer to achieve deep soil penetration.
To calculate your run time, determine the square footage of your raised bed and the total GPH of your emitters. For a 4x8-foot bed (32 square feet) with 20 plants using 0.9 GPH drippers, your system outputs 18 gallons per hour. Most vegetable gardens require about 1 to 1.5 inches of water per week, which equates to roughly 20 gallons per 32 square feet. Therefore, running your system for approximately 60 to 75 minutes per week, split into three 25-minute sessions, will provide optimal deep watering that encourages robust root growth without waterlogging the soil.
Expert Insights on Water Efficiency
Drip irrigation is scientifically proven to outperform overhead watering methods, particularly in raised bed environments where soil drainage is rapid. According to the University of California Agriculture and Natural Resources (UC ANR), drip irrigation systems deliver water directly to the root zone with up to 90 percent efficiency, compared to 50 to 70 percent efficiency for traditional sprinklers. This dramatic reduction in water loss is primarily due to the elimination of wind drift and surface evaporation. Furthermore, UC ANR notes that keeping the foliage dry significantly reduces the incidence of fungal pathogens like powdery mildew and early blight, which thrive in the humid microclimates created by overhead sprinklers.
Troubleshooting Common Issues
- Emitters are blowing off the tubing: Your pressure regulator is likely failing or missing. Verify that the pressure is reduced to 30 PSI. Standard household pressure will easily pop 1/4-inch barbed fittings.
- Uneven watering (plants at the end of the line are dry): You may have exceeded the maximum flow capacity for a single 1/2-inch tubing line. A 1/2-inch mainline can typically support up to 240 GPH. If you have more emitters, split the system into two zones or upgrade to a 3/4-inch mainline.
- Clogged drippers: Inspect your 200-mesh filter. If the screen is torn or missing, sediment from your pipes will quickly clog the micro-channels in the pressure-compensating drippers.
Seasonal Maintenance and Winterization
To protect your investment and ensure your system is ready for the next spring planting season, proper winterization is mandatory in climates that experience freezing temperatures. Before the first hard frost, detach the smart controller, backflow preventer, filter, and pressure regulator, and store them indoors. Open the end caps on your mainline tubing and flush the system with water to remove any sediment or organic matter. Leave the end caps off and the manual drain valves open throughout the winter so that condensation and rainwater can escape, preventing ice expansion from cracking your poly tubing. By following this practical guide, your smart drip irrigation system will provide years of automated, water-efficient service, ensuring your garden-to-table harvests are abundant and sustainable.

