
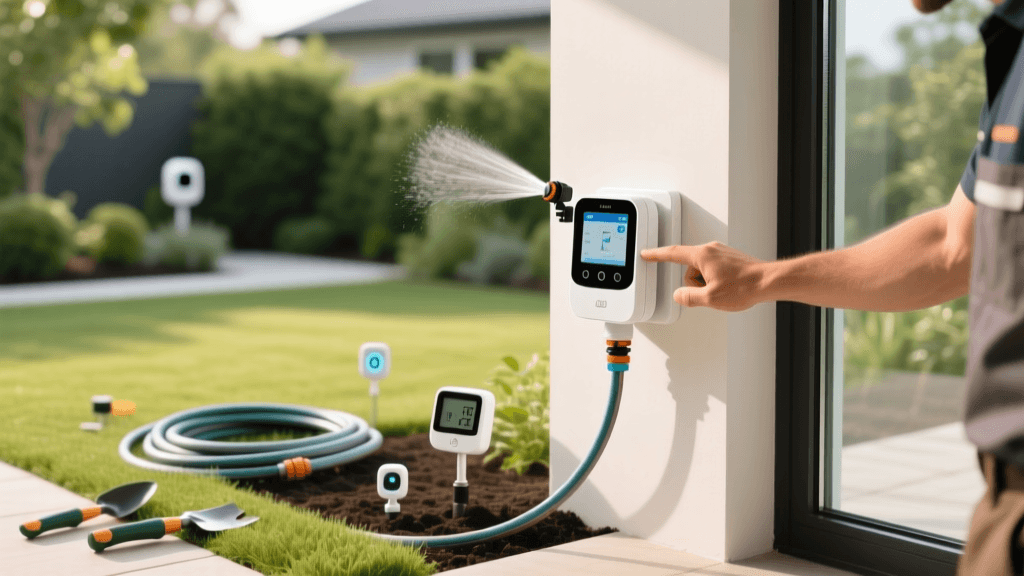
How to Install and Set Up a Smart Sprinkler Controller
Why Upgrade to a Smart Sprinkler Controller?
Bridging the gap between indoor smart home technology and outdoor landscape maintenance is one of the most effective ways to modernize your property. Traditional irrigation timers operate on rigid, pre-set schedules, often watering your lawn during rainstorms or wasting gallons on overcast days. Upgrading to a smart sprinkler controller replaces guesswork with hyper-local weather data, soil moisture tracking, and automated seasonal adjustments.
According to the U.S. Environmental Protection Agency (EPA) WaterSense program, replacing a standard clock-based timer with a WaterSense-labeled smart irrigation controller can save the average home nearly 7,600 gallons of water annually. Beyond the environmental impact, this translates to tangible reductions in your monthly utility bills while promoting deeper, healthier root growth in your turf by preventing shallow overwatering.
'WaterSense labeled weather-based irrigation controllers use local weather data to determine when and how much to water, reducing water waste and improving plant health.' — U.S. EPA WaterSense Program
This practical guide will walk you through the physical installation, wiring, and digital programming of a smart sprinkler controller, ensuring your garden-to-table vegetables and ornamental lawn receive precise, efficient hydration.
Tools and Materials Needed
Before beginning, ensure you have the following tools and materials on hand. Most smart controllers range in cost from $150 to $250, depending on the number of zones and advanced features.
- Smart Sprinkler Controller: Ensure it supports your zone count (typically 8, 12, or 16 zones).
- Phillips and Flathead Screwdrivers: For removing the old faceplate and securing wire terminals.
- Wire Strippers/Cutters: For trimming and stripping 18 AWG irrigation wire.
- Power Drill and Bits: For mounting the new backplate into drywall or masonry.
- Wire Nuts and Electrical Tape: For securing any spliced connections.
- Smartphone or Tablet: Required for downloading the companion app and connecting the device to your home Wi-Fi network.
- Picture or Labels: To document your existing wire configuration.
Step-by-Step Installation Guide
Step 1: Turn Off Power and Document Existing Wiring
Safety is paramount when working with electrical components. Locate your home's circuit breaker and turn off the power to your irrigation system. Once the power is off, open the door of your existing sprinkler controller. Before removing any wires, take a clear, well-lit photograph of the terminal board. Alternatively, use painter's tape to label each wire according to its terminal number (e.g., Zone 1, Zone 2, Common). Note that the 'Common' wire is usually white or black and connects to the 'C' terminal.
Step 2: Remove the Old Controller
Loosen the terminal screws and gently pull the wires out. Unscrew the mounting bracket from the wall and set the old unit aside. If the old mounting holes are damaged or do not align with your new smart controller's backplate, patch them with spackle before proceeding.
Step 3: Mount the New Smart Controller Backplate
Position the new backplate on the wall. For optimal Wi-Fi signal reception and ease of use, mount the controller approximately 5 feet above the ground. Use a level to ensure it is straight, mark the drill holes, and secure the plate using the provided wall anchors and screws. If mounting outdoors, ensure the unit is rated for exterior use (NEMA 3R or higher) and is sheltered from direct, prolonged sunlight.
Step 4: Wire the Zones and Common Wire
Strip about 1/2 inch of insulation from the ends of your 18-gauge multi-strand irrigation wires. Insert the 'Common' wire into the designated 'C' terminal on the new controller. Next, insert each zone wire into its corresponding numbered terminal (1 through 8, etc.). Tighten the screws firmly, ensuring no bare wire is exposed outside the terminal block, which could cause a short circuit. If your system includes a master valve or pump start relay, connect those wires to the 'MV' or 'P' terminals respectively.
Step 5: Connect to Wi-Fi and Power Up
Restore power at the circuit breaker. The smart controller should boot up and display a Wi-Fi setup prompt. Crucial Tip: Most smart irrigation controllers only connect to 2.4 GHz Wi-Fi networks, not 5 GHz networks. Ensure your smartphone is connected to your router's 2.4 GHz band during the setup process via the manufacturer's app.
Top Smart Sprinkler Controllers Compared
Choosing the right hardware is essential for seamless smart home integration. Below is a comparison of three industry-leading, EPA WaterSense-certified models.
| Model | Est. Cost | Zones | Weather Intelligence | Best For |
|---|---|---|---|---|
| Rachio 3 | $229 | 8 or 16 | Hyper-local (Weather Intelligence Plus) | Advanced users wanting deep analytics and IFTTT integration. |
| Orbit B-hyve XR | $179 | 6 to 16 | WeatherSense technology | Homeowners needing an indoor/outdoor rated unit with a physical dial. |
| Netro Sprite | $129 | 6 or 12 | AI-driven plant database | Budget-conscious gardeners wanting automated plant-specific care. |
How to Program Your Smart Controller for Maximum Efficiency
Physical installation is only half the battle. The true water-saving magic happens within the app's programming interface. Follow these best practices to configure your zones.
Define Your Zone Characteristics
Smart controllers calculate watering times based on evapotranspiration (ET) rates, which are influenced by your specific landscape variables. For each zone, input the following data into the app:
- Plant Type: Differentiate between cool-season turf (e.g., Kentucky Bluegrass), warm-season turf (e.g., Bermuda), and garden-to-table vegetable beds. Vegetables generally require more frequent, shallow watering than established lawns.
- Soil Type: This is critical. Clay soils absorb water slowly and are prone to runoff, while sandy soils drain rapidly and require more frequent, shorter bursts.
- Sun Exposure: Mark zones as 'Full Sun', 'Partial Shade', or 'Full Shade' to adjust the baseline water requirement.
- Sprinkler Head Type: Rotor heads apply water much slower than static spray heads. The app uses this to calculate accurate run times.
Implement the 'Cycle and Soak' Method
If you have clay soil or sloped terrain, configure your smart controller to use the 'Cycle and Soak' feature. Instead of running a zone for 20 continuous minutes (which leads to wasteful street runoff), the controller splits the time into three 7-minute cycles with 45-minute soak periods in between. This allows the soil structure to absorb the moisture deeply, encouraging drought-resistant root systems.
Enable Smart Weather Skips
Navigate to the 'Smart Features' or 'Weather Intelligence' tab in your app and enable the following automated skips:
- Rain Skip: Pauses watering if local radar detects a specified threshold of rainfall (e.g., 1/8 inch).
- Freeze Skip: Prevents the system from running when temperatures drop near or below 32°F, protecting your pipes from bursting and your walkways from icing.
- Wind Skip: Halts irrigation if wind speeds exceed 15-20 mph, preventing water from blowing onto driveways and neighboring properties.
Troubleshooting Common Issues
Even with a flawless installation, you may encounter minor hiccups during the first season. Here is how to resolve the most common smart irrigation issues:
- Controller Shows 'Offline': This is usually a Wi-Fi range issue. Garage walls and brick exteriors can block 2.4 GHz signals. Install a simple Wi-Fi range extender halfway between your main router and the sprinkler controller.
- Zone Will Not Turn On: If the app shows the zone is running but no water is spraying, check the physical solenoid valve in the yard. A wire may have been pulled loose during landscaping, or the solenoid itself may have failed and require a $15 replacement.
- Overwatering in Shaded Areas: If shaded zones remain soggy, manually adjust the 'Crop Coefficient' or 'Water Budget' for that specific zone in the app, reducing it by 20% to 30% to account for lower evaporation rates.
Conclusion
Integrating a smart sprinkler controller into your home's exterior infrastructure is a highly rewarding weekend DIY project. By combining precise hardware installation with intelligent, weather-based programming, you protect your landscape investment, reduce your environmental footprint, and ensure your outdoor living spaces remain lush and vibrant all season long. Take the time to accurately map your soil types and sun exposure, and let the smart technology handle the rest.

