
How to Install and Calibrate a Smart Sprinkler System
Why Upgrade to a Smart Wi-Fi Sprinkler Controller?
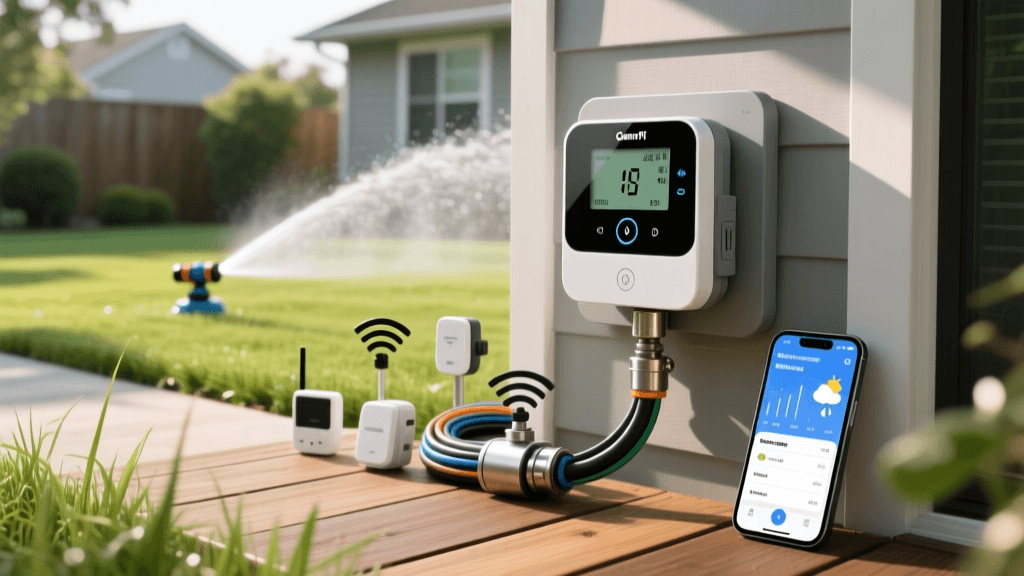
Upgrading your outdoor space with smart home integration is one of the most effective ways to bridge the gap between modern convenience and energy-efficient landscaping. If you are still relying on a traditional dial-based irrigation timer, you are likely overwatering your lawn, wasting resources, and driving up your utility bills. According to the Environmental Protection Agency (EPA), standard clock-based timers can waste up to 50 percent of the water they distribute due to evaporation, wind, and runoff. By switching to a Weather-Based Irrigation Controller (WBIC), you can automate your garden care, adapt to local microclimates, and ensure your landscape gets exactly what it needs.
In this practical how-to guide, we will walk you through the exact steps to install, wire, and calibrate a smart Wi-Fi sprinkler controller. Whether you are managing a sprawling backyard or a compact urban garden, this upgrade is a foundational DIY project that pays for itself in water savings.
Tools and Materials Needed
Before beginning your installation, gather the following tools. Most smart controllers are designed for DIY installation and take roughly 45 to 60 minutes to set up.
- Smart Wi-Fi Sprinkler Controller (e.g., Rachio 3, Orbit B-hyve, or Rain Bird) — Cost: $100 to $250
- Phillips-head and flathead screwdrivers
- Wire strippers (for 18-gauge irrigation wire)
- Non-contact voltage tester (essential for safety)
- Power drill with a 1/8-inch drill bit (for drywall anchors)
- Smartphone or tablet (for app configuration)
- Digital camera or smartphone (to photograph existing wiring)
Step-by-Step Installation Guide
Step 1: Power Down and Document Existing Wiring
Safety is your first priority. Locate the transformer plug for your current irrigation controller and unplug it from the wall outlet. If your system is hardwired, turn off the corresponding circuit breaker at your main electrical panel. Use your non-contact voltage tester on the terminal screws to confirm the power is completely off.
Once the power is disconnected, open the faceplate of your old controller. Before removing a single wire, take a clear, well-lit photograph of the terminal strip. You will need this reference to identify which colored wire corresponds to which irrigation zone, master valve, or pump start relay.
Step 2: Remove the Old Unit and Mount the New Controller
Loosen the terminal screws and gently pull the wires out. If the wires are stiff or brittle, use your wire strippers to snip off the damaged ends and strip back a quarter-inch of insulation to expose fresh copper. Unscrew the old controller from the wall.
Hold the new smart controller's mounting bracket against the wall. Use a level to ensure it is straight, mark the screw holes with a pencil, and drill pilot holes. Insert drywall anchors if you are not drilling into a wood stud, then secure the bracket with the provided screws.
Step 3: Wire the Smart Controller
Thread the irrigation wires through the bottom or back knockout hole of the new smart controller. Referencing the photograph you took in Step 1, insert the wires into the corresponding terminals on the new unit:
- Common Wire (C): Usually white or black, this completes the circuit for all zones.
- Zone Wires (1, 2, 3, etc.): These are typically colored (red, blue, green, brown) and control individual solenoid valves.
- Master Valve (M) or Pump Start (P): Only connect these if your system utilizes a main shut-off valve or a well pump.
- Sensor Terminals (S or SEN): If you have a wired rain or soil moisture sensor, connect it here. Note: Many smart controllers use hyper-local weather data instead of physical sensors, but keeping a wired sensor as a backup is a best practice.
If you encounter a wire that is too short to reach the new terminal block, use a wire nut and a small pigtail extension of 18-gauge solid copper wire to bridge the gap. Ensure all copper strands are tightly twisted together before capping to prevent short circuits against the controller's backplate. Tighten the terminal screws firmly, give each wire a gentle tug to ensure a solid connection, and snap the faceplate onto the mounting bracket. Plug the transformer into a standard 120V outlet (or restore power at the breaker).
Connecting to Wi-Fi and App Configuration
With the hardware installed, download the manufacturer's companion app (e.g., Rachio, B-hyve, or Rain Bird). Follow the on-screen prompts to connect the controller to your home's 2.4GHz Wi-Fi network. Most smart home devices do not support 5GHz networks, so ensure your router is broadcasting a 2.4GHz band.
Once connected, explore the app's smart home integration settings. Linking your controller to platforms like Apple HomeKit, Amazon Alexa, or Google Home allows you to build advanced automations. For example, you can create a routine that automatically pauses your irrigation schedule if your smart home weather station detects high wind speeds, preventing water waste and uneven distribution across your lawn.
Calibrating Your System for Maximum Efficiency
Physical installation is only half the battle. The true magic of a smart controller lies in its calibration. To leverage Evapotranspiration (ET) data—the measure of water lost to the atmosphere through soil evaporation and plant transpiration—you must accurately define your landscape's microclimates within the app.
1. Define Soil Type and Slope
Water absorption rates vary wildly by soil composition. Sandy soil drains rapidly, requiring shorter, more frequent watering cycles. Clay soil absorbs water slowly, necessitating the cycle and soak method to prevent runoff. Set the soil type for each individual zone in the app. Additionally, flag any zones with a slope greater than 5 percent so the software can automatically schedule cycle-and-soak intervals.
2. Input Vegetation and Sun Exposure
A zone planted with drought-tolerant native shrubs in full shade requires a fraction of the water needed by a sunny Kentucky Bluegrass lawn. Categorize each zone by plant type (Cool Season Turf, Warm Season Turf, Shrubs, Flower Beds) and assign the correct sun exposure (Full Sun, Partial Shade, Full Shade).
3. Adjust Nozzle Precipitation Rates
If your zones use high-efficiency rotary nozzles (which apply water at roughly 0.5 inches per hour) rather than traditional spray heads (1.5 inches per hour), you must adjust the precipitation rate in the app. Failing to do so will result in severe underwatering of those specific zones.
Smart Controller Comparison Chart
Choosing the right hardware is critical for seamless smart home integration. Below is a comparison of the top three EPA WaterSense-certified smart controllers on the market.
| Feature | Rachio 3 (8-Zone) | Orbit B-hyve (6-Zone) | Rain Bird ST8I-2.0 (8-Zone) |
|---|---|---|---|
| Average Cost | $229 | $119 | $159 |
| EPA WaterSense Certified | Yes | Yes | Yes |
| Weather Data Source | Hyper-local Weather Intelligence Plus | WeatherSense (Local Stations) | Local Weather Data |
| Smart Home Integration | Apple HomeKit, Alexa, Google, IFTTT | Alexa, Google | Alexa, Google |
| Best For | Advanced users wanting granular control | Budget-conscious DIYers | Rain Bird legacy system upgraders |
Expert Insights on Water Conservation
Smart irrigation controllers that use evapotranspiration (ET) data or soil moisture sensors can reduce outdoor water use by 15 to 50 percent compared to conventional clock timers. By adjusting watering schedules based on real-time weather conditions, these devices prevent overwatering and promote deeper, healthier root systems.
— Colorado State University Extension, Water-Wise Landscaping Guidelines
This data underscores the importance of not just installing the device, but allowing the smart schedules to run without manual interference. Trust the algorithm; it is designed to let your soil dry out appropriately between watering days, which forces grass roots to grow deeper in search of moisture, inherently drought-proofing your lawn.
Maintenance and Seasonal Adjustments
While smart controllers handle daily fluctuations automatically, you should perform a few seasonal maintenance tasks to ensure peak performance:
- Spring Startup: Inspect all sprinkler heads for damage from winter frost heave. Clean the filters inside the nozzles and verify that the app's seasonal shift is set to 100 percent for peak summer growth.
- Mid-Summer Audit: Perform a catch can test. Place five to six empty, straight-sided tuna cans at varying distances from the sprinkler heads within a single zone. Run the system for exactly 15 minutes. Measure the depth of the water in each can using a ruler, then calculate the average depth. Multiply this average by four to determine your hourly precipitation rate. If your measured rate differs significantly from the manufacturer's specifications entered in the app, adjust the app's global precipitation rate slider to match your real-world output.
- Winterization: If you live in a freezing climate, blow out your irrigation lines with an air compressor before the first hard freeze. Use the app's standby or winterize mode to shut off the smart scheduling while keeping the Wi-Fi connection active for firmware updates.
Final Thoughts on Smart Landscaping
Integrating a smart Wi-Fi sprinkler controller into your home's ecosystem is a highly rewarding weekend project. By combining practical DIY skills with modern weather-based data, you protect your landscape investment, lower your monthly water bills, and contribute to broader municipal water conservation efforts. Take the time to calibrate your zones accurately, and let the technology do the heavy lifting for a greener, healthier, and more sustainable yard.

