Lawn Care
2026 Lawn Roller Guide: Sod & Molehill Repair After Webworms
The Collateral Damage of Tree Web Worm Infestations
As specialists in tree web worm control, we frequently witness a frustrating secondary disaster that unfolds on the lawn beneath treated trees. When arborists and homeowners battle fall webworms (Hyphantria cunea) or eastern tent caterpillars, the primary focus is naturally on saving the canopy. However, the heavy frass (caterpillar droppings), fallen leaf litter, and descending pupae create an all-you-can-eat buffet for subterranean insectivores. According to the University of Kentucky Entomology, the life cycle of these pests often deposits thousands of protein-rich pupae into the topsoil and thatch layer directly below the host tree.
While your trees may recover, the underlying turf often faces a secondary invasion: moles. Moles are highly sensitive to the vibrations and scents of soil-dwelling insects. When a heavy webworm cycle concludes, moles aggressively tunnel through your lawn to harvest the pupae and associated grubs. The result is a network of raised ridges, collapsed tunnels, and unsightly molehills that destroy grass roots and ruin the aesthetic of your landscape. In 2026, the most effective protocol for repairing this specific type of collateral damage involves strategic turf replacement and the precise use of a lawn roller for sod establishment and molehill repair.
Why a Lawn Roller is Essential for Post-Webworm Recovery
Once the mole population is managed and the webworm debris is cleared, the lawn is left with severe topographical inconsistencies. Simply throwing grass seed over collapsed mole tunnels rarely yields a uniform surface. For immediate, high-quality results, laying new sod is the preferred 2026 recovery method. However, sod requires intimate, air-free contact with the topsoil to establish roots quickly. This is where a lawn roller becomes indispensable.
A lawn roller compresses the soil, eliminating hidden air pockets that can cause newly laid sod to dry out and die. Furthermore, when addressing residual molehills, a roller helps integrate topdressing materials into the existing turf canopy, ensuring a level playing field. Modern 2026 lawn rollers feature advanced UV-stabilized high-density polyethylene (HDPE) shells that resist cracking, rust, and heat warping, making them far superior to the heavy, rust-prone steel rollers of the past decade.
Selecting the Right Lawn Roller in 2026
Choosing the correct roller depends on the size of the area damaged by the webworm-mole cycle and the type of equipment you own. Push rollers are ideal for targeted molehill repair and small sod patches beneath ornamental trees, while tow-behind models are necessary for large-scale lawn renovations.
| Roller Type | Material | Weight Capacity | Best Application | 2026 Avg. Price |
|---|---|---|---|---|
| 18-Inch Push Roller | HDPE Poly | Up to 200 lbs (water-filled) | Small sod patches, targeted molehill repair | $85 - $120 |
| 24-Inch Push Roller | HDPE Poly | Up to 300 lbs (water-filled) | Medium turf areas, pre-sod soil firming | $130 - $180 |
| 36-Inch Tow-Behind | Steel / Poly Blend | Up to 400 lbs (sand/water) | Large-scale sod establishment, tractor-pulled | $220 - $350 |
Step-by-Step Molehill Repair Protocol
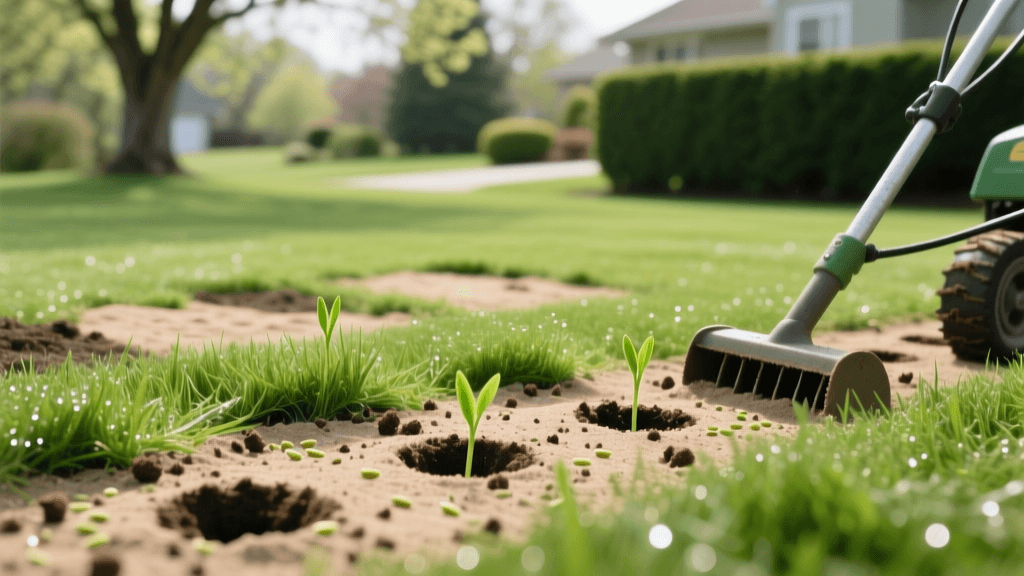
Before you can lay sod, you must address the existing mole damage. Moles create two types of damage: deep feeding tunnels and surface foraging ridges, capped by volcano-shaped mounds of excavated soil. Follow this protocol to repair the damage using your lawn roller:
- Shave the Mounds: Use a flat-edged spade to slice off the top of the molehill, removing the excess soil. Do not discard this soil; it is excellent, loose topsoil that can be repurposed for topdressing.
- Expose and Collapse Tunnels: Use a heavy garden rake to aggressively scratch away the thatch and expose the surface ridges. Step heavily along the ridges to collapse the shallow tunnels beneath the surface.
- Fill and Topdress: Distribute the reserved soil (or a 50/50 mix of compost and sand) over the collapsed tunnels and depressed areas. Use a leveling rake to spread the material evenly, ensuring it sifts down into the existing grass canopy.
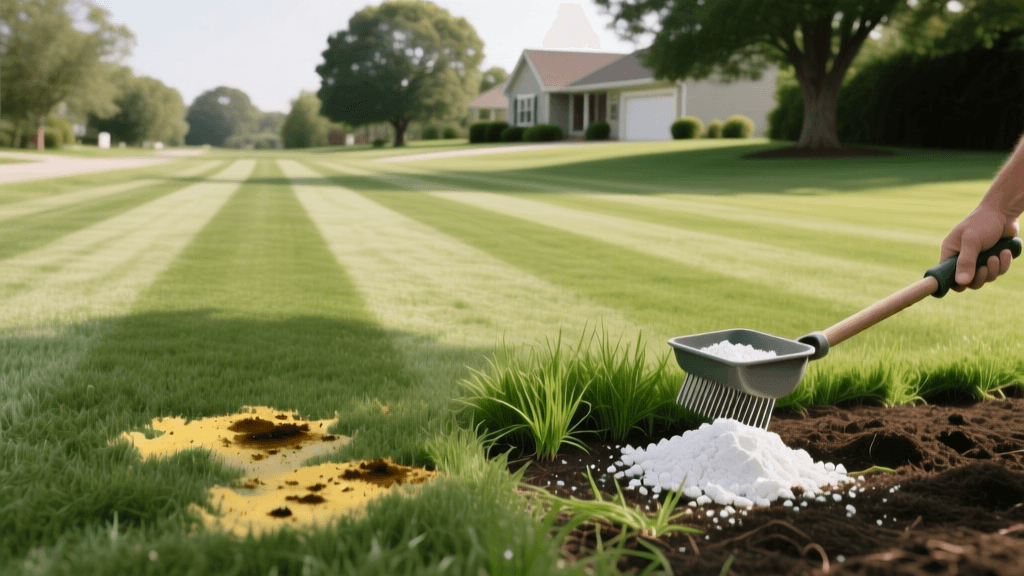
- Roll the Surface: Fill your 18-inch or 24-inch poly roller to about one-third capacity with water. This provides enough downforce to firm the soil and press the topdressing into the turf without causing severe subsoil compaction. Roll the repaired area in a grid pattern (north-south, then east-west) to ensure a perfectly level surface.
Best Practices for Sod Establishment and Root Contact
Once the molehills are leveled and the damaged turf beneath the webworm-infested trees is removed, it is time to lay new sod. The University of Minnesota Extension emphasizes that proper soil preparation and post-installation rolling are the most critical factors in sod survival. Here is how to utilize your lawn roller for flawless sod establishment:
Phase 1: Pre-Rolling the Seedbed
After raking and grading the bare soil, roll the area before laying the sod. This step is crucial for revealing hidden depressions or soft spots left by deep mole burrows. If the roller sinks into a soft patch, add more topsoil and roll again. A firm, pre-rolled seedbed prevents the new sod from settling unevenly after heavy rains, which can lead to water pooling and root rot.
Phase 2: Laying and Hydrating the Sod
Lay your sod tightly together, staggering the seams like bricks. Immediately after laying, water the sod deeply. The water acts as a temporary lubricant and helps settle the soil beneath the sod. Allow the water to absorb for about 30 to 45 minutes; you want the soil moist but not muddy.
Phase 3: The Final Post-Roll
This is the most vital step for sod establishment. Fill your lawn roller to roughly half-capacity with water (approximately 150 lbs of downforce for a standard 24-inch roller). Roll the entire newly sodded area. The physical weight of the roller presses the sod roots firmly against the underlying soil, eliminating microscopic air pockets that would otherwise desiccate the delicate new roots. This intimate soil-to-root contact accelerates the knitting process, allowing the sod to anchor into your lawn in as little as 10 to 14 days.
Timing and Soil Compaction Warnings
While rolling is essential for sod and molehill repair, it must be executed with an understanding of your local soil profile. The primary risk of using a lawn roller is soil compaction, which restricts oxygen and water flow to grassroots. To avoid this in 2026, adhere to the following guidelines:
- Never Roll Saturated Clay: If your lawn has heavy clay soil and it has recently rained, do not use a roller. Rolling wet clay destroys soil structure, creating a hardpan surface that repels water and stifles root growth. Wait until the soil is merely damp (field capacity).
- Limit Weight on Established Turf: When repairing minor molehills on an existing lawn, keep the roller weight light (one-quarter full). Heavy weights on established turf will crush the grass crowns and compact the root zone.
- Follow Up with Aeration: If you had to use heavy rolling to flatten severe mole tunneling across a large clay-based lawn, schedule a core aeration treatment for the following season. Core aeration will relieve any minor compaction introduced by the roller, ensuring long-term turf health.
Conclusion
Tree web worm control extends far beyond the branches of your host trees. By understanding the ecological chain reaction that draws moles to your lawn, you can proactively prepare for turf recovery. Utilizing a modern HDPE lawn roller in 2026 is the most efficient, cost-effective method for erasing molehill damage and ensuring the rapid establishment of new sod. By following precise weight guidelines and timing your rolling sessions correctly, you will restore a smooth, resilient, and flawless lawn that complements your newly treated, healthy trees.