
Gardening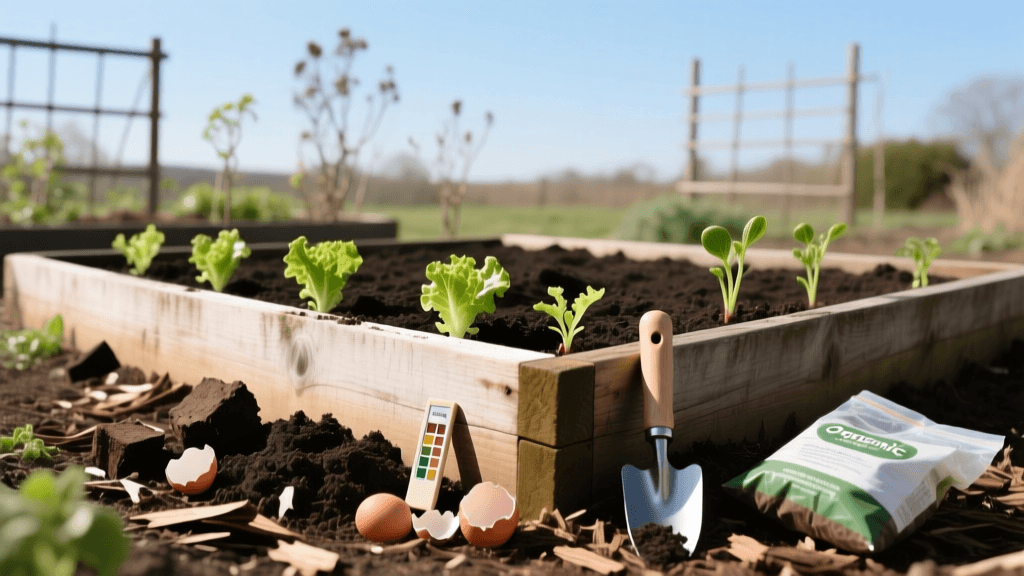
Organic Spring Soil Prep for Raised Vegetable Garden
Welcome to the dawn of a new growing season. As the frost recedes and the soil begins to warm, gardeners are faced with the most critical task of the year: spring soil preparation. For those cultivating vegetables in raised beds, this seasonal maintenance is not just about turning dirt; it is about reviving a complex, living ecosystem. Raised beds provide incredible benefits, including improved drainage, earlier soil warming, and reduced compaction from foot traffic. However, these same advantages mean that nutrients leach out more rapidly, and the intensive planting typical of raised beds depletes soil organic matter at an accelerated rate.
The Unique Challenge of Raised Bed Soil Health
Unlike traditional in-ground row gardens, raised beds are essentially giant containers. Over the course of a single growing season, heavy feeders like tomatoes, peppers, and brassicas will strip the soil of vital macronutrients—nitrogen, phosphorus, and potassium—as well as essential micronutrients like calcium and magnesium. Furthermore, the natural settling of soil over the winter months means your beds will likely be several inches lower than they were the previous autumn. Restoring the physical volume, biological activity, and chemical balance of your soil is the cornerstone of seasonal garden health. Neglecting this spring ritual often leads to stunted growth, increased susceptibility to soil-borne pathogens, and poor water retention during the heat of summer.
Step 1: Surface Clearing and Early Weed Eradication
Before you add a single scoop of compost or fertilizer, you must prepare the canvas. Begin by removing any remaining winter mulch, dead plant debris, and early-emerging weeds. If you planted a winter cover crop, such as crimson clover or winter rye, now is the time to terminate it. Use a garden hoe or a specialized tool like a stirrup hoe to slice weeds just below the soil surface. Avoid deep tilling, which can disrupt the delicate mycorrhizal fungal networks that help plant roots absorb nutrients. According to the USDA Natural Resources Conservation Service (NRCS), minimizing soil disturbance preserves soil structure and prevents dormant weed seeds from being brought to the surface where they can germinate.
Step 2: Comprehensive Soil Testing for Nutrient Deficiencies
You would not prescribe medication without a medical diagnosis, and you should not amend your soil without a soil test. Guessing your soil needs often results in nutrient lockout, where an excess of one mineral prevents the uptake of another. For example, excessive phosphorus can inhibit the absorption of zinc and iron.
Invest in a comprehensive laboratory soil test through your local university extension office. The Cornell University Cooperative Extension emphasizes that maintaining a soil pH between 6.0 and 6.8 is critical for vegetable gardens, as this is the sweet spot where the vast majority of nutrients are biologically available to plant roots. If your test reveals a pH below 6.0, you will need to apply pulverized agricultural lime. If it is above 7.0, elemental sulfur or peat moss can help gently lower the alkalinity. Always apply pH adjusters at least three to four weeks before planting to give them time to react with the soil chemistry.
Step 3: Targeted Organic Amendments and Application Rates
Once your pH is dialed in, it is time to replenish the macronutrients. Organic amendments release nutrients slowly as soil microbes break them down, providing a steady, season-long supply of food for your vegetables while simultaneously building soil structure. Below is a detailed guide to the most effective organic amendments for a standard 4-foot by 8-foot raised bed (32 square feet), assuming a baseline of moderate depletion.
| Amendment | Primary Benefit | Application Rate (4x8 Bed) | Estimated Cost |
|---|---|---|---|
| Blood Meal (12-0-0) | Fast-acting Nitrogen for leafy growth | 0.5 lbs | $4.00 |
| Bone Meal (3-15-0) | Phosphorus for root and flower development | 0.75 lbs | $3.50 |
| Kelp Meal (1-0.5-2.5) | Trace minerals and disease resistance | 1.0 lbs | $6.00 |
| Worm Castings | Microbial inoculant and gentle nutrients | 2.0 gallons | $12.00 |
| Langbeinite (Sul-Po-Mag) | Potassium, Sulfur, and Magnesium | 0.5 lbs | $5.00 |
Broadcast these amendments evenly across the soil surface. To incorporate them, use a broadfork or a garden fork to gently lift and crack the soil, then use a steel bow rake to mix the amendments into the top four to six inches of the bed. This low-till approach protects the soil food web while ensuring nutrients are within reach of emerging root systems.
Step 4: Rebuilding Soil Volume with Premium Compost
Because raised beds settle and organic matter decomposes, you must physically replace the lost volume. Compost is the undisputed king of soil conditioners. It acts as a sponge, holding up to 20 times its weight in water, which is crucial for the rapid-draining environment of a raised bed. Furthermore, compost introduces billions of beneficial bacteria and fungi that suppress soil-borne diseases like fusarium wilt and verticillium wilt.
For a 4x8 foot bed that has settled by two inches over the winter, you will need approximately 5.3 cubic feet of compost to refill the bed to the top edge. Purchase high-quality, OMRI-listed (Organic Materials Review Institute) bagged compost, or source it from a reputable local landscape supplier. Avoid cheap, municipal composts that may contain persistent herbicides like aminopyralid, which can survive the composting process and severely stunt the growth of nightshades and legumes. Spread the compost evenly over the surface and gently rake it into the top few inches, blending it with your native soil and dry amendments.
Step 5: Mulching and Early Season Moisture Regulation
The final step in your spring soil preparation is the application of a protective mulch layer. Bare soil is highly vulnerable to erosion from spring rains, crusting from the sun, and rapid moisture evaporation. Once your seeds are sown or transplants are in the ground, apply a two-inch layer of organic mulch.
For vegetable beds, seed-free straw or shredded fall leaves are superior choices. Avoid wood chips or bark mulch in the immediate planting zones of annual vegetables; as they break down, they tie up nitrogen in the upper soil layer, robbing your shallow-rooted crops of essential nutrients. Straw mulch not only conserves moisture but also acts as an insulating barrier, keeping the soil temperatures stable during unpredictable spring cold snaps and preventing soil from splashing onto the lower leaves of your plants, which is a primary vector for fungal blights.
A Year-Round Seasonal Maintenance Schedule
Spring preparation is just one phase of the seasonal maintenance cycle. To ensure long-term soil health, adopt this ongoing schedule:
- Early Summer: Side-dress heavy feeders (tomatoes, corn) with a nitrogen-rich amendment like alfalfa meal or a liquid fish emulsion to support fruiting.
- Late Summer: Monitor moisture levels daily. Replenish mulch layers that have broken down to maintain a consistent two-inch depth.
- Autumn: Remove spent crops and plant a fall cover crop (like daikon radish or hairy vetch) to prevent erosion and fix atmospheric nitrogen.
- Winter: Top-dress the beds with raw manure or fresh wood chips, allowing the harsh winter elements and freezing/thawing cycles to break them down safely before spring.
Conclusion: The Foundation of a Thriving Garden
Seasonal maintenance and soil health are inextricably linked. By viewing your raised bed not merely as a container of dirt, but as a living biological engine, you set the stage for a bountiful and resilient harvest. Taking the time to test, amend, and rebuild your soil structure every spring pays dividends throughout the growing season, resulting in robust plants capable of defending themselves against pests and environmental stress. Treat your soil with respect, and it will nourish your garden for years to come.

