
Gardening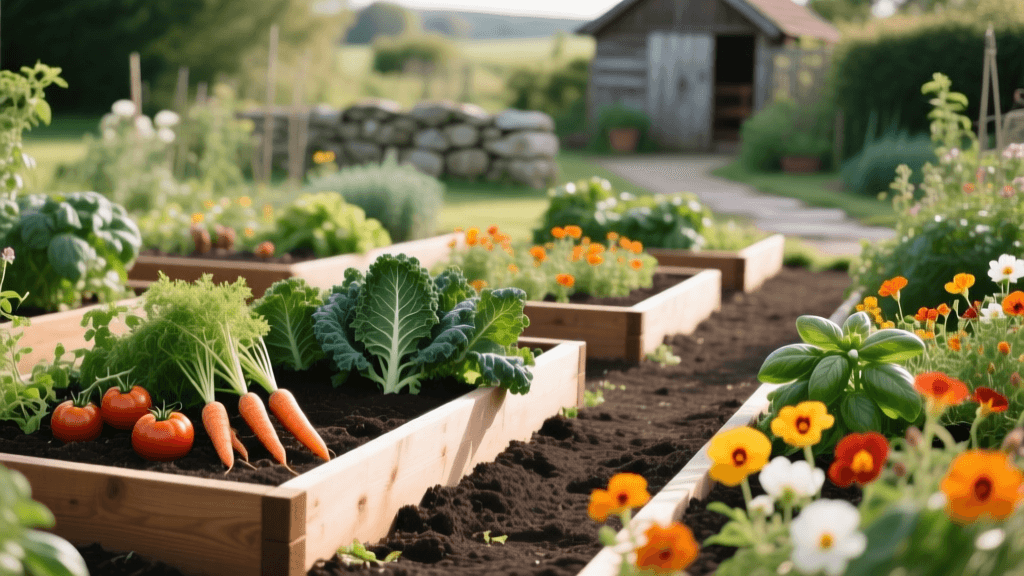
Designing a Productive Potager: Raised Bed Layout Plans
The Art and Science of the Potager Garden
The French kitchen garden, or 'potager', is a masterclass in blending form and function. Unlike traditional row-crop vegetable gardens that prioritize sheer yield over aesthetics, a potager is designed to be visually striking from every angle. It incorporates geometric patterns, vibrant color contrasts, and vertical architecture to create a landscape that is as beautiful as it is edible. For the modern home gardener, designing a potager using raised beds offers the perfect intersection of controlled soil environments, ergonomic maintenance, and stunning landscape design. Whether you are working with a sprawling suburban backyard or a compact urban courtyard, meticulous planning is the cornerstone of a successful potager.
In this comprehensive design guide, we will walk through the essential planning phases of building a raised bed potager. From mapping your microclimate and selecting dimensional lumber to engineering companion planting grids and budgeting for hardscaping, this guide provides the actionable blueprints you need to break ground with confidence.
Site Selection and Microclimate Mapping
Before sketching a single raised bed, you must understand the environmental canvas you are working with. A productive potager requires a minimum of six to eight hours of direct sunlight daily, particularly during the peak growing months of June through August. However, light is not the only factor. You must also consider wind corridors, water access, and soil drainage.
Conducting a Sun and Wind Audit
Use a digital sunlight calculator or a simple shadow-mapping journal over a 48-hour period in early spring to track how structures and deciduous trees cast shadows across your yard. Remember that a fence or tree line that seems benign in April may cast a devastating shadow by July when the sun's angle changes. Additionally, identify prevailing winds. Tender crops like peppers and eggplants will require protection from harsh afternoon gusts, which can be mitigated by designing a living windbreak of hardy herbs like rosemary or lavender along the garden's perimeter.
Raised Bed Dimensions and Material Selection
The physical framework of your potager dictates both its visual impact and its horticultural success. The golden rule of raised bed design is accessibility: beds should never exceed four feet in width. This ensures that the average gardener can reach the center of the bed from either side without stepping on and compacting the carefully engineered soil structure.
Optimal Measurements for Ergonomics and Yield
For a traditional potager layout, 4-foot by 8-foot rectangular beds are the industry standard, as they minimize lumber waste (since dimensional lumber is sold in 8-foot lengths). However, the depth of the bed is where many gardeners make a critical error. While 10-inch beds are sufficient for shallow-rooted lettuces, a true potager features deep-rooted heirloom tomatoes, parsnips, and carrots. Therefore, plan for an 18-inch to 24-inch bed depth. This requires more soil upfront but drastically reduces watering frequency and increases drought resilience.
Choosing the Right Hardscape Materials
Untreated Western Red Cedar or Redwood are the premier choices for raised bed construction due to their natural rot resistance and beautiful aging process. Expect to pay approximately $45 to $60 per 8-foot cedar board. If budget is a primary constraint, consider composite materials or corrugated galvanized steel panels framed with cedar, which offer a modern industrial aesthetic and a lifespan exceeding 25 years.
Engineering the Perfect Soil Matrix
The soil in a raised bed is not merely dirt; it is a living, engineered substrate. According to the Cornell University College of Agriculture and Life Sciences (CALS), filling raised beds with native topsoil often leads to severe compaction and poor drainage. Instead, CALS recommends a specialized bulk soil mix designed for container and raised bed environments.
For a high-yield potager, utilize the following modified soil recipe:
- 50% High-Quality Topsoil: Provides the mineral base and structural integrity.
- 30% Organic Compost: Such as leaf mold or composted manure, to introduce beneficial microbes and slow-release nutrients.
- 10% Coir or Peat Moss: For moisture retention.
- 10% Aeration Amendment: Coarse pumice or perlite to ensure oxygen reaches the root zone.
To further inoculate your soil with beneficial mycorrhizal fungi, incorporate a granular organic fertilizer like Espoma Organic Bio-tone Starter Plus at the time of planting. This specific product contains both endo- and ecto-mycorrhizae, which expand the root surface area of your vegetables by up to 100 times, vastly improving nutrient uptake.
Pathway Geometry and Focal Points
The negative space in a potager is just as important as the planted space. Pathways dictate the flow of the garden and provide the geometric skeleton of the design. For a functional potager, main pathways must be at least 36 inches wide to accommodate a standard garden wheelbarrow and allow for comfortable kneeling. Secondary paths between individual beds can be narrowed to 24 inches.
Hardscaping Materials for Pathways
Decomposed granite (DG) stabilized with a natural binder is an excellent choice for potager pathways. It provides a permeable, weed-resistant surface that complements the rustic elegance of cedar beds. Alternatively, a thick layer of arborist wood chips over a base of cardboard will suppress weeds and slowly break down to feed the adjacent soil food web. Every formal potager requires a focal point to anchor the design. Place a classical birdbath, a wrought-in obelisk, or a dwarf fruit tree in the center of the garden where the main pathways intersect.
The Companion Planting Matrix
A potager relies heavily on interplanting to maximize spatial efficiency and naturally deter pests. The University of Minnesota Extension highlights that strategic companion planting can disrupt pest life cycles and attract beneficial predatory insects. Rather than planting in monoculture blocks, design your beds using a grid system that integrates flowers, herbs, and vegetables.
| Primary Crop | Companion Herb | Trap / Nurse Crop | Design Function & Benefit |
|---|---|---|---|
| Heirloom Tomatoes | Sweet Basil | Nasturtiums | Basil masks tomato scent from hornworms; Nasturtiums act as a trap crop for aphids while spilling beautifully over bed edges. |
| Brassicas (Kale/Cabbage) | Dill and Thyme | Sweet Alyssum | Alyssum attracts parasitic wasps that prey on cabbage loopers; Thyme provides a low-growing living mulch. |
| Pole Beans | Summer Savory | Marigolds | Marigold roots exude compounds that suppress root-knot nematodes; Savory improves bean flavor and deters bean beetles. |
| Zucchini / Squash | Borage | Radishes | Borage attracts prolific pollinators essential for squash fruit set; Radishes break up soil crust and deter squash vine borers. |
When sketching your planting plan, assign a specific color palette to each bed. For example, pair the deep purple foliage of 'Redbor' kale with the bright yellow blooms of marigolds and the silvery foliage of dusty miller for a striking visual contrast that also serves a vital ecological function.
Vertical Architecture and Trellising
To achieve the high yields characteristic of a potager without sacrificing square footage, you must build upwards. Vertical elements draw the eye, create privacy, and provide essential support for vining crops like cucumbers, pole beans, and indeterminate tomatoes.
One of the most cost-effective and durable trellising solutions is the use of 16-foot galvanized cattle panels. By bending a single panel into an arch and securing it to T-posts driven into the ground on either side of a pathway, you create a stunning tunnel entrance to your potager. This archway can support heavy crops like winter squash and gourds, turning a functional necessity into a breathtaking garden feature. The initial investment for a cattle panel is roughly $30, and it will last a lifetime without rotting or snapping under the weight of wet foliage.
Budgeting Your Potager Project
Proper financial planning prevents mid-project fatigue. Below is an estimated budget for constructing a modest, four-bed potager (each bed measuring 4x8 feet and 18 inches deep), including soil, pathways, and basic trellising.
| Category | Item Description | Estimated Cost |
|---|---|---|
| Lumber & Hardware | 24 Western Red Cedar boards (2x6x8), exterior deck screws, corner brackets | $1,450.00 |
| Soil & Amendments | 12 cubic yards of custom raised bed mix (delivered in bulk), mycorrhizal inoculant | $680.00 |
| Pathways | 3 tons of stabilized decomposed granite, landscape fabric base | $320.00 |
| Vertical Elements | 3 galvanized cattle panels, 6 T-posts, heavy-duty zip ties | $135.00 |
| Irrigation | Drip irrigation mainline, 1/2 inch tubing, adjustable emitters, digital timer | $210.00 |
| Total Estimated | Complete Hardscape and Soil Infrastructure | $2,795.00 |
Note: This budget excludes the cost of seeds, transplants, and seasonal fertilizers, which typically add another $150 to $300 to the first-year budget.
Seasonal Planning and Succession Sowing
A well-designed potager is never empty. To maintain the visual integrity and productivity of the garden, you must plan for succession sowing. As soon as spring radishes and early lettuces are harvested in late May, the space should immediately be filled with heat-loving summer crops like bush beans or dwarf eggplants. Keep a dedicated garden journal to track planting dates, harvest windows, and frost dates specific to your USDA Hardiness Zone.
In late summer, begin sowing cool-season crops like spinach, arugula, and Swiss chard in the partial shade provided by your taller summer plants. By the time the first frost arrives and the summer crops are pulled, the fall greens will be fully established, ensuring your potager remains a lush, vibrant tapestry of color and texture well into the winter months.
Conclusion
Designing a potager is an exercise in patience, geometry, and ecological stewardship. By investing time in precise site mapping, engineering deep raised beds with premium soil, and utilizing companion planting matrices, you create a resilient ecosystem that rewards you with both aesthetic beauty and culinary abundance. Start your planning phase in the late winter, sketch your grids, order your cedar, and prepare to transform your landscape into a living masterpiece.

