Landscaping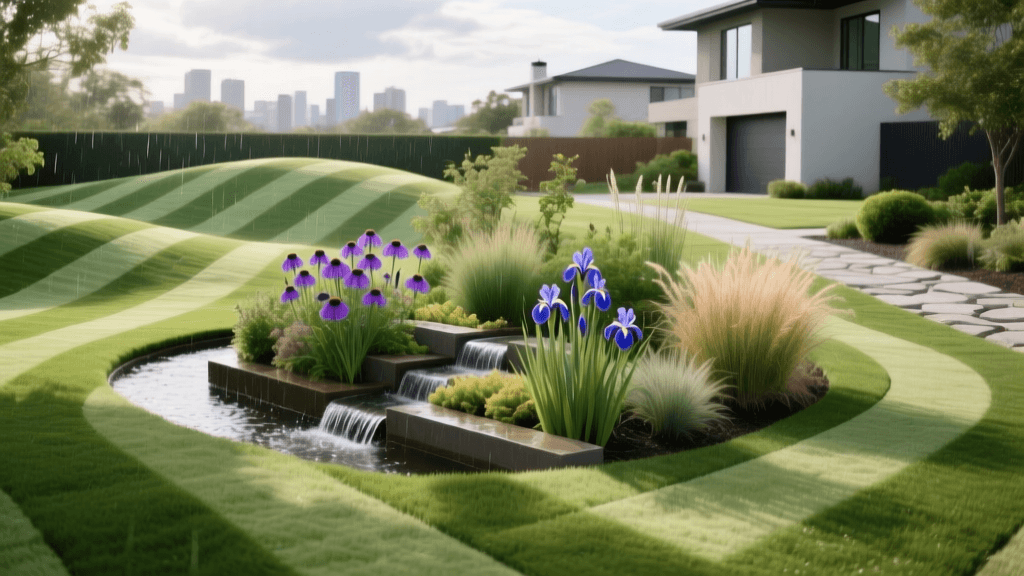
2026 Rain Garden Lawn Striping & Aesthetic Pattern Guide
The Intersection of Eco-Function and Aesthetic Form
As landscaping trends evolve in 2026, homeowners and landscape architects are no longer forcing a choice between ecological responsibility and curb appeal. The modern lawn is a canvas, and stormwater management features—specifically rain gardens—have become the focal points of advanced aesthetic designs. By integrating a rain garden installation for stormwater management with precision lawn striping and aesthetic patterns, you can create a dynamic, living landscape that handles heavy runoff while showcasing professional-grade turf art.
A rain garden is a shallow, planted depression that captures and filters stormwater runoff from roofs, driveways, and lawns. Traditionally, these gardens were tucked away in side yards or hidden behind fences. However, the 2026 landscaping ethos places eco-features front and center. When you use a rain garden as the anchor for your lawn striping patterns, the garden transforms from a mere utility into a striking geometric or organic centerpiece that guides the eye and elevates the entire property.
Planning Your Rain Garden Layout for Striping
The success of wrapping lawn stripes around a stormwater basin depends entirely on the shape and edging of the garden. To achieve crisp, professional lines, the transition between the turf and the garden must be seamless and mower-friendly.
Choosing the Right Shape
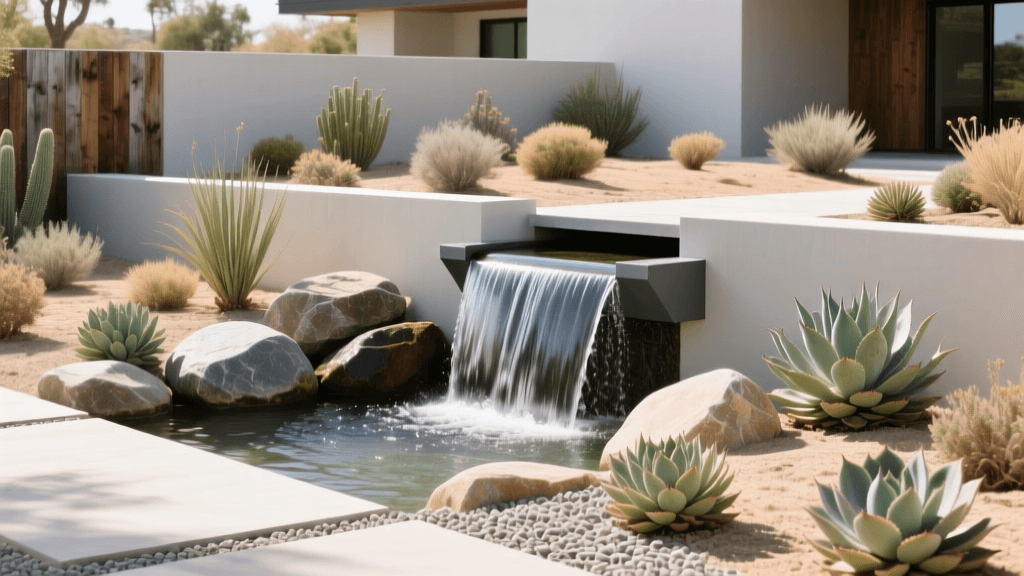
- The Oval or Kidney Shape: Ideal for concentric circular striping patterns. The smooth curves allow zero-turn mowers to maintain momentum, bending the grass blades in continuous, sweeping arcs that mimic ripples in water.
- The Rectangular or Diamond Shape: Perfect for geometric lawns. Sharp angles allow you to bounce checkerboard or diamond stripe patterns directly off the hardscape border, creating a formal, structured look that contrasts beautifully with the wild, native plantings inside the basin.
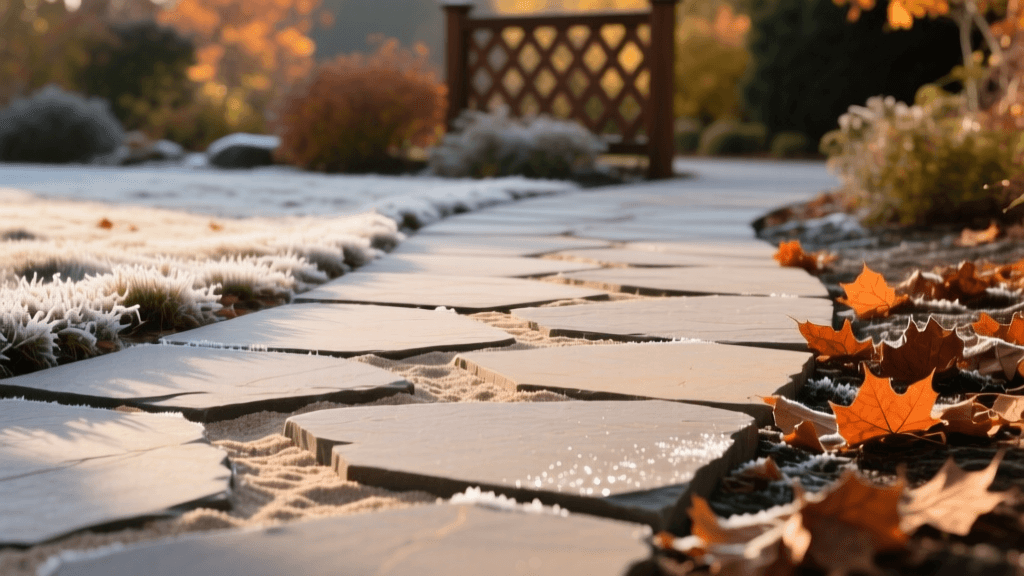
Installing a Flush Hardscape Border
To stripe effectively right up to the edge of the rain garden, you must install a flush mowing border. Use flat pavers, flagstone, or poured concrete edging that sits exactly one-half inch below the soil grade. This allows your mower deck to glide over the border without scalping the turf, while the striping roller presses the grass down perfectly at the boundary line. According to the EPA Green Infrastructure guidelines, incorporating permeable or solid borders helps define the basin while preventing turfgrass rhizomes from invading the stormwater filtration zone.
Step-by-Step Rain Garden Installation
Before you can mow aesthetic patterns, the garden must be properly engineered to handle your region's rainfall. The University of Minnesota Extension emphasizes that proper soil composition and depth are critical for ensuring the garden drains within 24 to 48 hours, preventing mosquito breeding and root rot.
Step 1: The Percolation Test
Dig a test hole 12 inches deep and 8 inches wide in your proposed location. Fill it with water and let it drain completely to prime the soil. Refill it and measure how many inches of water drain per hour. You need a minimum infiltration rate of 0.5 inches per hour. If your native soil is heavy clay, you will need to excavate deeper and amend heavily, or install an underdrain connected to your municipal storm system.
Step 2: Excavation and Basin Shaping
Excavate the basin to a depth of 6 to 8 inches, ensuring the bottom is perfectly level. A level bottom ensures water pools evenly, protecting the plants from localized erosion. Create gently sloping sides (a 3:1 slope ratio) to prevent the edges from collapsing under the weight of your mowing equipment.
Step 3: The 2026 Bio-Soil Mix
Modern rain garden soil mixes have evolved. In 2026, the integration of biochar is a standard practice for enhancing stormwater filtration and carbon sequestration. Use the following engineered soil ratio to replace the native dirt you excavated:
| Material | Volume Ratio | Purpose in Stormwater Management |
|---|---|---|
| Coarse Washed Sand | 50% | Ensures rapid drainage, prevents soil compaction, and creates pore space for water infiltration. |
| Sandy Loam Topsoil | 30% | Provides a stable base structure, essential nutrients, and microbial life for plant health. |
| Leaf & Bark Compost | 15% | Retains moisture during dry spells, binds soil particles, and feeds deep-rooted native species. |
| Horticultural Biochar | 5% | Acts as a permanent sponge for heavy metals and toxins in runoff while sequestering carbon. |
Step 4: Planting and Mulching
Apply a 2-inch layer of double-shredded hardwood mulch. Avoid lightweight pine bark or wood chips, which will float away during the first major storm event. Plant your selected native species according to their moisture tolerance zones (detailed below).
Mowing Techniques: Wrapping Patterns Around the Basin
With the rain garden installed and bordered, it is time to lay down the stripes. The key to aesthetic lawn patterns is manipulating the direction in which the grass blades are bent. Light reflects off the side of the blade facing you (light stripe) and absorbs into the top of the blade facing away (dark stripe).
The Concentric Halo Pattern
Best suited for oval or circular rain gardens. Begin by mowing a tight perimeter pass directly alongside the flush hardscape border, turning your mower to bend the grass away from the garden. For the next pass, overlap slightly and mow in the opposite direction, or continue expanding your circle outward. This creates a mesmerizing 'ripple' effect that draws the eye directly to the lush, textured plantings in the center of the basin. The alternating light and dark rings mimic the natural flow of water that the garden is designed to capture.
The Geometric Diamond Overlay
If you have installed a rectangular or diamond-shaped rain garden, use it as a backboard for a checkerboard pattern. Mow parallel lines running north-to-south, passing right over the flush border (if your mower deck clearance allows) or turning precisely on the pavers. Then, mow east-to-west lines. The sharp angles of the rain garden act as a visual anchor, making the geometric turf lines appear even more precise and intentional.
The Chevron Deflection
For elongated, kidney-shaped rain gardens situated on a slope, use a chevron pattern. Start at the center point of the garden's longest edge and mow outward at a 45-degree angle. When you reach the perimeter of the yard, turn and mow back toward the garden at the opposing 45-degree angle. This creates a series of 'V' shapes that point toward the rain garden, subtly directing the viewer's gaze—and the visual flow of the landscape—toward the stormwater feature.
2026 Equipment and Turf Technology
Executing complex patterns around a delicate ecological feature requires the right equipment. In 2026, turf management technology has made this easier than ever.
- GPS Geofenced Robotic Mowers: For the perimeter maintenance, modern robotic mowers utilize RTK-GPS technology to create virtual boundaries. You can map a precise exclusion zone around the rain garden basin, ensuring the mower never clips the delicate native sedges or damages the mulch bed, while still cutting the turf within a millimeter of the hardscape border.
- Polyurethane Striping Rollers: If you are using a zero-turn mower for the main canvas, equip it with a 2026-model weighted polyurethane striping kit. Unlike older rubber flaps that merely sweep the grass, heavy polyurethane rollers physically bend the turf crown without causing the cellular damage that leads to brown tips.
- Turfgrass Selection: To get the most dramatic stripe contrast, plant a high-density Kentucky Bluegrass or a modern dwarf Tall Fescue blend. These species have wide, flexible blades that hold a bend exceptionally well, creating deep, high-contrast stripes that last for days.
Plant Selection for Visual Contrast
A striped lawn is all about horizontal lines and low-profile uniformity. To maximize the aesthetic impact, the plants inside your rain garden should provide aggressive vertical contrast. The National Wildlife Federation recommends utilizing native species that support local pollinators while providing striking architectural forms.
- Zone 1 (The Center/Deepest Area): Plant species that can tolerate standing water for up to 48 hours. Swamp Milkweed (Asclepias incarnata) and Blue Flag Iris (Iris versicolor) offer tall, rigid vertical spikes and vibrant blooms that pop against the green and white horizontal lawn stripes.
- Zone 2 (The Slopes): These areas experience fluctuating moisture levels. Use Soft Rush (Juncus effusus) and New England Aster (Symphyotrichum novae-angliae). The cylindrical, grass-like texture of the rushes provides a brilliant textural contrast to the manicured turf.
- Zone 3 (The Edges): The driest zones near your flush paver border. Plant Purple Coneflower (Echinacea purpurea) and Little Bluestem (Schizachyrium scoparium). Little Bluestem turns a stunning coppery-red in the autumn, providing a warm color boundary that frames the cool-toned lawn stripes perfectly.
Maintenance and Stormwater Efficiency
Maintaining the dual function of your landscape requires a balanced approach. Never blow grass clippings into the rain garden basin; the excess nitrogen from decomposing clippings will trigger algae blooms and overwhelm the native plants, while the physical bulk of the clippings will clog the soil pores, destroying the garden's infiltration rate. Always use a bagger or mulching kit when mowing the immediate perimeter.
Additionally, inspect the flush hardscape border twice a year. Soil settlement or frost heave can cause pavers to rise above the turf grade. If a paver lifts, it will block your mower deck and ruin the continuity of your striping pattern. Re-level the base sand beneath any shifted stones to maintain that seamless transition between the engineered stormwater basin and your meticulously striped 2026 lawn.