
Gardening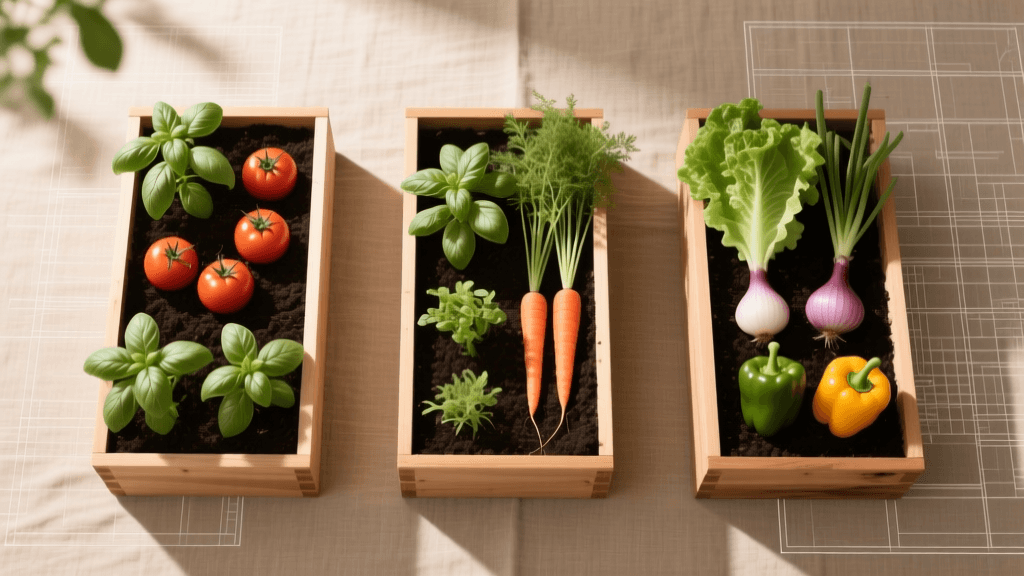
Planning the Perfect Raised Bed Kitchen Garden Layout
The Renaissance of the Potager: Form Meets Function
The traditional French potager, or kitchen garden, is a masterclass in blending agricultural utility with ornamental beauty. Unlike standard row-crop vegetable gardens that prioritize sheer volume, a modern raised bed kitchen garden focuses on accessibility, intensive planting, and aesthetic appeal. Designing a layout that maximizes yield while creating a visually stunning outdoor space requires careful planning, precise measurements, and an understanding of microclimates. Whether you are working with a sprawling suburban backyard or a compact urban lot, this comprehensive design guide will walk you through the essential steps to plan, build, and plant the perfect raised bed kitchen garden.
Step 1: Microclimate Mapping and Site Selection
Before purchasing a single board or bag of soil, you must understand the light and water dynamics of your yard. Most fruiting crops, such as tomatoes, peppers, and squash, require a minimum of six to eight hours of direct sunlight daily. Leafy greens and root vegetables can tolerate partial shade, thriving with just four to six hours of sun.
To accurately map your site, use a sun-tracking app like SunCalc or simply place a tally mark on a notepad every hour to track shadow lines cast by your home, fences, and mature trees. Remember that the sun sits lower on the horizon in the spring and fall, meaning a bed that receives full sun in June might be completely shaded by a nearby oak tree in September. Additionally, ensure your chosen site is within 100 feet of a reliable water source. Dragging heavy hoses across the lawn daily is the fastest way to kill a gardener's enthusiasm.
Step 2: Raised Bed Dimensions and Material Selection
The golden rule of raised bed design is accessibility. A bed should never be wider than four feet if accessible from both sides, or two feet if pushed against a fence. This ensures you can reach the center of the bed to harvest and weed without ever stepping on the soil, which prevents compaction. The standard length is eight feet, as this aligns perfectly with standard lumber sizing, minimizing waste and cuts.
Depth is equally crucial. While six inches is sufficient for shallow-rooted lettuce, a depth of 11 to 12 inches is ideal for accommodating deep-rooted crops like carrots and tomatoes, while also providing adequate soil volume to retain moisture during summer heatwaves.
Material Comparison Chart
| Material | Estimated Lifespan | Cost (4x8x1 ft) | Design Pros | Design Cons |
|---|---|---|---|---|
| Untreated Cedar | 10-15 Years | $150 - $220 | Natural rot resistance, ages to a beautiful silver-gray. | Higher upfront cost, can warp in extreme humidity. |
| Galvanized Steel | 20-30 Years | $80 - $130 | Sleek modern aesthetic, extremely durable, pest-proof. | Soil can overheat in extreme southern climates. |
| Composite Timber | 25+ Years | $250 - $350 | Zero maintenance, retains color, won't splinter. | Expensive, can bow outward if not properly braced. |
| Concrete Blocks | 50+ Years | $60 - $90 | Modular design, excellent thermal mass for cold climates. | Industrial look, heavy to move, alters soil pH slightly. |
Step 3: Designing Accessible and Aesthetic Pathways
Pathways are the arteries of your kitchen garden. They dictate the flow of movement and heavily influence the visual geometry of the space. For primary walkways, maintain a minimum width of 30 inches to comfortably accommodate a standard wheelbarrow. Secondary paths between beds can be narrowed to 18 inches to maximize growing space.
For a formal, structured look, consider using decomposed granite (DG) bordered by steel edging. DG compacts into a firm, permeable surface that feels satisfying underfoot and suppresses weeds effectively. For a more rustic, woodland aesthetic, lay down heavy-duty landscape fabric and top it with three to four inches of arborist woodchips. Woodchips are often available for free from local tree-trimming services, retain soil moisture, and eventually break down to feed the surrounding beds. Avoid using bare grass between beds, as it requires constant mowing and trimming, and frequently invades the garden soil via rhizomes.
Step 4: The Foundation: Engineering the Perfect Soil Matrix
Because raised beds are a closed environment, you cannot rely on native topsoil. Native soil will compact heavily in a raised bed, suffocating roots and causing drainage issues. Instead, you must engineer a lightweight, nutrient-dense soil matrix.
A widely adopted and highly effective formula is the modified 'Square Foot Gardening' mix. For a standard 4x8x1 foot bed, you will need approximately 32 cubic feet (1.2 cubic yards) of soil. The ideal recipe consists of:
- 33% High-Quality Compost: Use a diverse blend of composts (e.g., mushroom compost, worm castings, and composted manure) to ensure a broad spectrum of micronutrients. Brands like Espoma Organic Compost are excellent choices.
- 33% Coco Coir or Peat Moss: This provides water retention and a light, fluffy texture. Coco coir is generally preferred over peat moss due to its sustainable harvesting and neutral pH.
- 33% Coarse Vermiculite or Perlite: This ensures aeration and drainage, preventing the soil matrix from collapsing and compacting over time.
Before planting, incorporate a balanced, slow-release organic fertilizer such as Espoma Garden-tone (3-4-4 NPK) at the manufacturer's recommended rate to provide a baseline of macronutrients for heavy-feeding crops.
Step 5: Vertical Zoning and Trellis Placement
A well-designed kitchen garden grows upward as well as outward. Vertical gardening increases your yield per square foot, improves air circulation (reducing fungal diseases), and adds striking architectural height to the landscape. When planning your layout, always position trellises and vertical structures on the north side of your raised beds. This prevents tall, vining crops from casting shadows on the shorter, sun-loving plants situated in front of them.
For indeterminate tomatoes, pole beans, and cucumbers, 16-foot galvanized cattle panels are the gold standard. They cost roughly $30 each at farm supply stores and can be cut in half to create sturdy 8-foot trellises, or bent into an archway spanning a pathway. Secure them to heavy-duty steel T-posts driven two feet into the ground using heavy-duty zip ties or metal wire. This setup provides decades of reliable support and creates a breathtaking, tunnel-like focal point in the garden.
Step 6: Succession Planning and Companion Grids
The hallmark of a productive kitchen garden is succession planting and strategic companion planting. Rather than planting the entire bed at once, divide your beds into a 1-foot by 1-foot grid system. This visual organization makes planning and crop rotation incredibly intuitive.
Strategic Companion Planting Guide
- Tomatoes + Basil + Marigolds: Basil is believed to improve the flavor of tomatoes and repel hornworms, while French marigolds secrete compounds from their roots that suppress harmful soil nematodes.
- Carrots + Alliums (Onions/Leeks): The strong scent of alliums masks the smell of carrots, confusing the carrot rust fly and protecting your root harvest.
- Brassicas (Kale/Cabbage) + Nasturtiums: Nasturtiums act as a brilliant trap crop, drawing aphids and cabbage worms away from your valuable leafy greens.
- Cucumbers + Radishes + Sunflowers: Radishes deter cucumber beetles, while sunflowers provide natural, living trellises for lighter cucumber varieties and attract essential pollinators.
By mapping out these companion grids on paper before the season begins, you ensure that every square foot of your raised bed is working in ecological harmony.
Expert Insights on Raised Bed Management
While raised beds offer incredible advantages in garden design and soil control, they also present unique management challenges that planners must anticipate. According to research and guidelines published by the Cornell University College of Agriculture and Life Sciences (CALS), the very drainage that makes raised beds ideal for early spring planting also makes them highly susceptible to rapid drying in the summer.
'Raised beds warm up faster in the spring and drain better than in-ground gardens, extending the growing season. However, because they are elevated and exposed to air on the sides, they require more frequent irrigation and careful soil formulation with high organic matter to prevent compaction and drought stress.' — Cornell University Cooperative Extension
To mitigate this, Cornell experts recommend integrating drip irrigation systems directly into the bed design phase. Lay 1/2-inch mainline tubing along the perimeter and use 1/4-inch drip emitters spaced every 6 inches. Covering the soil surface with two inches of organic mulch, such as straw or shredded leaves, will further reduce evaporation by up to 70%, keeping your engineered soil matrix perfectly moist and biologically active.
Conclusion
Designing a raised bed kitchen garden is an exercise in balancing horticultural science with landscape art. By carefully selecting your site, investing in durable materials, engineering a superior soil matrix, and utilizing vertical space, you create more than just a place to grow food. You create a sustainable, highly productive outdoor living space that will yield fresh, organic harvests and visual delight for years to come. Grab your graph paper, measure your sunlight, and begin drafting the potager of your dreams today.

