
Gardening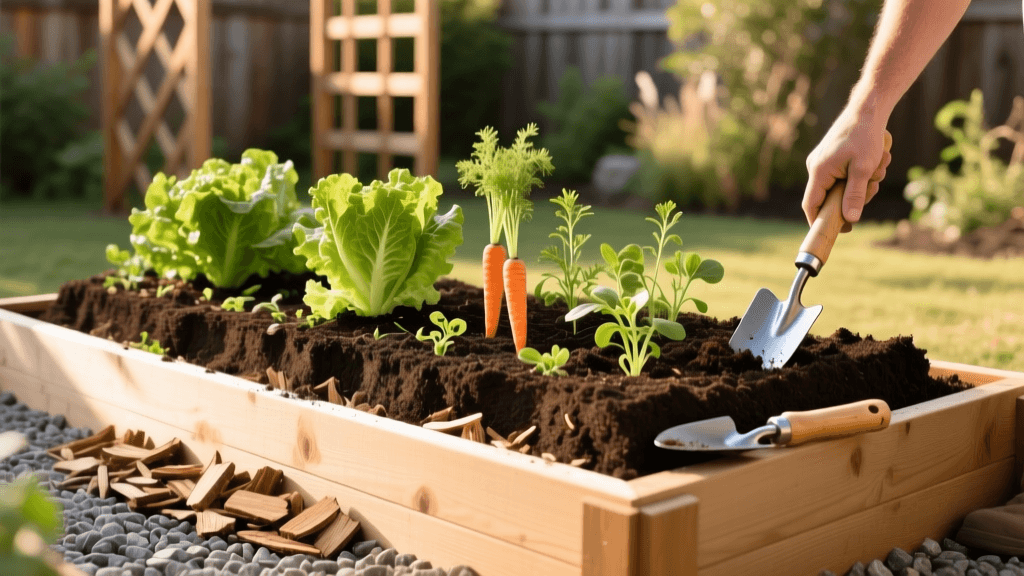
Mastering Raised Bed Soil Layering: Expert Tips for Maximum Yield
Building a raised bed vegetable garden is one of the most rewarding investments a home gardener can make. However, the success of your harvest relies almost entirely on what happens beneath the surface. Many beginners make the costly mistake of simply filling their wooden or metal beds with cheap topsoil or native dirt, only to face compaction, poor drainage, and nutrient deficiencies by mid-summer. As an expert gardener, you must approach raised bed soil preparation not as a simple filling exercise, but as the creation of a living, breathing ecosystem. In this comprehensive guide, we will explore expert tips and best practices for layering and amending raised bed soil to guarantee maximum yields, robust root systems, and long-term soil health.
The Science of Raised Bed Soil Architecture
Unlike in-ground gardens, raised beds are essentially large containers. This means they are subject to unique hydrological and thermal dynamics. Water moves differently through a confined soil column, and the soil warms up and cools down faster than the surrounding earth. Therefore, the physical structure of your soil—its architecture—is just as important as its chemical nutrient profile.
According to the Cornell University Cooperative Extension, maintaining a soil organic matter level of 5% to 10% in intensive vegetable production systems is critical for moisture retention, cation exchange capacity, and nutrient cycling. In a raised bed, achieving this requires a deliberate blend of materials that provide both immediate nutrients and long-term structural integrity. If your soil lacks macro-pores, roots will suffocate; if it lacks micro-pores, it will dry out rapidly. The expert approach involves creating a stratified soil profile that mimics natural forest floors while optimizing for agricultural output.
"The physical properties of soil in raised beds dictate water holding capacity and aeration. A well-structured raised bed mix should hold moisture like a sponge while draining freely enough to prevent anaerobic conditions." — Dr. Nina Bassuk, Urban Horticulture Specialist, Cornell University.
The Core Soil Mix Ratio: The 40-40-20 Rule
Before we discuss the specific layering technique, we must establish the foundational soil mix. While many gardeners swear by Mel's Mix (from Square Foot Gardening), modern soil science suggests a slightly modified ratio that incorporates heavier mineral components for long-term stability. The 40-40-20 rule is the gold standard for expert raised bed construction.
| Component | Volume Ratio | Primary Function | Estimated Cost (per cu ft) |
|---|---|---|---|
| High-Quality Topsoil | 40% | Structure, Minerals, Weight | $1.50 - $2.50 |
| Organic Compost | 40% | Nutrients, Microbes, Moisture | $2.00 - $4.00 |
| Coarse Aeration | 20% | Drainage, Oxygen, Root Growth | $3.00 - $5.00 |
For the aeration component, avoid using fine vermiculite as it breaks down over time and can compact. Instead, opt for coarse horticultural pumice, expanded shale, or large-grade perlite. These materials will not degrade, ensuring your bed maintains its drainage properties for a decade or more.
Expert Layering Techniques: Bottom to Top
Filling a deep raised bed (18 to 24 inches) entirely with the premium 40-40-20 mix can be prohibitively expensive. A 4x8 foot bed that is 24 inches deep requires roughly 48 cubic feet of soil. To save money while simultaneously building a resilient, drought-tolerant soil web, experts utilize a strategic layering method inspired by Hugelkultur and lasagna composting.
Layer 1: The Base and Drainage Layer (Bottom 4-6 Inches)
Start at the very bottom of your raised bed. If you are placing the bed over heavy clay or compacted ground, do not use landscape fabric or cardboard, as these can impede deep taproots and earthworm migration. Instead, lay down a 2-inch layer of coarse wood chips or arborist mulch. This creates a French-drain effect at the base of the bed, preventing water from pooling and causing root rot. Over this, add a 2-inch layer of decaying logs or thick branches. As this wood slowly breaks down over the next 3 to 5 years, it will act as a sponge, holding deep moisture and releasing trace minerals.
Layer 2: The Bulk Organic Matter (Middle 6-8 Inches)
Above the wood base, you want to introduce bulk organic materials that will slowly compost in place. Use a mixture of dried autumn leaves, straw (not hay, to avoid weed seeds), and grass clippings. Pack this layer down slightly and water it thoroughly. This layer serves as a transitional zone. As it decomposes, it will generate gentle bottom-up heat in the early spring, warming the root zone and extending your growing season by up to two weeks.
Layer 3: The Nutrient Engine (Next 4-6 Inches)
Now it is time to introduce the biological heavyweights. Add a thick layer of diverse organic compost. For the best results, blend mushroom compost, vermicompost (worm castings), and aged manure. Vermicompost is particularly crucial here; it is rich in humic acids and beneficial soil microbes that will immediately begin breaking down the carbon-rich layers beneath it. This nutrient engine will feed your heavy-feeding crops like tomatoes, peppers, and brassicas throughout the entire season.
Layer 4: The Premium Growing Medium (Top 8-10 Inches)
The final layer, where the majority of your plant roots will reside, is your premium 40-40-20 mix. Blend the topsoil, compost, and pumice thoroughly before adding it to the top of the bed. This layer provides the perfect tilth for seed germination and delicate transplant roots. Because it sits atop the decomposing layers below, it will benefit from a steady upward wicking of moisture and nutrients, reducing your need for frequent watering and synthetic fertilizers.
Advanced Amendments for Specific Crops
To elevate your soil from good to exceptional, incorporate targeted dry amendments into the top 8 inches of your premium layer before planting. Here are expert-recommended additions based on crop types:
- Biochar (1 cup per square foot): Pre-charge biochar with compost tea before adding it to the bed. It provides a permanent, porous habitat for soil bacteria and drastically improves nutrient retention in sandy or loose mixes.
- Kelp Meal (2 tablespoons per square foot): Essential for fruiting crops like tomatoes and eggplants. It provides over 60 trace minerals and natural growth hormones that stimulate vigorous root development and flower set.
- Azomite or Glacial Rock Dust (1/2 cup per square foot): Re-mineralizes the soil with essential micronutrients that are often lacking in commercial topsoils, improving the flavor and nutritional density of your harvested vegetables.
- Neem Cake (1/4 cup per square foot): Acts as a slow-release nitrogen source while simultaneously deterring soil-dwelling pests like root-knot nematodes and fungus gnat larvae.
Seasonal Maintenance and Soil Recharging
A common misconception is that raised bed soil is a "set it and forget it" medium. Because you are harvesting biomass and removing it from the ecosystem, nutrients are constantly being exported. To maintain expert-level yields, you must practice seasonal soil recharging.
In the late fall, after clearing out spent crops, top-dress your beds with 2 inches of fresh compost and a light dusting of agricultural lime (if your soil pH has dropped below 6.2). Plant a winter cover crop, such as crimson clover or winter rye. These cover crops will scavenge leftover nitrogen, prevent winter erosion, and their roots will create natural bio-pores in the soil. In early spring, simply chop the cover crop down at the soil line and let it decompose in place as a green manure.
Common Mistakes to Avoid
Even seasoned gardeners can fall into bad habits when managing raised beds. Avoid these critical errors to protect your soil architecture:
- Over-Tilling: Never use a rototiller in a raised bed. Tilling destroys the delicate fungal networks (mycorrhizae) you have worked hard to establish and brings dormant weed seeds to the surface. Always use a broadfork or a hand trowel to gently aerate the soil between seasons.
- Walking on the Soil: The primary advantage of a raised bed is the elimination of soil compaction. Ensure your beds are no wider than 4 feet so you can reach the center from the pathways without ever stepping inside the bed.
- Ignoring Soil Tests: Do not guess your soil's needs. Send a sample to your local university extension office every two years. A comprehensive soil test will cost around $20 to $30 and will provide exact, mathematically sound recommendations for lime, sulfur, and specific N-P-K amendments.
Conclusion
Mastering raised bed soil layering is the hallmark of an expert gardener. By understanding the science of soil architecture, utilizing the 40-40-20 mix, and implementing a strategic bottom-to-top layering system, you transform a simple wooden box into a thriving, self-sustaining ecosystem. The initial investment of time and resources into proper soil preparation will pay dividends for years to come, resulting in healthier plants, fewer pest issues, and bountiful harvests season after season. Treat your soil as your most valuable garden tool, and it will reward you abundantly.

