
Gardening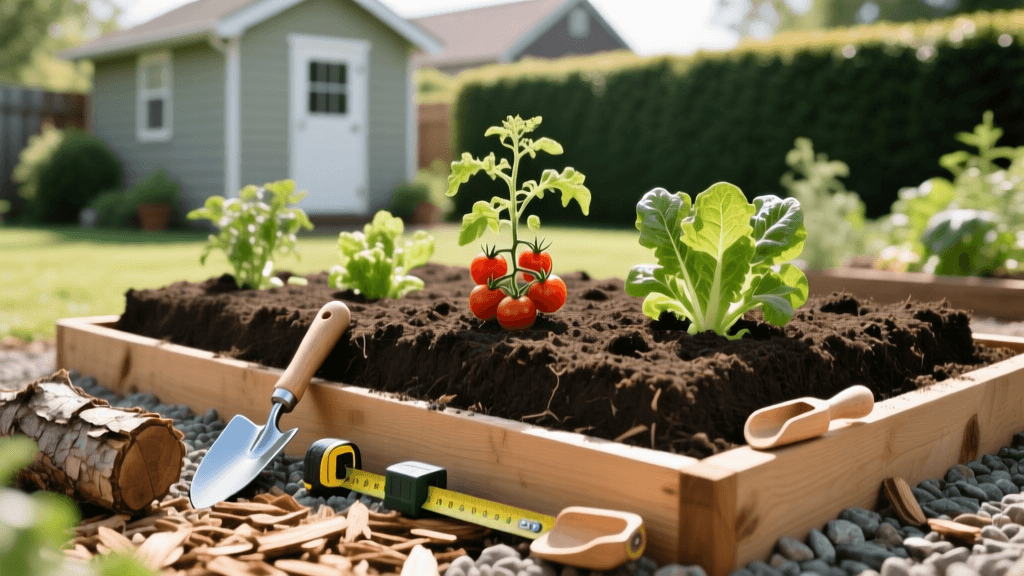
Expert Soil Layering Techniques for Raised Bed Gardens
The Problem with Traditional Raised Bed Filling
Gardening in raised beds offers unparalleled control over soil quality, drainage, and weed management. However, one of the most common and costly mistakes home gardeners make is treating a raised bed like a giant flower pot, filling it entirely with expensive, bagged potting mix or uniform topsoil. This approach not only drains your wallet but can also lead to soil compaction, poor deep-root aeration, and rapid moisture loss during peak summer heat. As a senior horticulturist, I advocate for the stratified soil layering technique—a refined, manageable adaptation of the traditional Hugelkultur method. By mimicking the natural forest floor, you can create a resilient, moisture-retentive, and nutrient-dense growing environment for a fraction of the cost.
The Stratified Layering Method: A Step-by-Step Guide
To execute this properly, we must view the raised bed in distinct horizontal horizons. For a standard 4-foot by 8-foot raised bed that is 12 inches deep (requiring roughly 32 cubic feet of total volume), here is the exact blueprint for stratified layering.
Layer 1: The Base and Weed Barrier (0-2 Inches)
Start at the very bottom. If your bed is placed directly on native soil or lawn, lay down a thick layer of uncoated, plain brown corrugated cardboard. Avoid glossy or wax-coated boxes, as they contain microplastics and chemical dyes that have no place in a food garden. Overlap the edges by at least three inches to prevent aggressive weeds like bindweed or Bermuda grass from penetrating. On top of the cardboard, add a 1-inch layer of coarse wood chips or small, untreated twigs. This creates a vital air gap that facilitates bottom-up drainage and prevents the wet cardboard from forming an impermeable seal against the earth.
Layer 2: The Biomass Core (2-6 Inches)
This is where the magic—and the savings—happen. Fill the next 4 to 5 inches with carbon-rich and nitrogen-rich yard waste. Excellent carbon sources include dry autumn leaves, straw, or shredded newspaper. Nitrogen sources include fresh grass clippings, pulled weeds (strictly before they go to seed), and kitchen vegetable scraps. This decomposing biomass acts like a giant sponge, holding up to 80% of its weight in water. As the materials break down over the season, they feed the soil food web and slowly release nutrients directly to the deep taproots of crops like tomatoes and peppers. Crucially, avoid using large, intact logs in standard 12-inch beds, as they will cause severe nitrogen tie-up and leave massive air pockets that dry out shallow feeder roots.
Layer 3: The Nutrient Transition (6-9 Inches)
To prevent the decomposing core from temporarily robbing the upper soil layers of nitrogen (a process known as nitrogen immobilization), you need a buffer zone. Add a 2-inch layer of highly biologically active material. Finished compost, vermicompost (worm castings), or well-rotted manure are ideal here. This layer serves as a biological bridge, inoculating the raw biomass below with beneficial mycorrhizal fungi and bacteria that accelerate decomposition while providing an immediate, accessible nutrient reservoir for your plants.
Layer 4: The Planting Crown (9-12 Inches)
The top 4 to 5 inches of your raised bed should be reserved for the actual root zone of your seedlings and transplants. Do not use heavy garden soil or pure topsoil here, as it will inevitably compact in a raised bed environment. Instead, use a premium, fluffy mixture. A highly effective, expert-recommended recipe is 50% high-quality screened compost, 30% coconut coir or peat moss for moisture retention, and 20% coarse perlite or pumice for aeration. This crown layer ensures that delicate seedling roots have zero resistance, promoting explosive early growth and robust establishment.
Cost Comparison: Traditional vs. Stratified Filling
One of the primary advantages of the stratified method is the dramatic reduction in material costs. Below is a cost breakdown for filling a single 4x8x12 inch raised bed (32 cubic feet).
| Method | Materials Required | Estimated Cost | Long-Term Soil Health |
|---|---|---|---|
| Traditional Bagged Mix | 16 bags (2 cu ft each) of premium raised bed soil | $240 - $320 | Degrades over time; requires heavy annual amendments |
| Bulk Topsoil & Compost | 1.2 cubic yards of 50/50 topsoil-compost blend | $90 - $140 (plus delivery fees) | Good, but prone to compaction and poor deep drainage |
| Stratified Layering | Cardboard, yard waste, 5 bags compost, 3 bags coir/perlite | $45 - $75 | Excellent; self-fertilizing and highly moisture-retentive |
Expert Best Practices for Long-Term Success
- Water In Each Layer: As you build your bed, thoroughly water the cardboard and the biomass core. Dry leaves and straw will wick moisture away from your plants' roots if not pre-soaked. A good rule of thumb is to water each layer until it is as damp as a wrung-out sponge.
- Avoid Allelopathic Woods: Never use black walnut, tree of heaven, or treated lumber scraps in your biomass core. Black walnut contains juglone, a natural herbicide that will stunt or kill solanaceous crops like tomatoes, peppers, and eggplants.
- Autumn Top-Dressing: Because the biomass core will decompose and settle over the first year, your soil level will drop by 2 to 3 inches. Each autumn, top-dress the bed with an inch of finished compost and a light layer of shredded leaves to maintain the crown height and replenish organic matter.
- Plant Immediately: Unlike traditional Hugelkultur mounds which may need to cure, this stratified raised bed method is ready for planting immediately. The nitrogen-rich transition layer and the fluffy crown ensure that transplants and seeds have exactly what they need on day one.
What the Science Says: Authoritative Insights
The principles behind stratified layering are heavily supported by academic horticultural research. According to the University of Minnesota Extension, incorporating coarse organic matter at the base of raised beds significantly improves the soil's water-holding capacity without sacrificing the vital oxygen levels required for root respiration. Their research highlights that container and raised bed environments suffer from a 'perched water table' effect if the soil texture is too uniform. By introducing a gradient of particle sizes—from coarse twigs at the bottom to fine compost at the top—gardeners can manipulate soil physics to ensure both deep drainage and surface moisture retention.
Furthermore, research from Cornell University's Department of Horticulture emphasizes the role of the soil food web in breaking down raw carbon sources. By placing raw biomass beneath a layer of finished compost, gardeners introduce the necessary microbial inoculants directly to the carbon source, accelerating the humification process and turning yard waste into stable, plant-available humus over a 12 to 18-month cycle.
Common Mistakes to Avoid
Even with the best intentions, gardeners can stumble when adopting advanced soil techniques. Avoid these common pitfalls:
- Using Fresh Wood Chips in the Crown: While wood chips are excellent for the deep core or as a surface mulch, mixing them into the top 4 inches of soil will cause severe nitrogen deficiency as microbes consume all available nitrogen to break down the carbon.
- Skipping the Cardboard: If you build a raised bed directly over a lawn without a robust cardboard barrier, the underlying grass will survive the initial soil dump, eventually growing up into your pristine planting crown and creating a weedy nightmare.
- Over-reliance on Peat Moss: While peat moss is a traditional soil amendment, it is highly acidic and environmentally contentious. Always buffer peat moss with compost, or better yet, substitute it entirely with coconut coir, which has a more neutral pH and is a renewable byproduct of the coconut industry.
Conclusion
Building a raised bed is an investment in your garden's future, but you do not need to spend a small fortune on bagged soil to achieve professional-level yields. By utilizing the stratified soil layering technique, you can recycle yard waste, drastically reduce material costs, and engineer a superior growing environment that mimics nature's own soil-building processes. Whether you are growing deep-rooted heirloom tomatoes or shallow-rooted leafy greens, this expert-approved layering method will provide the aeration, moisture, and biological activity your crops need to thrive season after season.

