
Smart Drip Irrigation: Drought-Proof Your Home Garden
The Hidden Cost of Traditional Sprinklers in Drought Conditions
As climate patterns shift and drought conditions become more frequent across North America, homeowners are facing unprecedented challenges in maintaining their outdoor spaces. Traditional spray-head sprinkler systems, while effective for broad turfgrass coverage, are notoriously inefficient. According to the EPA WaterSense program, conventional sprinklers can lose up to 50% of their water to wind drift, runoff, and evaporation before it ever reaches the root zone. In regions enforcing strict watering restrictions, this inefficiency is not just an environmental liability; it is a financial drain.
Transitioning to a water-wise landscape does not mean sacrificing a lush, vibrant garden. By bridging smart home technology with targeted drip irrigation, you can create a drought-resilient outdoor living space that thrives even under severe water restrictions. This guide explores the mechanics, costs, and step-by-step installation of smart drip irrigation systems tailored for garden beds, vegetable patches, and container plants.
Why Drip Irrigation is the Ultimate Drought Solution
Drip irrigation operates on a fundamentally different principle than overhead spraying. Instead of broadcasting water through the air, drip systems deliver water directly to the base of the plant, drop by drop. This targeted approach boasts an efficiency rate of 90% or higher. By keeping the soil surface and foliage dry, drip systems also drastically reduce the prevalence of fungal diseases and weed germination.
Understanding GPH vs. GPM
To design a drought-proof system, you must understand the flow metrics. Spray heads measure output in Gallons Per Minute (GPM), often putting out 1.5 to 3 GPM. Drip emitters, conversely, are measured in Gallons Per Hour (GPH). A standard drip emitter might output 0.5 to 2.0 GPH. This slow, methodical delivery allows heavy, clay-rich soils to absorb moisture without pooling or running off, ensuring deep root penetration that trains plants to withstand dry spells.
The Brains of the Operation: Smart Weather-Based Controllers
A drip system is only as efficient as the schedule it follows. Watering for a static 20 minutes every morning ignores the realities of microclimates, recent rainfall, and seasonal evapotranspiration (ET) rates. Smart irrigation controllers solve this by connecting to local weather stations via Wi-Fi. These devices automatically adjust watering durations based on real-time data, including temperature, humidity, wind speed, and solar radiation.
The Environmental Protection Agency (EPA) notes that replacing a standard clock timer with a WaterSense labeled smart controller can save the average home nearly 7,600 gallons of water annually. When paired with drip irrigation, the savings compound exponentially.
Top Smart Irrigation Controllers Compared
| Model | Max Zones | Smart Features | Average Cost | WaterSense Certified |
|---|---|---|---|---|
| Rachio 3 Smart Controller | 8 or 16 | Weather Intelligence Plus, freeze skip, rain skip | $229 - $279 | Yes |
| Orbit B-hyve XR | 6 or 12 | WeatherSense technology, app-based manual overrides | $149 - $189 | Yes |
| Rain Bird ST8I-2.0 | 8 | Basic Wi-Fi, seasonal adjust, mobile access | $129 - $149 | No |
Integrating Soil Moisture Sensors for Precision Watering
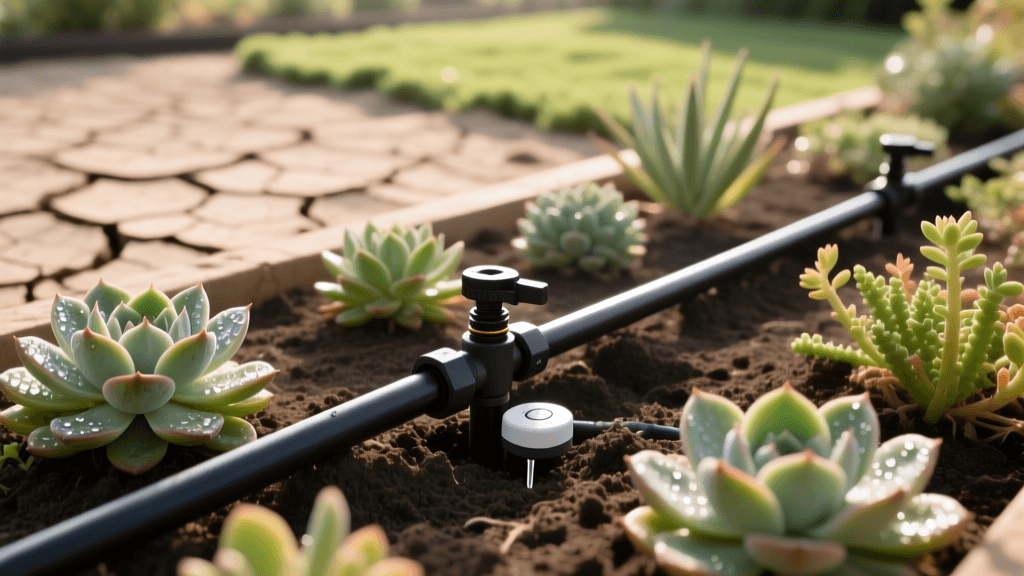
While weather-based controllers rely on regional data, soil moisture sensors provide hyper-local, ground-truth data. Devices like the Hunter Soil-Clik or Rain Bird SMRT-Y connect directly to your smart controller and measure the actual volumetric water content in the root zone. If the soil holds adequate moisture, the sensor overrides the scheduled watering cycle, preventing unnecessary irrigation during unexpected microclimate humidity or recent light rain events. Installing a sensor requires burying the probe at root depth (typically 4 to 6 inches for perennials, 12 inches for shrubs) in the driest, most representative zone of your garden. The wiring connects back to the controller's sensor terminals, creating a closed-loop feedback system that guarantees zero water waste.
Step-by-Step Guide to Installing a Smart Drip System
Installing a drip system is a highly accessible DIY project that typically takes a weekend to complete for an average-sized garden bed. Here is your actionable blueprint.
Step 1: Assemble the Head Assembly
The head assembly connects your outdoor spigot to the drip tubing. It must be assembled in a specific order to function correctly:
- Smart Timer: Attaches directly to the faucet. (If using a wired smart controller mounted to the house, you will use a manifold valve system instead of a hose-end timer).
- Backflow Preventer (Vacuum Breaker): Essential for preventing contaminated soil water from siphoning back into your home drinking supply.
- Filter (120 to 150 mesh): Drip emitters have microscopic openings. A screen filter prevents sediment from clogging the system.
- Pressure Regulator (25 to 30 PSI): Drip tubing is rated for low pressure. Standard household water pressure (50-80 PSI) will blow the fittings apart. A 25 PSI regulator is non-negotiable.
Step 2: Map and Lay the Mainline Tubing
Use 1/2-inch blank polyethylene tubing as your mainline. Lay it along the perimeter of your garden beds. Secure it every 3 to 4 feet using metal or plastic landscape staples. Leave the tubing in the sun for an hour before working with it; the heat makes the polyethylene pliable and much easier to connect to barbed fittings.
Step 3: Punch and Connect Micro-Tubing
Use a specialized drip tubing punch tool to create clean holes in the 1/2-inch mainline. Insert a barbed connector and attach 1/4-inch micro-tubing. Run the micro-tubing to the base of each plant. For shrubs and trees, loop the tubing around the root ball and insert multiple 1.0 GPH emitters to ensure even moisture distribution.
Step 4: Flush and Cap
Before attaching the end caps or flush valves, turn on the system for 60 seconds to flush out any plastic shavings or dirt that entered the lines during assembly. Once flushed, securely cap the ends of all 1/2-inch tubing using figure-8 end caps.
Hydrozoning: Grouping Plants by Water Needs
A smart controller can only do so much if your landscape design fights against itself. The concept of hydrozoning involves grouping plants with similar water and sunlight requirements into the same irrigation zones. Mixing a drought-tolerant lavender plant with a water-hungry hydrangea on the same drip valve guarantees that one will either drown or desiccate.
According to the Alliance for Water Efficiency, proper hydrozoning combined with smart irrigation can reduce outdoor water use by up to 30%. Assign your high-water vegetable beds to Zone 1, your moderate-water ornamental perennials to Zone 2, and your native, drought-tolerant xeriscaping to Zone 3.
Maintenance and Seasonal Adjustments
While drip systems require less maintenance than spray heads, they are not entirely set-and-forget. Once a month, physically walk your garden while the system is running. Look for geysers (indicating a blown emitter) or dry soil patches (indicating a clog). At the end of the growing season, open the flush valves to clear sediment. If you live in a climate with hard freezes, you must blow out the lines with compressed air or detach the above-ground head assembly and store it in a garage to prevent cracked housings.
Financial ROI and Municipal Rebates
The initial investment for a smart controller ($150-$250) and a complete drip kit for a 500-square-foot garden ($100-$150) is quickly recouped. Many municipal water districts offer aggressive rebates to incentivize drought-resistant upgrades. It is common to find rebates covering up to 100% of the cost of an EPA WaterSense certified smart controller. Check your local water provider portal before purchasing, as many require pre-approval to qualify for the reimbursement.
By integrating smart technology with targeted drip delivery, you transform your garden from a water-dependent liability into a resilient, self-sustaining ecosystem. You will spend less time dragging hoses, less money on utility bills, and more time enjoying your vibrant, drought-proof outdoor sanctuary.

