
Smart Irrigation Systems: Save Water and Grow a Greener Lawn
Watering your lawn should not feel like a guessing game. Yet, millions of homeowners rely on outdated, mechanical sprinkler timers that water the grass whether it is pouring rain or blazing hot. According to the Environmental Protection Agency (EPA), the average American family uses more than 300 gallons of water per day at home, and roughly 30% of that is dedicated to outdoor use. In arid climates, that number can skyrocket to 60%. The result? Overwatered lawns, shallow root systems, fungal diseases, and bloated utility bills.
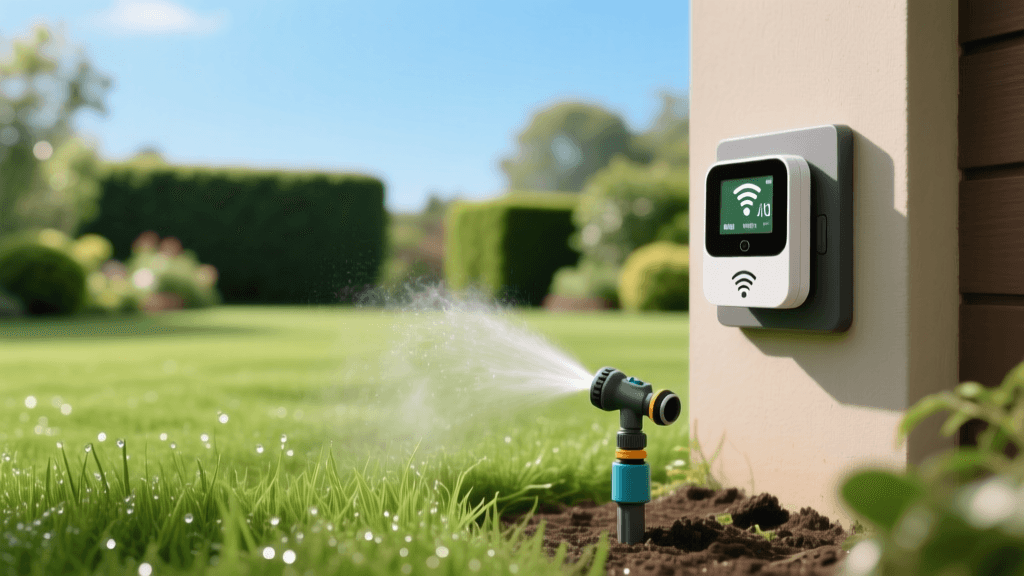
Enter the smart irrigation controller. By bridging the gap between home automation and energy-efficient landscaping, smart sprinkler systems take the guesswork out of lawn care. In this comprehensive guide, we will explore how smart irrigation works, compare the top models on the market, and provide a step-by-step blueprint for upgrading your outdoor watering system.
The Problem with Traditional Clock Timers
Traditional irrigation controllers operate on a fixed schedule. You set them to run for 15 minutes per zone, three times a week, and the machine blindly obeys. It does not know if it rained two inches yesterday. It does not know if a heatwave is rolling in tomorrow, or if the soil is already saturated. This rigid approach leads to massive water waste and weakens your turf by encouraging shallow root growth. When grass is overwatered, roots stay near the surface where moisture is easily accessible, making the lawn highly susceptible to drought stress and disease.
The Science of Smart Watering: Evapotranspiration
Smart irrigation controllers replace arbitrary schedules with data-driven decisions. The most advanced models utilize Evapotranspiration (ET) data. ET is the sum of evaporation from the land surface plus transpiration from plants. By pulling hyper-local weather data from nearby meteorological stations via Wi-Fi, these controllers calculate exactly how much moisture your specific landscape is losing to the atmosphere.
As noted by the University of Minnesota Extension, weather-based smart controllers automatically adjust run times based on real-time variables like solar radiation, wind speed, humidity, and temperature. If a massive rainstorm is forecasted for Tuesday afternoon, a smart controller will automatically skip the Tuesday morning watering cycle, saving thousands of gallons of water over a single season.
Top Smart Sprinkler Controllers Compared
Choosing the right hardware is critical for seamless smart home integration and reliable outdoor performance. Below is a comparison of the top three Wi-Fi irrigation controllers currently dominating the market.
| Feature | Rachio 3 | Orbit B-hyve | Rain Bird ST8I-2.0 |
|---|---|---|---|
| Price Range | $229 - $279 | $99 - $139 | $149 - $189 |
| Zones Available | 8 or 16 | 6 or 12 | 8 |
| Weather Intelligence | Advanced (Freeze, Wind, Rain, Saturation) | WeatherSense (Local weather station data) | Basic Rain Delay & Seasonal Adjust |
| Smart Home Integration | Apple HomeKit, Alexa, Google, IFTTT | Alexa, Google Assistant | Alexa, Google Assistant |
| Best For | Enthusiasts wanting deep ecosystem integration | Budget-conscious DIYers | Upgrading existing Rain Bird systems |
Step-by-Step DIY Installation Guide
Upgrading to a smart controller is a highly rewarding weekend DIY project that typically takes less than an hour. Here is how to swap out your old timer safely and efficiently.
Step 1: Prep and Power Down
Locate your main irrigation breaker in your electrical panel and turn off the power to the sprinkler system. Always use a non-contact voltage tester on the wires inside your current controller to ensure the power is completely off before touching anything.
Step 2: Document the Wiring
Before removing a single wire, take a high-resolution, well-lit photograph of your existing controller wiring. Most systems use color-coded wires connected to numbered terminals (Zone 1, Zone 2, Common, Master Valve, etc.). Use a label maker or masking tape to tag each wire with its corresponding terminal number.
Step 3: Mount and Wire the New Controller
Remove the old backplate and mount the new smart controller base using the provided screws and drywall anchors. Feed the low-voltage wires through the center hole. Strip about 1/2 inch of insulation from the ends of the wires using wire strippers, and insert them into the corresponding push-lever terminals on the new smart hub. Ensure the white Common wire is securely in the C or COM terminal.
Step 4: Connect to Wi-Fi and Calibrate
Restore power at the breaker. Download the manufacturer app on your smartphone and follow the onboarding prompts to connect the device to your 2.4GHz Wi-Fi network. Input your specific landscape data: soil type (clay, loam, or sand), sprinkler head type (rotor or drip), and sun exposure (full sun or deep shade). This calibration is vital for the algorithm to calculate accurate run times.
Integrating with Your Smart Home Ecosystem
A true smart home bridges indoor and outdoor living. Modern irrigation controllers can be integrated into broader automation routines. For example, using IFTTT (If This Then That), you can create an applet that pauses your sprinkler system if your smart home security system is armed in 'Away' mode, preventing the system from watering the driveway while you are on vacation.
Geofencing is another powerful feature. By linking your smart controller to your phone location services, you can set a rule that delays watering if you are hosting an outdoor barbecue in the backyard, triggered automatically when your phone enters the property perimeter. Voice control via Amazon Alexa or Apple HomeKit also allows you to say, 'Hey Siri, skip the front yard watering today,' without ever opening an app.
Advanced Add-Ons: Soil Sensors and Flow Meters
While weather-based ET data is incredibly accurate, microclimates in your yard can skew the numbers. A heavily shaded backyard zone will retain moisture much longer than a front yard zone baking in the afternoon sun. To solve this, consider adding wireless soil moisture sensors.
Pro Tip: Bury a wireless soil moisture sensor at the root depth of your turf (typically 4 to 6 inches deep). The sensor communicates directly with the smart hub, overriding the weather forecast if the soil is already saturated, preventing dangerous runoff and erosion.
Additionally, installing a smart flow meter on your main irrigation line allows the system to monitor exact water usage in gallons. If a pipe bursts or a sprinkler head is sheared off by a lawnmower, the flow meter detects the abnormal spike in water pressure and instantly shuts off the main valve, sending an emergency alert to your smartphone. This single hardware addition can save you from thousands of dollars in landscape damage and water waste.
The Financial ROI: Rebates and Water Savings
The upfront cost of a smart irrigation controller ranges from $100 to $300, but the return on investment is rapid. The EPA WaterSense program reports that smart irrigation controllers can save the average home nearly 7,600 gallons of water annually. In regions with tiered water pricing or strict drought surcharges, this translates to a noticeable drop in your monthly utility bill.
Furthermore, because these devices are certified for water conservation, many local municipal water districts offer aggressive cash rebates. It is highly common for water utilities to rebate 50% to 100% of the purchase price of an EPA WaterSense-labeled smart controller. Always check your local water provider website before purchasing, as you may be able to upgrade your entire system for practically out-of-pocket.
Conclusion
Transitioning to a smart irrigation system is one of the most impactful upgrades you can make to your home exterior. It protects your landscape investment, eliminates the guilt of water waste, and seamlessly integrates your yard into your modern smart home ecosystem. By leveraging real-time weather data, soil science, and automated controls, you can achieve a lush, vibrant lawn while conserving one of our most precious natural resources.

