
Designing a Smart Kitchen Garden: Layout and Irrigation Plans
Bridging Indoor and Outdoor Living with a Smart Kitchen Garden
The modern home garden is no longer just a decorative afterthought; it is an extension of the indoor culinary space. Bridging the gap between indoor kitchens and outdoor landscapes, the smart kitchen garden provides fresh, garden-to-table ingredients while utilizing energy-efficient landscaping and smart home integration. Designing a functional, aesthetically pleasing, and highly productive kitchen garden requires careful planning regarding spatial layout, material selection, and automated irrigation. This comprehensive guide will walk you through the design and planning phases of building a smart kitchen garden tailored for year-round culinary harvests.
Phase 1: Site Selection and Microclimate Mapping
Before purchasing materials or drafting a layout, you must evaluate your outdoor space for optimal growing conditions. A successful kitchen garden requires a minimum of six to eight hours of direct sunlight daily. Use a sun-tracking application like Sun Surveyor to map the light patterns across your yard throughout the changing seasons. Pay special attention to the winter solstice, as the lower angle of the sun can cast long shadows from nearby fences, trees, or your home's roofline.
Proximity to your indoor kitchen or outdoor cooking area is another critical design factor. The concept of garden-to-table living relies on convenience. Position your garden within 50 to 100 feet of your primary cooking space to encourage frequent harvesting and daily maintenance. Additionally, consider wind patterns and frost pockets. Placing your garden near a south-facing wall can create a beneficial microclimate, absorbing heat during the day and radiating it at night to protect tender herbs and extend the growing season into late autumn.
Phase 2: Raised Bed Layout and Material Selection
Raised beds are the cornerstone of a productive kitchen garden. They offer superior drainage, warmer soil in the spring, and ergonomic benefits that reduce strain on your back and knees. When designing your layout, avoid long, single rows. Instead, opt for a U-shape, L-shape, or keyhole design. These configurations maximize your growing square footage while minimizing the hardscape pathways needed for access.
The golden rule for raised bed dimensions is width and depth. Beds should never exceed 4 feet in width, ensuring you can easily reach the center from either side without stepping on and compacting the soil. For depth, aim for 18 to 24 inches. This depth is crucial for cultivating deep-rooted garden-to-table staples like heirloom tomatoes, carrots, and parsnips.
Raised Bed Material Comparison
| Material | Estimated Cost (4x8 Bed) | Lifespan | Pros and Cons |
|---|---|---|---|
| Western Red Cedar | $250 - $400 | 10 - 15 Years | Natural rot resistance and classic look; requires occasional sealing to prevent graying. |
| Corten Steel | $400 - $700 | 25+ Years | Sleek modern aesthetic and extreme durability; heavy, and can leach iron into highly alkaline soils. |
| Recycled Composite | $300 - $500 | 20+ Years | Zero maintenance and eco-friendly; higher upfront cost and can warp slightly in extreme, direct heat. |
| Galvanized Corrugated Metal | $150 - $250 | 15 - 20 Years | Budget-friendly and excellent for industrial designs; soil can overheat in peak summer without shading. |
Phase 3: Soil Preparation and Nutrition Planning
The success of your garden-to-table harvest is entirely dependent on soil health. Avoid using native topsoil or heavy garden soil in raised beds, as it will compact and restrict root growth. Instead, formulate a lightweight, nutrient-dense mix.
According to the Cornell University Cooperative Extension, a high-quality raised bed soil mix should consist of equal parts high-quality compost, coconut coir (or peat moss), and coarse vermiculite. This specific ratio ensures optimal drainage, moisture retention, and nutrient availability for intensive crop production.
For a standard 4x8 foot bed that is 18 inches deep, you will need approximately 48 cubic feet of soil mix. Plan to top-dress your beds with 2 to 3 inches of fresh organic compost every early spring to replenish nutrients depleted by heavy-feeding crops like brassicas and nightshades.
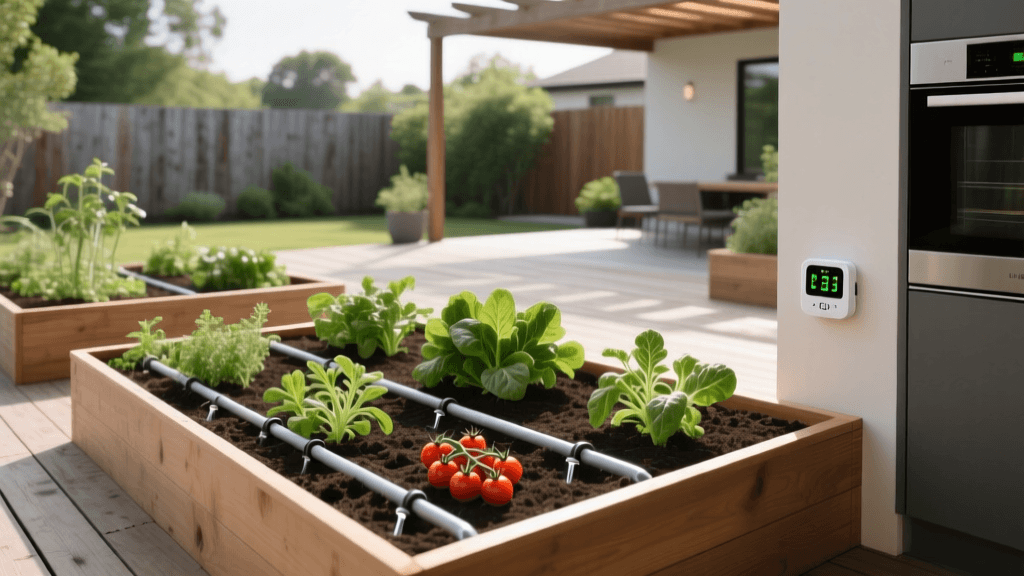
Phase 4: Smart Irrigation and Hydro-Zoning
Integrating smart home technology into your garden's irrigation system saves water, reduces utility bills, and ensures your plants receive precise hydration. Overhead sprinklers are inefficient for kitchen gardens, promoting fungal diseases on edible foliage and wasting water through evaporation. A subsurface or surface drip irrigation system is the industry standard for edible landscaping.
Designing Your Hydro-Zones
Hydro-zoning involves grouping plants with similar water requirements together on the same irrigation valve. In a kitchen garden, you typically need two distinct zones:
- Zone 1 (High Water Demand): Leafy greens, cucumbers, squash, and tomatoes. These require consistent, deep moisture.
- Zone 2 (Low to Moderate Water Demand): Mediterranean herbs like rosemary, thyme, oregano, and lavender. These prefer to dry out slightly between watering cycles.
Recommended Smart Irrigation Components
- Smart Controller: The Rachio 3 Smart Sprinkler Controller or Weathermatic SmartLink. These Wi-Fi-enabled devices connect to local weather stations and automatically skip watering during rain events or adjust run times based on seasonal evapotranspiration rates.
- Drip Tubing: Netafim Techline CV with built-in pressure-compensating check valves. This prevents low-head drainage and ensures uniform water distribution across sloped or uneven terrain.
- Soil Moisture Sensors: Install wireless soil moisture sensors at a depth of 6 inches in your most water-sensitive beds to provide real-time data back to your smart controller, overriding scheduled watering if the soil is already saturated.
Phase 5: Garden-to-Table Planting Strategy
When planning your planting layout, utilize vertical space to maximize yield per square foot. Install heavy-duty cattle panels or powder-coated steel trellises along the north-facing side of your raised beds. This prevents the trellised crops from casting shadows on shorter plants. Train indeterminate tomatoes, pole beans, and cucumbers vertically using soft silicone plant ties.
Implement succession planting to ensure a continuous harvest. Instead of planting an entire row of radishes or lettuce at once, sow a new 2-foot section every 14 days. Incorporate companion planting to naturally deter pests; for example, interplanting pungent French marigolds alongside tomatoes can help repel root-knot nematodes, while planting basil near peppers is believed to improve their flavor profile and deter thrips.
Budgeting and Project Timeline
Proper planning requires a realistic budget and timeline. A complete smart kitchen garden installation, including three 4x8 raised beds, premium soil, a smart drip irrigation system, and vertical trellises, typically ranges from $2,500 to $4,500 depending on material choices and whether you hire labor or opt for a DIY approach.
- Late Winter (Planning): Map sunlight, order seeds, and purchase smart irrigation components.
- Early Spring (Construction): Assemble raised beds, lay down weed-blocking landscape fabric, and install the mainline irrigation tubing before filling with soil.
- Mid-Spring (Planting): Fill beds with the Cornell-recommended soil mix, connect the smart controller to your home Wi-Fi, and transplant cold-hardy crops.
- Post-Frost (Expansion): Install vertical trellises and plant heat-loving summer crops like peppers and eggplants.
Conclusion
Designing a smart kitchen garden is a rewarding investment that seamlessly blends outdoor living with culinary excellence. By carefully planning your raised bed layout, utilizing durable materials, and integrating smart drip irrigation technology, you create a resilient, low-maintenance ecosystem. This strategic approach not only conserves water and reduces your environmental footprint but also guarantees a bountiful, garden-to-table harvest right outside your back door.

