
Viral Smart Rain Barrel DIY: Automate Garden Watering
The 'Smart Scaping' Trend Taking Over Social Media
If you have spent any time on GardenTok or Instagram Reels lately, you have likely noticed a massive shift in landscaping content. The perfectly manicured, water-thirsty turf grass is out, and 'Smart Scaping' is in. This viral movement bridges the gap between ancient rainwater harvesting techniques and modern Internet of Things (IoT) smart home technology. Homeowners are realizing that they can maintain lush, garden-to-table vegetable patches and vibrant pollinator gardens without driving up their municipal water bills or violating local watering restrictions.
According to EPA WaterSense, outdoor water use accounts for nearly 30% of total household water consumption, with that number spiking significantly in arid climates during the summer months. With shifting climate patterns and expanding drought zones tracked by the U.S. Drought Monitor, capturing free rainwater and automating its distribution is no longer just an eco-friendly hobby—it is a practical necessity for modern homeowners.
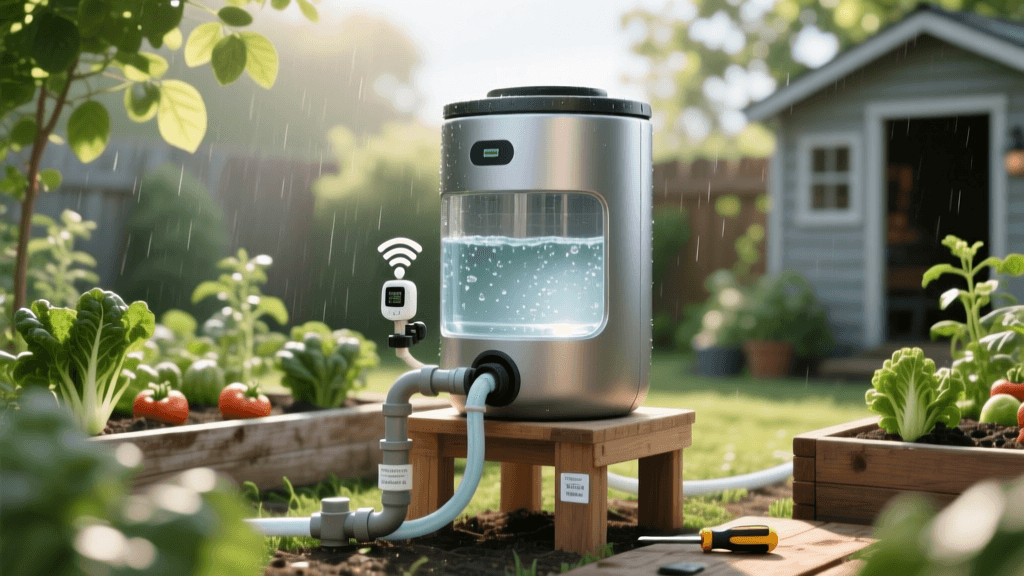
In this guide, we will break down the viral smart rain barrel DIY project that is taking the gardening community by storm. You will learn how to combine a high-capacity rain catchment system with a Wi-Fi-enabled smart timer and a solar-powered water pump to create a fully autonomous, zero-water-bill drip irrigation system.
The Physics Problem: Why Gravity-Fed Barrels Fail
Many viral videos show a simple gravity-fed rain barrel connected directly to a soaker hose. While aesthetically pleasing, these videos often omit a crucial physics lesson that leaves DIYers frustrated with dry plants. Water pressure is dictated by elevation. Specifically, you need 2.31 feet of vertical elevation to generate just 1 PSI (pound per square inch) of water pressure.
Most standard drip irrigation emitters and micro-sprinklers require a minimum of 15 to 25 PSI to operate correctly and distribute water evenly across your garden beds. If you rely solely on gravity, you would need to elevate your rain barrel between 35 and 58 feet into the air! Since building a 50-foot tower in your backyard is neither practical nor legal in most HOAs, the viral hack that actually works is integrating a low-voltage, solar-powered water pump into your system.
Materials and Cost Breakdown
Building this automated system is surprisingly affordable, especially when you source upcycled materials. Below is the shopping list for a standard 50-gallon smart rain barrel setup.
| Component | Recommended Product / Spec | Est. Cost | Purpose |
|---|---|---|---|
| Water Storage | 50-Gallon Upcycled Food-Grade Barrel | $40 | Holds harvested rainwater safely without chemical leaching. |
| Smart Controller | Orbit B-hyve Smart Hose Faucet Timer | $60 | Connects to Wi-Fi to automate watering schedules based on local weather. |
| Water Pump | ECO-WORTHY 12V Solar Water Pump Kit | $45 | Provides necessary PSI for drip lines using free solar energy. |
| Drip Irrigation | Rain Bird 1/4-inch Drip Kit (with 2 GPH emitters) | $35 | Delivers water directly to plant root zones to prevent evaporation. |
| Hardware | Brass Spigot, Teflon Tape, Vinyl Tubing | $15 | Creates watertight seals and connects the barrel to the pump. |
| Elevation Base | 4 Concrete Cinder Blocks | $10 | Raises barrel slightly to help prime the pump and prevent debris intake. |
| Total | $205 | Complete automated, off-grid irrigation system. |
Step-by-Step Guide to Building Your Viral Smart Rain Barrel
Step 1: Prep the Barrel and Base
Start by thoroughly washing your food-grade barrel. Never use a barrel that previously held toxic chemicals or pesticides. Elevate the barrel on four concrete cinder blocks (about 16 inches high). This slight elevation isn't enough to water the garden via gravity, but it is crucial for helping the solar pump prime itself and preventing the intake hose from sucking up sediment that naturally settles at the bottom of the barrel.
Drill a 3/4-inch hole about four inches from the bottom of the barrel. Wrap your brass spigot threads in Teflon tape and screw it in tightly, using a rubber gasket on the inside to ensure a watertight seal. Attach a coarse mesh screen over your downspout diverter to keep autumn leaves and roof grit out of your catchment system.
Step 2: Install the Solar Pump and Smart Hub
This is where the magic happens. Connect a short length of vinyl tubing from your brass spigot to the intake valve of your 12V solar water pump. Mount the small solar panel on a nearby fence or post where it will receive at least six hours of direct, unshaded sunlight daily.
Next, screw your Orbit B-hyve Smart Hose Faucet Timer directly onto the output side of the pump. The smart timer acts as an automated electronic valve. When the B-hyve app triggers a watering schedule, it opens the valve. Pro Tip: Wire the pump's power relay to the timer's valve circuit if you are comfortable with basic DIY wiring, or use a smart plug connected to the pump's transformer that triggers simultaneously with your B-hyve schedule via IFTTT (If This Then That) or your smart home hub.
Step 3: Lay Out the Drip Irrigation Lines
Attach your main 1/2-inch poly tubing to the smart timer's output. Run this main line along the perimeter of your garden beds. Use hole-punch tools to insert 1/4-inch micro-tubing and 2 GPH (gallons per hour) pressure-compensating emitters directly at the base of your tomatoes, peppers, and pollinator plants.
'Transitioning to a water-wise garden doesn't mean sacrificing beauty or yield. By integrating smart timers with rainwater harvesting, gardeners can automate their sustainability efforts, ensuring plants get exactly what they need, right when they need it, without wasting a single drop or lifting a watering can.' — Master Gardener & Smart-Scaping Advocate
Because you are using a solar pump capable of generating 30+ PSI, your pressure-compensating emitters will drip at a perfectly uniform rate, whether the plant is at the beginning of the line or 50 feet away at the end.
Pro Tips for Maximizing Efficiency and Garden Health
- Prevent Mosquito Breeding: Stagnant water is a breeding ground for pests. Drop one Mosquito Dunk (containing BTI, a naturally occurring bacterium that targets mosquito larvae but is 100% safe for plants, pets, and wildlife) into the barrel every 30 days. This aligns perfectly with the National Wildlife Federation's guidelines for maintaining safe backyard habitats.
- Use Rain Delay Features: The B-hyve smart timer features 'WeatherSense' technology, which pulls data from local weather stations. If a rainstorm is forecasted, the system will automatically skip your scheduled watering, preventing your garden beds from becoming waterlogged and saving your stored rainwater for drier days.
- Install an Overflow Valve: Always drill a secondary hole near the very top of the barrel and attach a hose directed toward a rain garden, a French drain, or a permeable hardscape area. During heavy torrential downpours, you want excess water to flow away from your home's foundation.
Seasonal Maintenance and Winterization
To ensure your viral DIY setup lasts for years, seasonal maintenance is non-negotiable. In late autumn, before the first hard freeze, you must winterize the system. Turn off the water supply from the downspout diverter and open the brass spigot to drain the barrel completely. Detach the smart timer and the solar pump, bringing them indoors to protect their internal electronic components and rubber diaphragms from cracking in freezing temperatures. Leave the barrel spigot in the 'open' position all winter so that any residual condensation or snowmelt can drain out, preventing ice expansion from shattering your brass fittings.
By embracing this trending smart rain barrel DIY, you are not just participating in a viral internet aesthetic; you are future-proofing your garden against climate volatility, reducing your carbon footprint, and joining a growing community of tech-savvy, eco-conscious homeowners who are redefining what it means to have a green thumb in the 21st century.

