
Viral No-Dig Lasagna Gardening: A Step-By-Step Guide
Why the No-Dig Lasagna Method is Taking Over Social Media
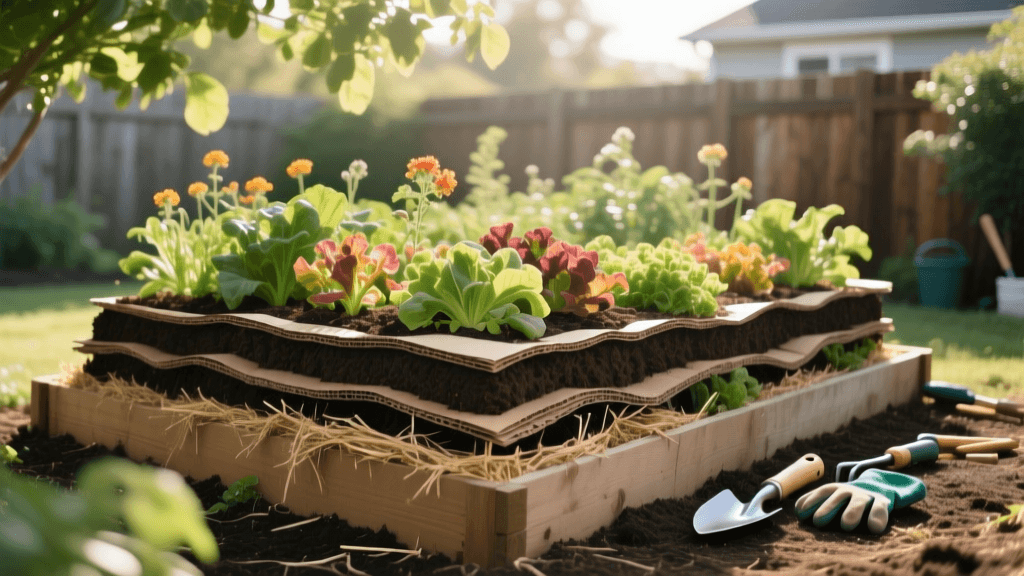
If you have spent any time on TikTok, Instagram Reels, or YouTube Shorts lately, you have likely seen the deeply satisfying videos of gardeners peeling back grass, laying down cardboard, and building lush, thriving garden beds without ever picking up a shovel. This is the viral no-dig lasagna gardening method, and it is completely revolutionizing how homeowners approach garden-to-table growing. Bridging the gap between sustainable home maintenance and high-yield outdoor living, this technique is celebrated for its low barrier to entry, eco-friendly recycling of household waste, and back-saving benefits.
Traditional gardening often involves back-breaking tilling, which disrupts the delicate soil microbiome and brings dormant weed seeds to the surface. The no-dig method flips this paradigm. By mimicking the natural decomposition process of a forest floor, lasagna gardening builds rich, aerated, and moisture-retentive soil from the top down. Whether you are looking to grow heirloom tomatoes for your summer salads or want to create a vibrant outdoor living space surrounded by edible landscaping, this trending viral hack is the ultimate foundation for a thriving garden.
The Science Behind Sheet Composting
Lasagna gardening is a form of sheet composting. Instead of building a compost pile in a bin and turning it for months, you build the compost pile directly on your garden bed. According to Charles Dowding, the pioneer of the modern no-dig movement, preserving the soil structure allows mycorrhizal fungi and beneficial nematodes to thrive undisturbed. These microscopic organisms form symbiotic relationships with plant roots, dramatically increasing their ability to uptake water and nutrients.
Furthermore, the Royal Horticultural Society (RHS) notes that no-dig beds suffer from significantly fewer weed outbreaks. Because you are not churning the soil, you are not exposing dormant weed seeds to the sunlight they need to germinate. The cardboard base acts as a physical light barrier, smothering existing grass and weeds while eventually breaking down into organic matter that attracts earthworms.
Materials and Cost Breakdown
One of the most viral aspects of this method is its cost-effectiveness. Building a traditional 4x8-foot raised bed with lumber and bagged soil can easily cost between $200 and $400. A lasagna garden bed of the same size can be built for under $50, utilizing materials you likely already have or can source for free.
| Layer Type | Material Examples | Quantity Needed (4x8 Bed) | Estimated Cost |
|---|---|---|---|
| Base Layer | Corrugated cardboard (no glossy ink/tape) | 10-15 large flattened boxes | Free (Sourced from appliance or grocery stores) |
| Browns (Carbon) | Straw, dry autumn leaves, shredded office paper | 4-5 bales or large bags | $15 - $20 |
| Greens (Nitrogen) | Fresh grass clippings, coffee grounds, vegetable scraps | 2-3 wheelbarrows full | Free (Sourced from yard and local coffee shops) |
| Top Cap | Organic compost and topsoil blend | 1 cubic yard (approx. 20-25 bags) | $30 - $40 (Bulk delivery or bagged) |
Step-by-Step Guide to Building Your Bed
Timing is everything. While you can build a lasagna garden at any time of the year, the optimal time is in the fall. This allows the layers to break down over the winter, creating a perfect, nutrient-dense seedbed for spring planting. However, if you are building in the spring, you will simply need a thicker top layer of compost to plant into immediately.
Step 1: Site Prep and the Cardboard Base
Choose a location that receives at least 6 to 8 hours of direct sunlight daily. Mow the existing grass or weeds as short as possible. Do not use chemical herbicides, as these will harm the beneficial soil life you are trying to cultivate. Next, lay down your corrugated cardboard. Ensure the pieces overlap by at least 6 inches to prevent weeds from sneaking through the gaps. Remove any plastic packing tape or glossy labels. Once the cardboard is laid out, soak it thoroughly with a garden hose. This heavy watering jumpstarts the decomposition process and makes the cardboard highly attractive to earthworms.
Step 2: The Green and Brown Alternating Layers
Now, you begin the actual 'lasagna' layering. The Environmental Protection Agency (EPA) recommends maintaining a proper balance of carbon-rich 'browns' and nitrogen-rich 'greens' for efficient composting. Aim for a ratio of roughly two parts browns to one part greens by volume.
- Layer 1 (Green): Spread a 2-inch layer of nitrogen-rich materials. Fresh grass clippings, pulled weeds (that have not gone to seed), and coffee grounds are excellent choices.
- Layer 2 (Brown): Add a 4-inch layer of carbon-rich materials. Dry leaves, straw, or shredded newspaper work perfectly. Avoid using hay, as it often contains viable seeds that will sprout in your garden.
- Repeat: Continue alternating these layers until your bed is about 18 to 24 inches high. The pile will look massive initially, but it will shrink by up to 75% as the materials decompose and settle.
Step 3: The Topsoil and Compost Cap
To finish the bed, cap the entire mound with 4 to 6 inches of high-quality organic compost mixed with topsoil. If you are building in the fall, 4 inches is sufficient, as you will be planting directly into the decomposed layers next spring. If you are building in the spring and want to plant immediately, use a full 6 inches of a rich compost-soil blend to give your transplants a stable, nutrient-rich environment to establish their roots while the lower layers break down.
Planting Your Garden-to-Table Crops
The beauty of a mature lasagna garden is its incredible moisture retention and nutrient density. The soil becomes dark, crumbly, and loose, making it effortless to dig small holes for transplants. For a highly productive garden-to-table setup, consider planting heavy feeders that thrive in rich, compost-heavy environments.
Top Crop Recommendations:
- Indeterminate Tomatoes: Varieties like 'Sungold' or 'Cherokee Purple' will send deep roots into the decomposing cardboard and grass layers, accessing a steady supply of moisture and calcium, which prevents blossom end rot.
- Zucchini and Winter Squash: These sprawling plants love the warmth generated by the active composting happening beneath the soil surface.
- Leafy Greens: 'Lacinato' kale, Swiss chard, and butterhead lettuce thrive in the nitrogen-rich environment created by the decomposing green layers.
Pro Tip: When planting transplants in a newly built spring lasagna bed, dig a hole slightly larger than the root ball, fill it with a handful of pure compost, and plant. This creates a localized 'nutrient pocket' that sustains the plant while the surrounding layers finish breaking down.
Maintenance and Troubleshooting Common Issues
One of the main reasons this method goes viral is the drastic reduction in seasonal maintenance. However, there are a few quirks to keep in mind during your first year.
Watering Wisely
Cardboard and dry leaves can be hydrophobic (water-repelling) when they first dry out. During the first few weeks, water deeply and slowly to ensure moisture penetrates all the way to the native soil below. Once the top layers break down and earthworms begin pulling organic matter into the subsoil, the bed will retain water incredibly well, often requiring 30% less irrigation than traditional tilled beds.
Managing the 'Nitrogen Robbing' Myth
A common gardening myth is that adding high-carbon materials like wood chips or dry leaves directly to a garden will 'rob' the soil of nitrogen as they decompose. While this is true if you mix raw wood chips directly into the soil, the lasagna method prevents this by keeping the high-carbon materials on the surface or in distinct layers, capped with a thick layer of finished compost where your plant roots will live. The decomposition happens below the root zone of most annual vegetables, meaning your crops will not suffer from nitrogen deficiency.
Dealing with Slugs and Snails
The moist, decomposing environment of a lasagna garden is a haven for earthworms, but it can also attract slugs. To protect your tender garden-to-table seedlings, use organic deterrents. Sprinkle crushed eggshells or diatomaceous earth around the base of your plants, or set up shallow dishes of beer at soil level to trap them. Encouraging natural predators like ground beetles and toads by leaving a few small rocks or logs near the garden perimeter will also help keep the slug population in check.
Final Thoughts on Sustainable Outdoor Living
The viral no-dig lasagna gardening method is more than just a passing social media trend; it is a fundamental shift toward regenerative home landscaping. By recycling household cardboard, yard waste, and kitchen scraps, you are diverting materials from the landfill while simultaneously building a resilient, high-yield food source right outside your door. Whether you are expanding your outdoor living space or simply want to enjoy the taste of homegrown produce, this step-by-step method provides a sustainable, budget-friendly, and highly rewarding path to garden-to-table success.

