
How to Winterize Smart Irrigation and Outdoor Plumbing
The Intersection of Home Infrastructure and Landscape Health
As autumn leaves begin to fall and nighttime temperatures consistently dip below freezing, homeowners often focus heavily on raking, mulching, and indoor weatherproofing. However, neglecting your outdoor water systems is a critical mistake that bridges both home maintenance and landscape health. Winterizing your smart irrigation system and outdoor plumbing is not merely about preventing burst pipes; it is fundamentally about protecting the soil structure, preserving root health, and preventing the overwintering of fungal pathogens that thrive in poorly drained, leaky irrigation zones.
When water is left inside irrigation lines, sprinkler heads, and outdoor faucets, the freeze-thaw cycle causes expansion that cracks PVC and polyethylene pipes. Come spring, these hidden leaks lead to localized soil saturation. This excessive moisture deprives turf and garden roots of oxygen, promoting root rot and creating a breeding ground for soil-borne diseases like Pythium and Phytophthora. By executing a thorough seasonal maintenance routine, you safeguard both your home's structural integrity and the biological health of your garden-to-table raised beds and lawn.
Step 1: Configuring Your Smart Irrigation Controller
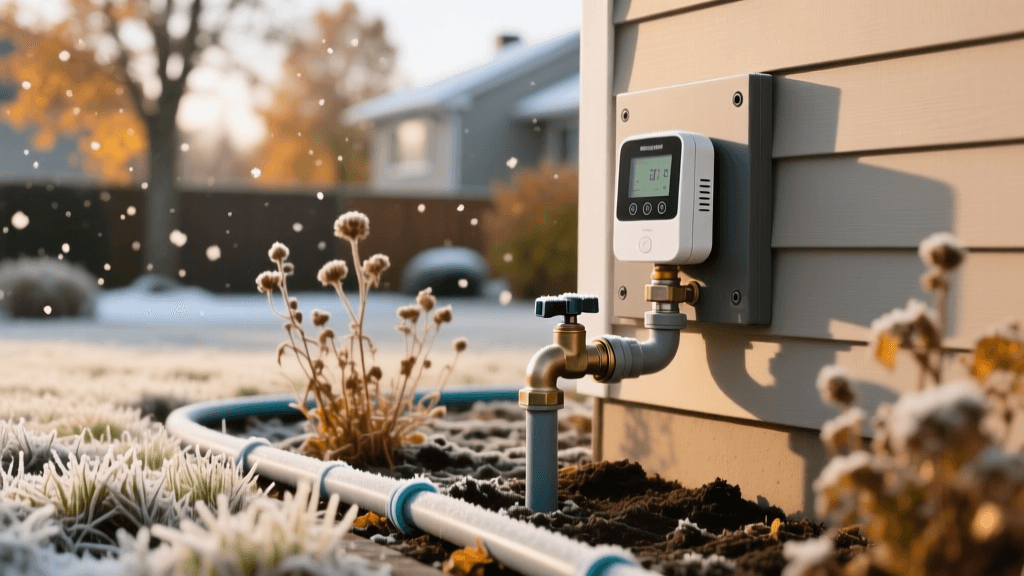
Modern smart irrigation controllers, such as the Rachio 3 or Orbit B-hyve, are designed to optimize water usage based on local weather data. However, leaving them active during the winter can result in accidental watering during unseasonable warm spells, which disrupts the natural dormancy cycle of cool-season grasses and perennials.
Putting the Controller to Sleep
Do not simply unplug your smart controller, as this will erase your customized zone schedules and soil-type settings. Instead, use the companion app to activate "Winterize" or "Sleep" mode. For the Rachio 3, navigate to the "More" tab, select "Controller Settings," and choose "Standby Mode." This halts all scheduled watering while keeping your Wi-Fi connection and historical data intact. Additionally, if your controller utilizes a backup battery (often a 9V or AA lithium battery), remove it to prevent battery acid leakage from corroding the internal circuit board during cold, damp months.
Step 2: Evacuating Water from the Mainline and Zones
Shutting off the water at the backflow preventer is only the first physical step. Water trapped in the low points of your irrigation lines will freeze and shatter the piping. The method you use to evacuate this water depends on how your system was originally installed.
- Manual Drain Method: Best for systems where all piping is sloped downward to manual drain valves. Open all drain valves and leave them open until spring. Activate each zone manually for 10 seconds to release pressure and allow water to escape.
- Auto-Drain Method: Ideal for systems equipped with automatic drain valves that open when water pressure drops below 10 PSI. Simply shut off the main water supply and run a single zone to depressurize the system. The auto-drains will open and empty the lines.
- Blow-Out Method (Industry Standard): The most thorough method, utilizing an air compressor to force residual water out of the sprinkler heads and drip lines.
The Blow-Out Method: Safety and Specifications
If you are using the blow-out method, safety and precision are paramount. Never use a standard home garage air compressor, as they typically do not provide the necessary volume (CFM) and can overheat. Rent a tow-behind industrial compressor capable of delivering 10 to 25 Cubic Feet per Minute (CFM).
Crucial Pressure Limits: Never exceed 50 PSI for polyethylene (flexible black pipe) systems, and never exceed 80 PSI for rigid PVC systems. Excessive pressure will atomize the water, creating a mist that can destroy the internal mechanisms of your sprinkler heads and cause severe injury.
Comparison of Irrigation Winterization Methods
| Method | Best System Type | Estimated Cost | Pros | Cons |
|---|---|---|---|---|
| Manual Drain | Sloped piping with manual valves | $0 (DIY) | Free, no special equipment needed | Labor-intensive, risk of incomplete drainage |
| Auto-Drain | Systems with auto-drain valves | $0 (DIY) | Quick, mostly hands-off | Valves can clog with debris over time |
| Blow-Out | All systems (especially flat terrain) | $50-$75 (DIY Rental) / $75-$150 (Pro) | Most thorough, protects landscape health | Requires heavy equipment, safety hazards if done incorrectly |
Step 3: Protecting Outdoor Faucets and Garden Plumbing
Outdoor spigots and the plumbing that feeds your garden-to-table hose bibs are highly susceptible to freeze damage. Even if you have "frost-free" sillcocks, leaving a hose attached prevents the internal valve from sealing properly, allowing water to pool inside the wall cavity. When this water freezes, it can burst the copper supply line inside your home, leading to catastrophic indoor water damage.
Actionable Steps:
- Disconnect all garden hoses, splitters (like the Melnor 4-Way Splitter), and wand attachments.
- Drain hoses completely by elevating one end and walking the length of the hose. Store them coiled in a dry garage or shed to prevent UV and cold-cracking.
- Shut off the interior isolation valve that supplies water to your outdoor spigots, then open the outdoor spigot to drain the remaining line.
- Install a foam insulated faucet cover, such as the Frost King FC1 Foam Faucet Cover (typically under $10). These covers feature an interior gasket that seals against the siding, keeping ambient heat from the home inside the sillcock cavity.
Step 4: Drip Irrigation and Raised Bed Winterization
Drip irrigation systems used in vegetable gardens and raised beds require specialized attention. The 1/4-inch micro-tubing and plastic emitters are incredibly fragile when frozen. Furthermore, organic matter and soil pathogens can back-siphon into the emitters if left submerged in saturated winter soil.
Detach the main poly tubing from the water source and remove the pressure regulator and backflow preventer. Store these components indoors. For the lines remaining in the garden, use the blow-out method at a very low PSI (under 25 PSI) to clear the emitters. In regions with severe winters (USDA Zones 3-5), it is highly recommended to completely pull the 1/4-inch drip lines from the soil, coil them, and store them in a frost-free environment to extend their lifespan from 3 years to over 10 years.
Expert Guidelines and Authoritative Citations
The importance of proper winterization is heavily emphasized by agricultural and horticultural institutions. According to the Colorado State University Extension, improper blow-out procedures are the leading cause of spring irrigation failures in regions with deep frost lines.
"When winterizing an irrigation system, the air compressor must be sized correctly to provide adequate volume without exceeding safe pressure limits. A compressor delivering at least 10 to 25 CFM is required to effectively scavenge water from the lines. Never exceed 50 PSI for poly pipe or 80 PSI for PVC to prevent catastrophic failure of the sprinkler heads and piping."
— Colorado State University Extension, Fact Sheet 4.735: Sprinkler System Winterization
Following these university-backed guidelines ensures that your landscape remains healthy, preventing the soil compaction and erosion caused by mid-winter pipe bursts and subsequent spring flooding.
Cost Breakdown: DIY vs. Professional Services
Deciding whether to tackle this seasonal maintenance yourself or hire a professional depends on your budget, equipment access, and comfort level with high-pressure air systems.
- DIY Blow-Out: Renting a 185 CFM tow-behind compressor from a local equipment rental yard typically costs between $50 and $85 per day. This is cost-effective if you are coordinating with neighbors to winterize multiple properties in a single afternoon.
- Professional Service: Hiring a licensed irrigation specialist to perform a blow-out and system audit generally costs $75 to $150 for a standard residential system (up to 8 zones). Professionals carry the necessary insurance and use specialized, regulated compressors that guarantee safe PSI levels, protecting both your landscape infrastructure and your personal safety.
Final Thoughts on Seasonal Health
Winterizing your smart irrigation and outdoor plumbing is a vital component of holistic home and garden care. By taking the time in late autumn to properly drain, protect, and secure your water systems, you are investing in the long-term health of your soil, the structural integrity of your home, and the vitality of your spring landscape. A dry, well-rested garden bed is the foundation of a thriving garden-to-table harvest in the seasons to come.

