Gardening
Xeriscape Seedling Hardening: 7-Day Transition Schedule 2026
The Critical Role of Hardening Off in Xeriscaping
As we navigate the 2026 growing season, with its shifting climate patterns and increasingly strict municipal water restrictions, xeriscaping has transitioned from a niche landscaping trend to an essential horticultural practice. However, selecting drought-tolerant species like Agastache, Penstemon, Salvia, and native succulents is only the first step. The true test of a low-water garden's resilience begins before the plants ever touch the soil: during the hardening off process. Hardening off seedlings for a xeriscape requires a fundamentally different approach than preparing traditional vegetable or annual flower transplants. While traditional hardening focuses primarily on temperature acclimation, xeriscape hardening must deliberately stress the plant to trigger physiological adaptations that conserve water and withstand intense solar radiation.
According to the Colorado State University Extension, the foundational principles of xeriscaping rely heavily on proper plant establishment and soil preparation. If a drought-tolerant seedling is moved directly from a high-humidity, low-light greenhouse environment into a blazing, arid garden bed, it will suffer from severe sunscald, rapid moisture loss, and potentially fatal transplant shock. By utilizing a specialized 7-day transition schedule, you force the seedling to develop a thicker epicuticular wax layer (the protective coating on leaves), increase lignin production for stronger stems, and regulate stomatal density to minimize transpiration.
The Science of Drought Acclimation
When a seedling is exposed to gradual water deficit and increased ultraviolet (UV) light, it undergoes a series of survival mechanisms. The plant begins to produce abscisic acid (ABA), a hormone that signals the stomata (the microscopic pores on leaves) to close during the hottest parts of the day. This preserves internal moisture. Furthermore, the root system shifts its growth hormone allocation, prioritizing deep taproot development over shallow, lateral feeder roots. In 2026, advanced horticultural science emphasizes that this acclimation period is non-negotiable for low-water landscapes. Skipping this step results in plants that remain dependent on frequent, shallow watering, entirely defeating the purpose of a xeriscape design.
Preparing Your Xeriscape Hardening Station
Before initiating the 7-day schedule, you must set up a proper transition zone. Unlike traditional hardening, which often utilizes simple cold frames, xeriscape hardening requires precise control over solar radiation and wind exposure.
- Shade Cloth Selection: Use a 30% to 50% UV-blocking aluminet shade cloth. Aluminet reflects harsh infrared heat while allowing the specific light spectrums necessary for photosynthesis and cuticle thickening.
- Windbreaks: Wind desiccation is a primary killer of unhardened xeriscape seedlings. Use permeable windbreaks (like burlap or specialized landscaping mesh) that slow the wind by 50% rather than blocking it entirely, which allows the stems to experience the mechanical stress needed to thicken.
- Smart Moisture Monitoring: Utilize 2026-model Bluetooth soil moisture sensors to track the exact volumetric water content (VWC) of your seedling trays. Xeriscape seedlings should be allowed to approach the permanent wilting point briefly before being watered, a delicate balance best managed with digital probes.
The 7-Day Xeriscape Seedling Hardening Schedule
The following table outlines a rigorous 7-day protocol designed specifically for low-water and drought-tolerant species. This schedule assumes your seedlings are currently in a protected, high-humidity, 70°F (21°C) greenhouse or indoor environment with 12 hours of artificial light.
| Day | Sun Exposure | Wind Exposure | Watering Protocol | Nighttime Conditions |
|---|---|---|---|---|
| Day 1 | 2 hours dappled morning sun | Shielded (0-5 mph) | Water normally; maintain even moisture | Indoors / Protected greenhouse |
| Day 2 | 3 hours morning sun | Light breeze (5-10 mph) | Water normally; allow top 1/4 inch to dry | Indoors / Protected greenhouse |
| Day 3 | 4 hours morning sun | Moderate (10-15 mph) | Reduce water volume by 25%; water deeply | Outdoors in sheltered cold frame |
| Day 4 | 5 hours sun (incl. 1 hr afternoon) | Full ambient wind | Reduce water volume by 50%; wait for slight wilt | Outdoors in sheltered cold frame |
| Day 5 | 6 hours sun (incl. 2 hrs afternoon) | Full ambient wind | Water only if severe wilting occurs | Outdoors, exposed to night air |
| Day 6 | Full morning sun, 3 hrs afternoon | Full ambient wind | Deep soak only; force roots to seek moisture | Outdoors, exposed to night air |
| Day 7 | Full sun all day (8+ hours) | Full ambient wind | No supplemental water unless extreme heat | Outdoors, ready for planting |
Day-by-Day Breakdown and Observations
Days 1-2: The Initial Shock Phase. The goal here is to introduce UV radiation without causing photoinhibition. The leaves will begin to synthesize protective pigments like anthocyanins and flavonoids. Keep the wind blocked to prevent the delicate, unthickened stems from snapping or losing water faster than the roots can replace it.
Days 3-4: The Moisture Deficit Phase. This is where the magic of xeriscape hardening occurs. By reducing water volume and frequency, you trigger the ABA hormone response. The plant realizes that surface moisture is unreliable and begins pushing its taproot deeper into the cell tray. The EPA's WaterSense program emphasizes that encouraging deep root growth early on is the most effective way to ensure long-term landscape water efficiency. You may notice the leaves becoming slightly thicker, narrower, or changing to a more silvery hue as the epicuticular wax develops.
Days 5-7: Full Environmental Integration. The seedlings are now exposed to the harsh realities of the outdoor xeriscape environment: intense afternoon sun, drying winds, and fluctuating nighttime temperatures. By Day 7, the plant's stomata will be highly responsive, opening in the cool morning and tightly closing by midday to hoard water. The stems will be visibly stouter and more rigid due to lignification.
Advanced Xeriscape Transplanting Techniques
Once your 7-day schedule is complete, the seedlings are ready for their permanent home in the low-water landscape. However, the planting technique must support the drought-resistant traits you have just cultivated.
Mycorrhizal Inoculation
Before placing the seedling in the ground, dust the root ball with a high-quality endomycorrhizal fungi inoculant. In arid and low-water soils, mycorrhizal fungi form a symbiotic relationship with the plant's roots, effectively extending the root system's reach by hundreds of times. These fungal hyphae can access microscopic soil pores to extract water and phosphorus that the plant's roots could never reach alone. This is especially critical in the rocky, alkaline soils typical of many xeriscape environments.
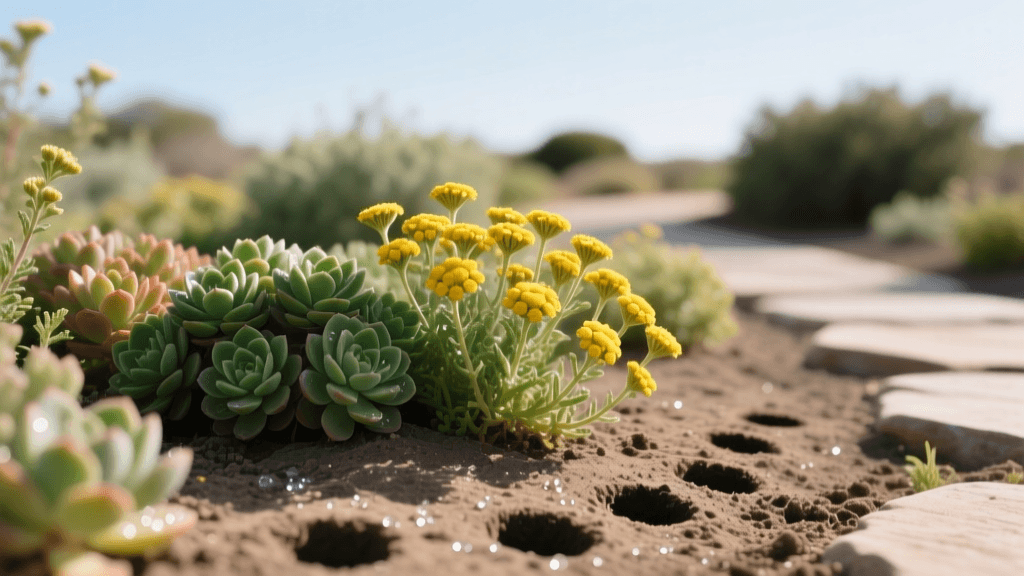
The 'Dry Hole' Planting Method
Traditional gardening advice often suggests filling a planting hole with water before dropping in the transplant. For xeriscape seedlings, this can be counterproductive. Instead, use the 'dry hole' method. Dig your hole, place the hardened-off seedling in, and backfill with native soil. Wait a full 24 hours before applying a slow, deep watering. This slight delay encourages the roots to immediately begin searching the surrounding soil profile for moisture, rather than passively sitting in a mud bath. When you do water, use a drip emitter or a deep root waterer to deliver moisture at least 6 inches below the surface, ensuring the taproot continues its downward trajectory.
Common Mistakes to Avoid in 2026
- Over-Mulching Immediately: While mulch is vital for xeriscapes, piling it against the tender stems of newly transplanted seedlings can trap excess moisture and cause collar rot. Keep organic or inorganic mulch (like pea gravel or decomposed granite) at least two inches away from the plant's crown.
- Pampering with Fertilizer: Do not apply high-nitrogen synthetic fertilizers during or immediately after the hardening process. Nitrogen promotes rapid, lush, and watery top growth—the exact opposite of what a drought-tolerant plant needs. Rely on the slow-release nutrients inherent in your compost-amended soil.
- Ignoring Microclimates: Even hardened xeriscape seedlings can fail if placed in a harsh reflective microclimate (such as against a south-facing stucco wall) without a brief transitional shading period. Use a temporary shade sail for the first two weeks post-transplant if the ambient hardscape reflects intense heat.
Conclusion
Transitioning seedlings to a xeriscape environment is an exercise in controlled stress. By following this rigorous 7-day hardening off schedule, you are not merely preparing your plants to survive the outdoors; you are actively programming their biology to thrive in a low-water landscape. As water conservation continues to dictate landscaping best practices in 2026 and beyond, mastering the art of drought acclimation will ensure your garden remains vibrant, resilient, and ecologically responsible for years to come. The effort invested in this critical one-week window will pay dividends in reduced water bills, lower maintenance, and a stunning, climate-adapted garden.