
Landscaping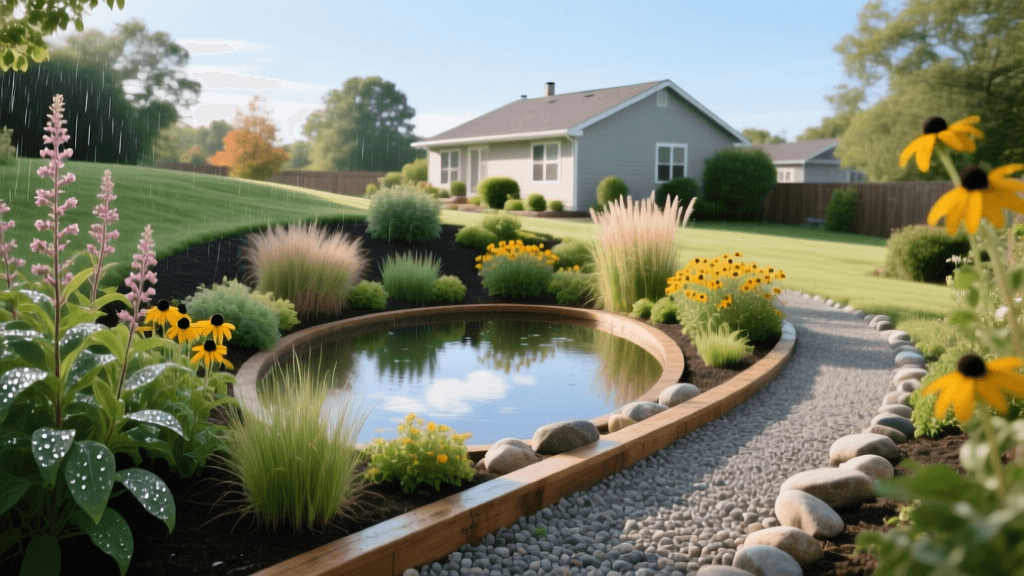
Backyard Rain Garden Design: Planning and Plant Guide
The Intersection of Landscape Design and Stormwater Management
When planning a landscape, homeowners often focus primarily on aesthetics, curb appeal, and outdoor living spaces. However, one of the most critical elements of a resilient landscape design is drainage. Poor drainage leads to soil erosion, flooded basements, and damaged foundations. Enter the rain garden: a beautifully designed, shallow depression planted with deep-rooted native species that captures and filters stormwater runoff from roofs, driveways, and lawns.
A well-planned rain garden transforms a landscape liability into a stunning ecological feature. By mimicking natural hydrology, rain gardens allow water to slowly percolate into the ground, filtering out pollutants like fertilizers, oils, and heavy metals before they reach local watersheds. This guide will walk you through the precise design principles, soil engineering, and plant selection required to build a functional and beautiful backyard rain garden.
Step 1: Strategic Site Selection
Location is everything in landscape planning. A rain garden must be situated where it can naturally intercept water flow without causing structural damage. When surveying your yard, look for natural low spots or areas where downspouts naturally discharge. However, you must adhere to strict safety setbacks. Always locate your rain garden at least 10 feet away from your home's foundation to prevent water from seeping into your basement or crawl space. Additionally, avoid placing the garden directly over a septic system, leach field, or underground utility lines.
Before you break ground, it is a legal and safety requirement to call 811 (the national call-before-you-dig hotline) to have your local utility companies mark any underground gas, water, or electrical lines. Timing is also crucial; the best time to plan and excavate a rain garden is in late summer or early fall when the soil is dry, making excavation easier and preparing the site for mid-spring planting.
Step 2: The Percolation Test and Soil Analysis
Not all soils drain equally. Clay-heavy soils retain water for days, which can drown plants and create a mosquito breeding ground, while sandy soils drain too quickly to filter pollutants effectively. To determine your soil's infiltration rate, perform a simple percolation test.
Dig a test hole about 12 inches deep and 6 inches wide in your proposed rain garden location. Fill the hole with water and let it drain completely to saturate the surrounding soil. Then, refill the hole to the top and measure how many inches the water level drops per hour. For a rain garden to function properly without holding standing water for more than 24 to 48 hours, you need an infiltration rate of at least 0.5 inches per hour. If your soil drains slower than this, you will need to amend the soil heavily or install an underdrain system connected to your municipal storm sewer.
Step 3: Sizing Your Rain Garden and Budgeting
Sizing a rain garden depends on the square footage of the impervious surfaces (roof, driveway, patio) draining into it, as well as your soil type. A general rule of thumb for residential landscaping is that the rain garden should be roughly 15% to 20% of the total impervious drainage area. For example, if a 500-square-foot section of your roof drains into the garden, and you have loamy soil, your rain garden should be approximately 75 to 100 square feet.
The ideal depth for a residential rain garden is between 4 and 8 inches. Deeper basins can become safety hazards and are harder to plant. When budgeting for your project, expect to spend between $3.00 and $5.00 per square foot for a DIY installation, which covers the cost of soil amendments, native plugs, and mulch. If you hire a professional landscaping contractor to handle the excavation, soil engineering, and planting, costs typically range from $10.00 to $15.00 per square foot.
Step 4: Engineering the Bioretention Soil Mix
As noted by Penn State Extension in their stormwater management guidelines, the bioretention soil mix is critical; native clay soils hold too much water and will drown all but the most adapted species, making the engineered sand-compost blend non-negotiable for long-term success. You should excavate the existing soil to a depth of 12 to 18 inches and replace it with a specialized bioretention mix.
The ideal engineered soil mix consists of:
- 50% to 60% Coarse Washed Sand: Provides structural integrity and ensures rapid drainage.
- 20% to 30% Topsoil: Offers a base for root anchorage and microbial life.
- 20% to 30% Organic Compost: Supplies slow-release nutrients, retains moisture during dry spells, and binds to heavy metals and pollutants.
Mix these components thoroughly before backfilling the excavated basin. Do not compact the soil; it must remain loose to allow water infiltration.
Step 5: Incorporating Hardscaping and Overflow
A complete landscape design integrates hardscaping to manage extreme weather events. During heavy storms, your rain garden will fill to capacity. You must design an overflow weir or spillway to direct excess water safely away from your property. Line the entry point of the garden with river rock (1.5 to 3 inches in diameter) to dissipate the energy of the incoming water and prevent soil scouring. The overflow exit should be lined with the same river rock and graded to direct excess water toward a municipal storm drain or a safe drainage swale. River rock typically costs between $50 and $70 per ton, making it an affordable and attractive hardscaping addition.
Step 6: Hydro-Zoning and Plant Selection
A rain garden is divided into three distinct hydro-zones based on moisture levels: the bottom (which stays wet the longest), the slopes (which experience fluctuating moisture), and the edges (which remain mostly dry). Selecting the right native plants for each zone is vital for the garden's survival and aesthetic appeal.
| Hydro-Zone | Common Name | Botanical Name | Moisture Tolerance | Sun Requirements |
|---|---|---|---|---|
| Bottom (Wet) | Swamp Milkweed | Asclepias incarnata | High (Tolerates standing water) | Full Sun |
| Bottom (Wet) | Blue Flag Iris | Iris versicolor | High (Thrives in saturated soil) | Full to Part Sun |
| Slopes (Fluctuating) | New England Aster | Symphyotrichum novae-angliae | Medium (Tolerates wet and dry) | Full Sun |
| Slopes (Fluctuating) | Purple Coneflower | Echinacea purpurea | Medium (Drought tolerant once established) | Full Sun |
| Edges (Dry) | Little Bluestem | Schizachyrium scoparium | Low (Prefers well-drained soil) | Full Sun |
| Edges (Dry) | Black-Eyed Susan | Rudbeckia hirta | Low (Highly drought resistant) | Full Sun |
When planting, use deep-rooted native plugs rather than seeds. Native plants possess root systems that can reach 3 to 10 feet deep, which naturally breaks up compacted subsoil and creates channels for water infiltration.
Step 7: Mulching and Finishing Touches
Mulch is essential for retaining moisture, suppressing weeds, and protecting the soil surface from erosion. However, not all mulches are suitable for rain gardens. Avoid pine bark or lightweight wood chips, as they will float away during the first heavy rainstorm. Instead, use double-shredded hardwood mulch or aged leaf mold. Apply a 2 to 3-inch layer of mulch over the entire garden bed, ensuring you keep the mulch a few inches away from the crowns of your newly planted specimens to prevent rot.
Maintenance and Long-Term Care
While rain gardens are designed to be low-maintenance sustainable landscapes, they do require care during their first two years of establishment. Water the garden deeply once a week during dry spells in the first growing season. Weeding is critical early on, as aggressive weeds can outcompete young native plugs. Once established, the deep-rooted natives will naturally suppress weeds and require minimal supplemental watering.
According to the United States Environmental Protection Agency (EPA), a typical residential rain garden can filter up to 30,000 gallons of stormwater runoff annually, significantly reducing the load of pollutants entering local watersheds while recharging local groundwater aquifers.
Annually, inspect the garden for sediment buildup near the entry point. If a layer of silt or sand has accumulated, carefully scrape it away to maintain the soil's infiltration rate. Replenish the hardwood mulch every two to three years as it decomposes, adding valuable organic matter back into your engineered bioretention soil. By following these design and planning principles, you will create a stunning, ecologically vital landscape feature that solves drainage issues and elevates your property's curb appeal for decades to come.

