
Landscaping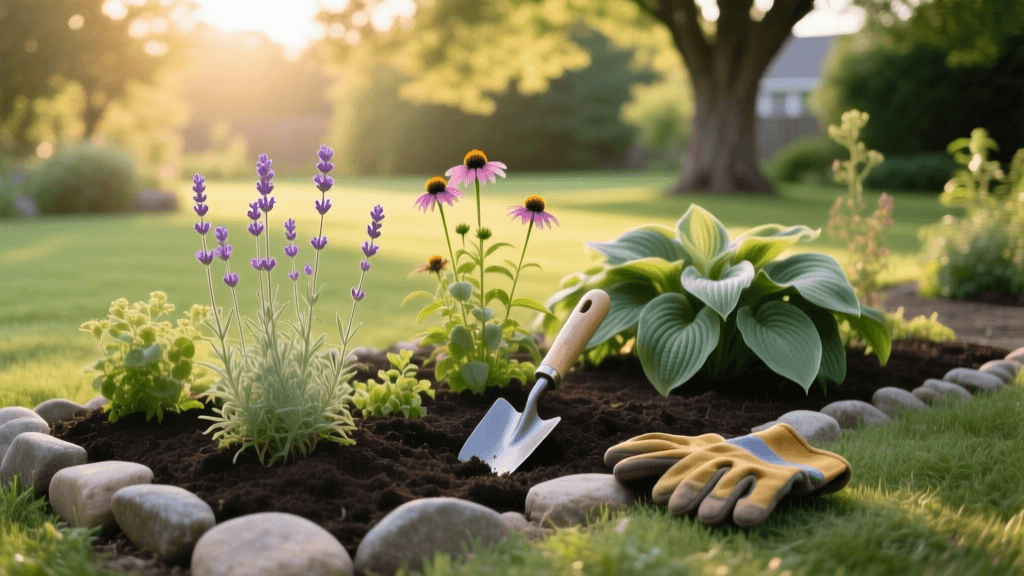
Beginner Guide to Planning and Planting Perennial Garden Beds
Welcome to the rewarding world of perennial landscaping. If you are looking to boost your curb appeal, create a sustainable outdoor living space, and reduce your weekend yard work, planting a perennial garden bed is one of the most effective projects you can undertake. Unlike annual flowers that complete their life cycle in a single season and must be replanted every spring, perennials return year after year, growing larger and more vibrant with each passing season.
For beginners, the prospect of designing and installing a garden bed can feel overwhelming. Questions about soil pH, sunlight requirements, hardscape edging, and plant spacing often deter new gardeners. However, by breaking the process down into manageable, actionable steps, you can transform a bare patch of grass into a thriving, low-maintenance landscape feature. This comprehensive guide will walk you through the exact steps, measurements, and product recommendations needed to plan, prepare, and plant your first perennial garden bed successfully.
The Landscaping Advantage of Perennials
Integrating perennials into your landscape design offers numerous ecological and financial benefits. While the initial investment for perennial plugs or potted plants might be slightly higher than buying flats of annual petunias or marigolds, the long-term return on investment is substantial. A well-planned perennial bed reduces the need for chemical fertilizers, minimizes soil erosion through deep root systems, and provides essential habitat for local pollinators like bees and butterflies.
From a design perspective, perennials offer incredible structural variety. You can utilize tall, architectural plants like Joe Pye Weed as a backdrop, mid-sized bloomers like Coneflowers as the focal point, and low-growing groundcovers like Creeping Thyme to soften the hardscaping edges. This layered approach mimics natural ecosystems and creates a visually dynamic garden that evolves throughout the growing season.
Step 1: Mapping Sunlight and Sizing Your Bed
The most common mistake beginners make is choosing plants before understanding their site's microclimate. Before purchasing any soil or plants, you must map the sunlight exposure of your chosen location. Spend a weekend observing the area. Does it receive the required 6 to 8 hours of direct, unfiltered sunlight for 'full sun' perennials, or is it dappled by tree canopies, making it better suited for 'part shade' varieties?
For your first project, we recommend a manageable bed size of 4 feet wide by 8 feet long (32 square feet). A 4-foot width ensures you can easily reach the center of the bed from either side for weeding and maintenance without stepping on and compacting the soil. To outline the bed, use a garden hose to create a gentle, sweeping curve or a clean geometric rectangle, marking the perimeter with landscaping spray paint.
Step 2: Soil Preparation and Hardscape Edging
Healthy soil is the foundation of any successful landscape. Begin by removing the existing turf grass within your marked perimeter. You can do this manually with a sharp spade or by using a sod cutter. Once the grass is removed, it is time to amend the native soil. Most residential soils are heavily compacted and lack organic matter.
- Amendment Ratio: Spread a 2 to 3-inch layer of organic compost over the entire 32-square-foot area. Products like Black Kow Composted Cow Manure or your local municipal leaf compost work exceptionally well. This will cost approximately $15 to $25 for enough bags to cover the space.
- Tilling and Mixing: Use a garden fork or a front-tine tiller to mix the compost into the top 6 to 8 inches of native soil. This improves drainage and aeration.
- Fertilizer Application: Incorporate a slow-release, organic granular fertilizer such as Espoma Garden-tone (4-3-4 NPK) at the rate recommended on the package (usually 1 cup per 10 square feet).
To give your garden bed a professional, finished look and prevent grass from creeping back into your perennials, install hardscape edging. A highly rated, beginner-friendly option is the Vigoro 20-ft Steel Landscape Edging. It costs around $35, bends easily around curves, and secures into the ground with heavy-duty steel stakes. Install the edging so that the top lip sits slightly below the mower blade height, allowing you to mow right over the edge without needing a string trimmer.
Step 3: Selecting Bulletproof Perennials
Choosing the right plants is critical for a low-maintenance landscape. For beginners, it is best to select 'bulletproof' perennials—varieties known for their drought tolerance, disease resistance, and vigorous growth habits. Below is a comparison chart of four highly recommended perennials that thrive in full sun to partial shade and provide continuous color from early summer through fall.
| Plant Name | Sun Requirement | Mature Size | Bloom Time | Est. Cost (1-Gallon) |
|---|---|---|---|---|
| Purple Coneflower (Echinacea) | Full Sun (6-8+ hrs) | 24-36' Tall, 18' Wide | June to September | $8 - $12 |
| Black-Eyed Susan (Rudbeckia) | Full Sun (6-8+ hrs) | 24-30' Tall, 18' Wide | July to October | $7 - $10 |
| Walker's Low Catmint | Full to Part Sun | 18-24' Tall, 24' Wide | May to September | $10 - $15 |
| Autumn Joy Sedum | Full Sun (6-8+ hrs) | 18-24' Tall, 24' Wide | August to November | $9 - $13 |
When purchasing these plants, opt for 1-gallon nursery pots rather than smaller plugs. While plugs are cheaper, 1-gallon plants have more established root systems, giving them a much higher survival rate during their first summer and allowing them to make an immediate visual impact in your landscape design.
Step 4: Spacing, Planting, and Mulching
Proper spacing is critical to prevent overcrowding, which can lead to poor air circulation and fungal diseases like powdery mildew. Read the plant tags carefully. If a Coneflower grows 18 inches wide, you should space the center of each plant at least 18 to 20 inches apart. Arrange your plants in odd-numbered groupings (clusters of 3 or 5) rather than straight rows, as this creates a more natural, flowing aesthetic that aligns with modern sustainable landscaping principles.
To plant, dig a hole that is twice as wide as the nursery pot but no deeper than the root ball. The crown of the plant (where the stems meet the roots) should sit exactly at or slightly above the surrounding soil grade. Backfill the hole with the native soil and compost mix, gently tamping it down to remove large air pockets, and water thoroughly to settle the soil.
After planting, apply a 2 to 3-inch layer of organic mulch over the bare soil. Shredded hardwood bark or pine straw are excellent choices. Mulch regulates soil temperature, retains moisture, and suppresses weed seeds. Be sure to keep the mulch pulled back 2 inches from the base of the plant stems to prevent crown rot. For a 32-square-foot bed, you will need roughly 1.5 to 2 cubic feet of mulch, which costs about $5 to $8 per bag.
Step 5: Ongoing Maintenance and Winterizing
The first year of a perennial garden is all about root establishment. Plan to water your new bed deeply once or twice a week, providing about 1 inch of water per week, depending on rainfall. Use a soaker hose or drip irrigation system to deliver water directly to the root zone, which minimizes evaporation and keeps foliage dry, further preventing disease.
In late fall, as the perennials die back, resist the urge to cut everything down to the ground. Leaving the dried seed heads of Coneflowers and Black-Eyed Susans standing through the winter provides crucial food for overwintering birds and adds beautiful structural interest to your winter landscape. Wait until early spring, just as new green growth begins to emerge at the base of the plants, to cut back the dead foliage to about 2 inches above the ground.
Expert Insight on Soil Drainage
According to the Penn State Extension, proper soil drainage is the single most important factor in perennial survival. 'Many perennials will tolerate poor fertility, but few will survive in poorly drained, waterlogged soils, especially during the winter months when freezing and thawing can heave roots out of the ground.' If your site has heavy clay soil that holds water for hours after a rainstorm, consider building a raised garden bed or amending heavily with expanded shale and compost to improve percolation.
By following this beginner-friendly guide, you will establish a resilient, beautiful perennial garden bed that enhances your property's curb appeal and provides a sanctuary for local wildlife. With careful planning, proper soil preparation, and smart plant selection, your landscape will thrive for years to come, requiring less work and delivering more beauty with every passing season.

