
Gardening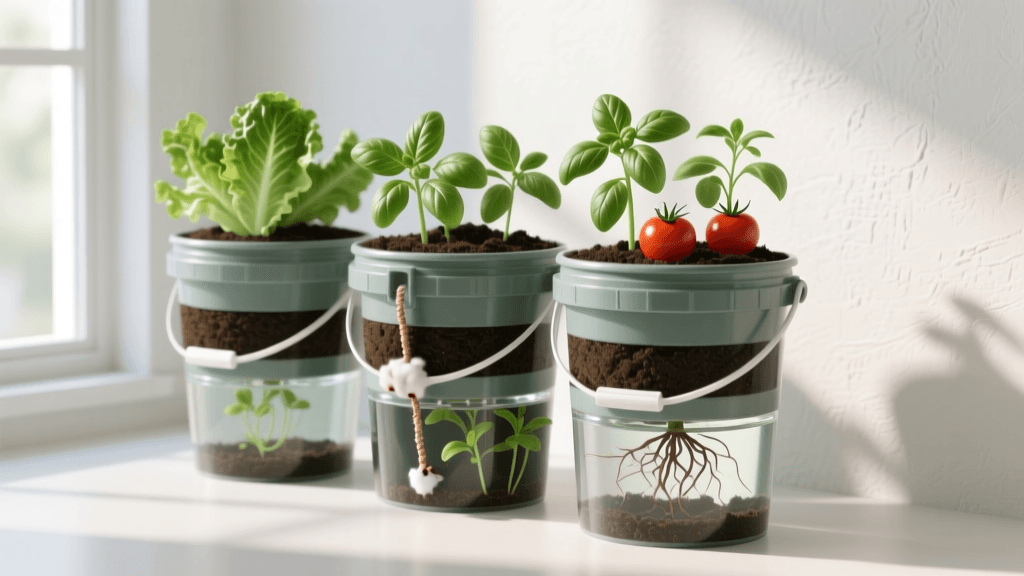
Build a Budget DIY Self-Watering Container Garden
Container gardening is a fantastic way to grow fresh vegetables, herbs, and flowers, especially for those with limited yard space or poor native soil. However, traditional pots and planters come with a significant drawback: they dry out incredibly fast. During the peak of summer, a standard terracotta or plastic pot may require watering once or even twice a day. This not only consumes a massive amount of your time but also drives up your water bill. Furthermore, inconsistent watering leads to plant stress, blossom end rot in tomatoes, and reduced yields. Enter the sub-irrigated planter, commonly known as a self-watering container. Commercial options are fantastic but often cost upwards of $80 to $120 per unit. For the budget-conscious gardener, building a DIY self-watering container garden using upcycled or inexpensive materials is a game-changer. You can achieve the same professional results for a fraction of the cost.
Why Choose a Self-Watering Container Garden?
Self-watering containers utilize a hidden water reservoir at the bottom of the planter. The soil sits above this reservoir, and a wicking mechanism draws moisture upward into the root zone through capillary action. This method provides a consistent, even supply of moisture directly to the roots, eliminating the wet-dry cycle that plagues traditional container gardening.
According to the Environmental Protection Agency (EPA), outdoor water use accounts for nearly a third of all residential water consumption, with traditional gardening and landscaping being major contributors. By utilizing a sub-irrigated system, you drastically reduce water loss due to surface evaporation and runoff. The water is sealed in the reservoir, meaning almost every drop is utilized by the plant. Additionally, because the water is wicked from below, the soil surface remains relatively dry, which significantly reduces the germination of weed seeds and the prevalence of soil-borne fungal diseases that thrive on damp foliage and topsoil.
Materials and Tools for the DIY Build
To build a highly effective, budget-friendly self-watering planter, you will need a few basic hardware items and upcycled materials. The total cost per unit is typically under $15 if you are sourcing buckets locally or reusing food-grade containers.
- Two 5-Gallon Food-Grade Buckets: Look for HDPE plastic (Recycling #2). You can often get these for free or a few dollars from local bakeries, delis, or restaurants that receive ingredients in them.
- 1-Inch PVC Pipe: About 2 feet long, to serve as the water fill tube.
- Landscape Fabric or Weed Barrier: To separate the soil from the water reservoir while allowing water to wick through.
- Drill and Hole Saw Bits: A 1-inch hole saw (for the PVC pipe) and a 3-inch or 4-inch hole saw (for the wicking chamber).
- Utility Knife or Scissors: For cutting the landscape fabric.
- PVC Cap or Cork: To cover the fill tube and prevent mosquitoes from breeding in the reservoir.
Step-by-Step Construction Guide
Building your DIY sub-irrigated planter takes about 20 minutes per bucket. Follow these steps for a foolproof assembly.
Step 1: Prepare the Outer Reservoir Bucket
Take your first 5-gallon bucket (this will be the outer shell and water reservoir). Using your drill and the 1-inch hole saw, drill a hole into the side of the bucket about 1.5 inches from the bottom. This is the overflow hole. It ensures that heavy rains do not flood the soil chamber and drown your plant roots. Water will simply drain out of this hole once the reservoir is full.
Step 2: Create the Wicking Chamber
Take the second bucket (the inner soil chamber). Using the large 3-inch or 4-inch hole saw, cut a hole in the exact center of the bottom. This large hole will allow the soil to push down into the water reservoir, acting as the primary wicking mechanism that draws water up into the rest of the soil. Next, drill about ten to fifteen 1/4-inch holes randomly across the rest of the bottom of this inner bucket to provide secondary drainage and minor wicking points.
Step 3: Install the Fill Tube
Cut your 1-inch PVC pipe so that it is slightly taller than the height of the bucket (about 20 inches). In the bottom of the inner bucket, use the 1-inch hole saw to cut a hole near the edge, opposite to where the wicking chamber is located. Insert the PVC pipe through this hole so it rests on the bottom of the outer bucket when assembled. This tube allows you to pour water directly into the hidden reservoir without disturbing the soil surface.
Step 4: Line with Landscape Fabric
Line the inside of the inner bucket with landscape fabric. Ensure the fabric pushes down into the large 3-inch wicking hole and extends slightly out of the bottom. This fabric acts as a barrier, keeping the soil inside the inner bucket while allowing water to travel up into the soil via capillary action. Secure the fabric to the top rim of the inner bucket using heavy-duty staples or waterproof tape.
Step 5: Assemble the Planter
Place the inner bucket (lined with fabric) inside the outer bucket. The inner bucket should rest securely on the rim or the bottom ridges of the outer bucket, leaving a 2-to-3-inch gap at the bottom for the water reservoir. Ensure the PVC fill tube aligns properly and sits on the bottom of the outer reservoir. Your physical structure is now complete!
The Ultimate Budget Soil Mix for Sub-Irrigated Planters
One of the most common mistakes beginners make is filling their DIY self-watering containers with heavy garden soil or topsoil. As noted by Penn State Extension, container gardens require a well-draining, lightweight, and porous growing media to ensure proper root aeration and moisture retention. Garden soil will compact heavily in a sub-irrigated system, leading to anaerobic conditions and root rot.
For a budget-friendly, high-performance soil mix, adapt the classic square foot gardening recipe to maximize wicking capabilities:
- 1/3 Coarse Vermiculite or Perlite: Provides essential aeration and prevents soil compaction.
- 1/3 Peat Moss or Coconut Coir: Acts as the primary moisture-retaining sponge. Coconut coir is a more sustainable, budget-friendly alternative to peat moss and wicks water exceptionally well.
- 1/3 High-Quality Compost: Provides a slow-release, organic nutrient base. Use a diverse blend of composts (e.g., mushroom, cow manure, and homemade kitchen compost) for a broad spectrum of micronutrients.
Mix these ingredients thoroughly in a wheelbarrow or on a tarp before filling your inner bucket. Leave about two inches of space at the top for mulch.
Cost Comparison: Commercial vs. DIY Self-Watering Planters
To truly understand the value of this budget-friendly DIY solution, consider the cost breakdown compared to premium commercial sub-irrigated planters on the market.
| Feature | Commercial Planter (e.g., EarthBox) | DIY 5-Gallon Bucket Planter |
|---|---|---|
| Initial Unit Cost | $80.00 - $120.00 | $5.00 - $12.00 |
| Soil Capacity | ~1.5 Cubic Feet | ~0.6 Cubic Feet |
| Water Reservoir | ~3 Gallons | ~1.5 Gallons |
| Customizability | Low (Fixed Design) | High (Easily Modified) |
| Durability | 10+ Years (UV Resistant) | 3-5 Years (Replace Buckets) |
Note: While commercial planters offer UV-resistant plastics and larger volumes, you can build eight DIY bucket planters for the price of one commercial unit, allowing you to spread your garden across a patio or balcony with ease.
Best Vegetables for Self-Watering Containers
Because self-watering containers provide a constant, reliable source of moisture, they are uniquely suited for heavy-feeding, high-yield crops that suffer from irregular watering.
- Tomatoes: Indeterminate and determinate varieties thrive here. The consistent moisture prevents blossom end rot, a common calcium-uptake issue caused by drought stress.
- Peppers: Both sweet bell peppers and hot chilies love the warm, consistently moist root zone.
- Cucumbers and Zucchini: These vining and bush squashes require massive amounts of water to produce crisp fruit. The reservoir ensures they never wilt on hot July afternoons.
- Leafy Greens: Lettuce, spinach, and Swiss chard will grow rapidly without turning bitter from heat and drought stress.
Avoid planting drought-tolerant Mediterranean herbs like rosemary, lavender, or sage in self-watering containers, as the constant moisture can lead to root rot in these specific species.
Maintenance and Seasonal Care
While DIY self-watering buckets drastically reduce daily maintenance, they do require some seasonal care to remain productive year after year. According to the University of Maryland Extension, container soils can accumulate fertilizer salts over time, which can harm plant roots and alter soil pH.
At the end of the growing season, flush the soil by pouring copious amounts of fresh water through the top of the soil, allowing it to drain out of the overflow hole. This leaches out excess salts.
During the winter months, if you live in a climate with freezing temperatures, empty the water reservoir completely. Water expands when it freezes, which can crack your plastic buckets or PVC pipes. Store the buckets in a garage or shed, or stack them upside down to prevent rain and snow from accumulating inside.
Before replanting in the spring, top off the soil with a fresh inch or two of compost to replenish the nutrients consumed by the previous season's crops. With this simple, budget-friendly DIY system, you will enjoy a bountiful, low-maintenance harvest while conserving water and keeping your gardening expenses firmly in check.

