
Tree Care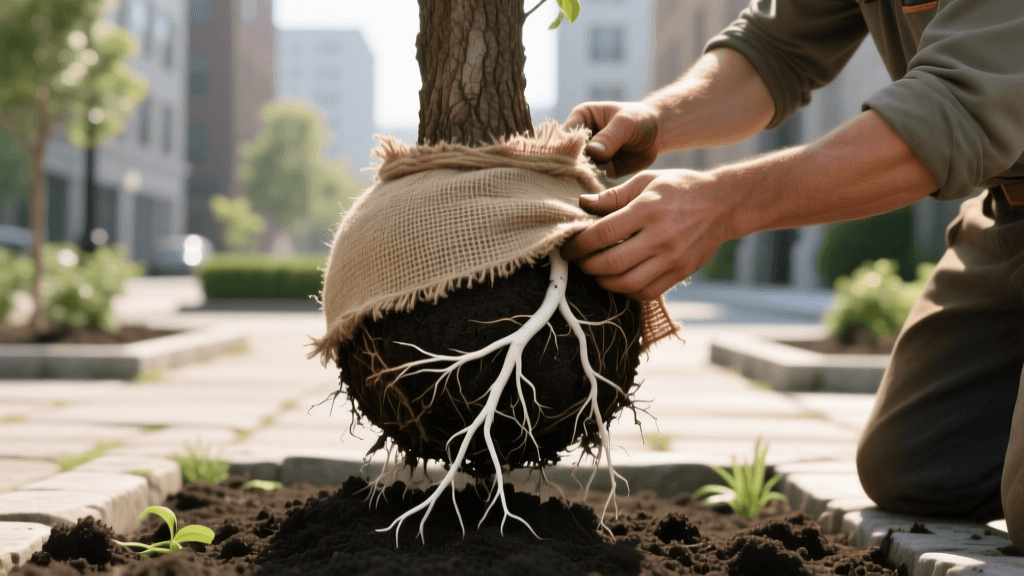
Balled & Burlapped Tree Planting: 2026 Root & Fertilizer Guide
The 2026 Standard for B&B Tree Planting
Planting a Balled and Burlapped (B&B) tree is a significant investment in your landscape. Unlike container-grown trees, B&B trees are field-dug, meaning up to 90% of their fine, water-absorbing roots are severed during harvest. This massive root loss creates severe transplant shock. In 2026, modern arboriculture emphasizes that physical root ball preparation and targeted nutritional support must happen simultaneously. If you simply drop a B&B root ball into a hole and cover it, you are setting the tree up for years of stunted growth or eventual decline. Proper burlap removal, root teasing, and a scientifically backed starter fertilizer schedule are the triad of successful tree establishment.
According to the Arbor Day Foundation, the vast majority of tree planting failures occur not from a lack of water, but from improper soil preparation, girdling roots left unchecked, and the failure to establish immediate root-to-soil contact. This guide will walk you through the exact physical preparation of the root ball and the specific fertilizer types and schedules required to maximize transplant success in 2026.
Burlap Removal: Natural vs. Synthetic
The most debated topic in tree planting is what to do with the burlap. Historically, landscapers were taught to leave natural jute burlap in the hole because it would "eventually decompose." In 2026, this advice is considered outdated and dangerous. Even natural burlap can take years to break down, acting as a physical barrier that restricts lateral root expansion and wicks moisture away from the root ball into the surrounding backfill. Furthermore, many modern nurseries use synthetic nylon burlap, which will never decompose and will permanently girdle the tree as the trunk expands.
Step-by-Step Burlap and Wire Basket Removal
- Position First: Lower the tree into the planting hole while it is still in the wire basket and burlap. This prevents the heavy root ball from crumbling and breaking the structural roots.
- Cut the Wire: Using heavy-duty bolt cutters, snip the top two or three horizontal rings of the wire basket. Remove these rings entirely. Leaving the top wires exposes you to the risk of them rusting and girdling the trunk flare over the next decade.
- Peel the Burlap: Cut the twine securing the burlap to the trunk. Peel the burlap back entirely, folding it down into the bottom of the hole or removing it completely. According to the University of Minnesota Extension, exposing the sides and top of the root ball is critical for new roots to easily penetrate the native soil.
- Inspect for Tags: Remove any plastic nursery tags or nylon strings wrapped around the trunk or root flare, as these will strangle the tree as it grows.
Root Ball Preparation: Teasing and Scoring
Once the burlap is removed, you must inspect the root ball. B&B trees are often dug from heavy clay soils, and the outer layer of the root ball can become glazed or compacted. Take a hand cultivator or a sharp knife and gently score the sides of the root ball vertically, about an inch deep. This severs any circling roots that formed while the tree was in the nursery bed and stimulates the growth of new, outward-facing lateral roots.
Next, locate the trunk flare—the point where the trunk widens at the base and the first structural roots emerge. Nursery soil is often piled over the flare during harvesting. Carefully brush away the top 2 to 3 inches of soil from the top of the root ball until the flare is fully exposed. Planting the tree with the flare buried is a primary cause of root rot and tree death. Exposing the flare also creates a direct surface for applying your starter fertilizers and mycorrhizal inoculants.
The Fertilizer Angle: Why Root Ball Prep Dictates Nutrient Uptake
The physical preparation of the root ball is intrinsically linked to your fertilizer schedule. When you remove the burlap and score the root ball, you are exposing the severed root tips. These fresh cuts are the exact locations where new root hairs will emerge. By applying the correct fertilizer types directly to this exposed surface before backfilling, you create a nutrient-rich zone that encourages rapid root colonization.
However, the International Society of Arboriculture (ISA) warns against using high-nitrogen synthetic fertilizers at the time of planting. High nitrogen forces the tree to push out top growth (leaves and branches) before the root system is established enough to support it, leading to severe moisture stress. Instead, the 2026 fertilizer protocol for B&B trees focuses on Phosphorus (for root development), Potassium (for cellular stress tolerance), and biological inoculants.
Best Fertilizer Types for Direct Root Ball Application
When preparing your planting hole and root ball, keep these three specific fertilizer categories on hand:
1. Mycorrhizal Inoculants
Mycorrhizae are beneficial fungi that form a symbiotic relationship with tree roots, effectively extending the root system's reach by up to 50 times. Because B&B trees lose their native fungal networks during harvest, reintroducing them is mandatory. Products like Myke Pro Granular or the mycorrhizae included in Espoma Bio-tone Starter Plus (which retails for roughly $15 per 4lb bag in 2026) should be dusted directly onto the exposed sides and top of the root ball.
2. Low-Nitrogen, High-Phosphorus Organic Starters
Look for an N-P-K ratio where the first number (Nitrogen) is low, and the second number (Phosphorus) is prominent. A ratio like 4-3-3 or 2-4-2 is ideal. Organic granular fertilizers release nutrients slowly via microbial breakdown, ensuring a steady food supply without the risk of chemical root burn.
3. Liquid Kelp and Bio-Stimulants
Sea kelp extracts contain natural cytokinins and auxins—plant hormones that trigger root initiation and mitigate transplant shock. These are not traditional N-P-K fertilizers, but rather biological stress-relievers applied as a soil drench immediately after planting.
The 2026 First-Year Fertilizer Schedule
Establishing a B&B tree is a multi-phase process. Do not attempt to front-load all your nutrients on day one. Follow this structured schedule to align with the tree's natural biological rhythms.
| Timeline | Fertilizer Type | Application Method & Dosage | Primary Goal |
|---|---|---|---|
| Day of Planting | Mycorrhizal Inoculant + Organic Starter (e.g., 4-3-3) | Dust 2-4 oz of inoculant directly on roots. Mix 1-2 cups of starter into the backfill soil (not the bottom of the hole). | Stimulate immediate root hair generation and prevent transplant shock. |
| Month 2 (Post-Plant) | Liquid Sea Kelp / Humic Acid | Apply as a soil drench around the drip line per bottle instructions (usually 2 oz per gallon of water). | Provide bio-stimulants to support the tree through its first summer heat stress. |
| Month 6 (Late Fall) | Zero-Nitrogen Winterizer (e.g., 0-0-25 Potassium) | Broadcast lightly over the root zone before the ground freezes. | Harden off the tree's cellular structure for winter without pushing vulnerable late-season growth. |
| Month 12 (Following Spring) | Balanced Slow-Release (e.g., 10-10-10 or 12-4-8) | Apply 1 lb of nitrogen per 1,000 sq ft of root zone area. | Support the first major flush of canopy growth now that the root anchor is established. |
Common Fertilizer Mistakes to Avoid
Even with perfect burlap removal, poor fertilizer choices can ruin a B&B planting. Avoid these common errors:
- Using Fertilizer Spikes: Hammering concentrated synthetic fertilizer spikes into the root ball or the immediate backfill will chemically burn the fragile new root tips. The concentration of salts in spikes is far too high for a stressed, newly planted tree.
- Amending the Backfill Too Heavily: Do not mix large amounts of rich compost or synthetic fertilizers directly into the backfill soil. If the planting hole is significantly richer and looser than the surrounding native clay, water will pool in the hole (creating a "bathtub" effect), drowning the roots and washing away your applied nutrients.
- Skipping the Root Flare Dusting: Many gardeners throw fertilizer into the bottom of the hole before setting the tree. This is useless. Tree roots absorb nutrients primarily near the soil surface and the drip line, not from a taproot sitting at the bottom of a clay pit. Always apply fertilizers to the top and sides of the prepared root ball.
Backfilling and Post-Planting Hydration
Once the burlap is gone, the wires are cut, the roots are scored, and the mycorrhizal starter fertilizer has been applied, it is time to backfill. Use the native soil you dug out of the hole. Break up large clods and pack the soil gently around the root ball to eliminate massive air pockets, but do not stomp it down so hard that you destroy soil structure and pore space.
Immediately after backfilling, build a shallow berm of soil around the outer edge of the planting hole to create a water basin. Fill this basin with water slowly, allowing it to percolate down through the root ball. This initial deep watering serves two purposes: it settles the soil around the roots, and it activates the organic starter fertilizers and mycorrhizae you applied, waking up the microbes and beginning the nutrient exchange process. For the first year, monitor soil moisture weekly, ensuring the top 4 inches of the root ball remain consistently damp but never waterlogged. By combining meticulous physical root preparation with a biologically sound fertilizer schedule, your B&B tree will transition from a stressed nursery transplant into a thriving, deeply anchored landscape cornerstone.

