
Tree Care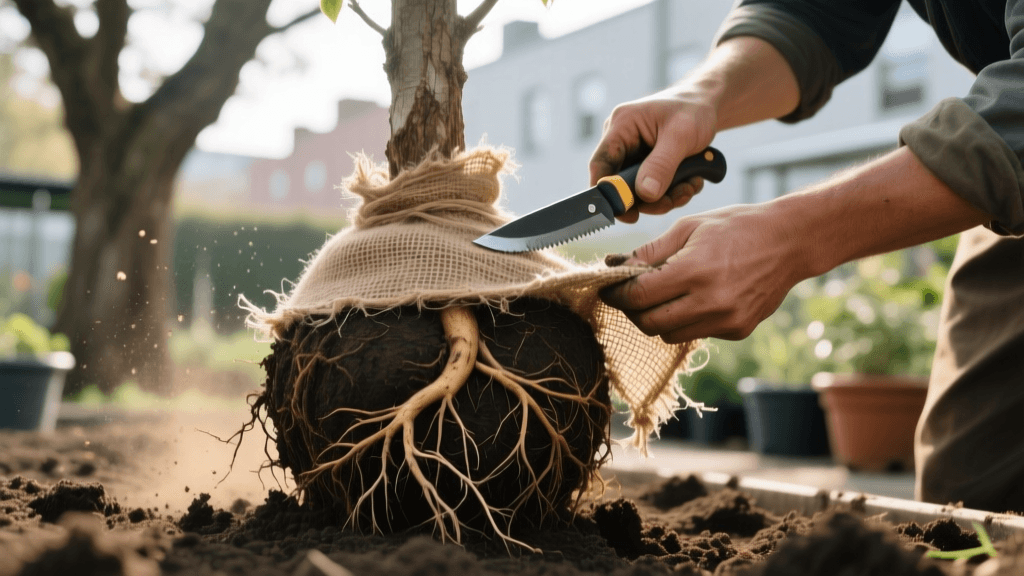
Root Ball Prep & Burlap Removal Guide for Trees in 2026
Why Proper Root Ball Preparation Matters in 2026
Planting a tree is one of the most impactful investments you can make in your landscape, but the success of that investment is almost entirely determined by what happens below the soil line. In 2026, with nursery prices for a high-quality, 2-inch caliper Balled and Burlapped (B&B) tree averaging between $180 and $350, making a mistake during the planting process is an expensive error. The most critical, yet frequently misunderstood, aspect of planting B&B trees is root ball preparation and the proper removal of burlap and wire baskets.
For decades, a persistent landscaping myth suggested that you should leave the burlap intact and simply plant the entire root ball as-is, assuming the material would decompose. Modern arboriculture has thoroughly debunked this. According to the University of Minnesota Extension, failing to remove synthetic burlap, treated natural burlap, and wire baskets restricts root expansion, traps moisture against the trunk, and inevitably leads to girdling roots and premature tree decline. This comprehensive guide will walk you through the exact, up-to-date protocols for root ball preparation and burlap removal to ensure your tree thrives for decades.
Understanding Balled and Burlapped (B&B) Trees
B&B trees are field-grown trees that are mechanically dug from the ground with their root ball intact. The soil and roots are then tightly wrapped in burlap and secured with twine, heavy-duty staples, and often a wire basket. This method is favored for larger caliper trees because it provides structural stability during transport. However, the harvesting process itself is traumatic for the tree; up to 85% of the fine, water-absorbing roots are left behind in the field. Therefore, the remaining root ball must be treated with extreme care and properly prepared to encourage rapid outward root growth into the native soil.
Natural vs. Synthetic Burlap: A Comparison
Before you begin the removal process, you must identify the type of burlap used. Not all burlap is created equal, and the material dictates your removal strategy.
| Feature | Natural (Untreated) Burlap | Synthetic / Plastic Burlap | Treated Natural Burlap |
|---|---|---|---|
| Material | 100% Jute or Hemp | Polypropylene or Nylon | Jute treated with copper or chemicals |
| Decomposition | Decays in 1-2 years | Never decomposes | Decays very slowly (3-5+ years) |
| Root Penetration | Roots can eventually penetrate | Roots cannot penetrate | Chemicals can inhibit root growth |
| Removal Requirement | Must remove top half; pull back sides | MUST be completely removed | MUST be completely removed |
The Arbor Day Foundation strongly advises that if you cannot definitively identify the burlap as untreated, natural jute, you must treat it as synthetic and remove it entirely. In 2026, many commercial nurseries use synthetic burlap that is dyed green or brown to mimic natural jute, making visual identification unreliable. When in doubt, cut it out.
Step 1: Exposing the Root Flare
The root flare (or trunk flare) is the area at the base of the tree where the trunk widens and transitions into the structural roots. In most B&B trees, the root flare is buried under 2 to 6 inches of excess soil added during the nursery harvesting process. Planting a tree with a buried root flare is the number one cause of tree mortality in urban and suburban landscapes.
Actionable Steps:
- Before digging your planting hole, place the tree on its side or upright on a tarp.
- Using a hand trowel, a soft-bristled brush, or a gentle stream of water from a garden hose, carefully remove the top layer of soil from the root ball.
- Continue excavating until you clearly see the first structural roots radiating outward from the trunk. This is your root flare.
- Measure the distance from the root flare to the bottom of the root ball. This exact measurement dictates the maximum depth of your planting hole.
Step 2: The Burlap and Wire Basket Removal Process
Once the root flare is exposed and the tree is positioned in the hole (but before backfilling), it is time to remove the binding materials. Never lift or move the tree by its trunk once it is partially planted, as this can snap the delicate roots inside the ball.
The Removal Protocol:
- Cut the Twine: Locate the heavy twine or nylon straps wrapped tightly around the base of the trunk. Use bypass pruning shears or a utility knife to cut and completely remove this twine. Leaving twine around the trunk will girdle the tree as it grows, cutting off the phloem and eventually killing the canopy.
- Peel Back the Burlap: Cut the burlap away from the top of the root ball. If it is synthetic or treated, pull it out from under the root ball entirely. If it is confirmed natural burlap, you can leave the bottom layer under the ball, but you must fold the top half completely down and away from the trunk and root flare.
- Remove Staples: Pull out any heavy steel staples used to pin the burlap to the soil. These can rust and interfere with future root growth or pose a hazard if the tree is later removed.
- Address the Wire Basket: Wire baskets provide structural integrity to the root ball. Using wire snips or bolt cutters, cut away the top half of the wire basket, including the top ring and the upper vertical wires. Remove all loose wire pieces from the hole. Leaving the bottom half of the basket is generally acceptable and helps prevent the root ball from collapsing while you backfill, but the top ring must be entirely removed so it does not girdle the expanding trunk in the future.
Step 3: Addressing Circling and Girdling Roots
While the root ball is exposed, inspect the outer edges for circling roots. Although circling roots are more common in container-grown trees, they can occur in B&B trees if they were left in the ground too long before harvesting or if the soil texture inside the ball differs drastically from the surrounding field soil.
If you find roots circling the perimeter of the root ball, use a sharp spade or a pruning saw to shave off the outer 1/2 inch to 1 inch of the root ball. This aggressive but necessary technique, often called 'root shaving' or 'boxing,' severs the circling roots and stimulates the growth of new, outward-growing lateral roots. Do not skip this step; a circling root will eventually expand and strangle the trunk from the inside out.
Step 4: Setting the Tree and Backfilling
With the burlap removed, the wire basket cut, and the roots prepped, you are ready to backfill. The planting hole should be two to three times wider than the root ball, but no deeper than the measured distance from the root flare to the base of the ball. In fact, planting the tree 1 to 2 inches slightly above grade is highly recommended in 2026 to account for soil settlement and to prevent water from pooling around the trunk.
Use the native soil you dug from the hole to backfill. Do not amend the backfill with heavy compost, peat moss, or fertilizer. Amended soil creates a 'bathtub effect' where water pools in the loose soil of the planting hole, drowning the roots and discouraging them from expanding into the native clay or sand. Break up large clods of native soil and pack it gently around the root ball to eliminate large air pockets. Water the tree deeply immediately after backfilling to settle the soil.
Common Mistakes to Avoid
- Leaving the top wire ring intact: This will eventually girdle the tree and cause structural failure during high winds a decade later.
- Amending the backfill: This discourages roots from leaving the planting hole and creates drainage issues.
- Piling mulch against the trunk: After planting, apply 2 to 3 inches of organic wood chip mulch over the root zone, but keep it at least 3 inches away from the trunk flare. 'Volcano mulching' invites rot, fungal diseases, and rodent damage.
- Dragging the tree by the trunk: Always move B&B trees by supporting the root ball with equipment or by lifting the basket. Lifting by the trunk tears the root ball away from the trunk internally.
Conclusion
Proper root ball preparation and meticulous burlap removal are not optional steps; they are the foundation of a healthy, structurally sound tree. By taking the extra 20 minutes to expose the root flare, cut away synthetic materials, remove the top wire basket, and shave circling roots, you ensure that your tree's energy is spent establishing a vast, outward-growing root system rather than fighting against its planting materials. Follow these 2026 best practices, and your newly planted trees will be well-equipped to handle environmental stressors and thrive in your landscape for generations.

