
Landscaping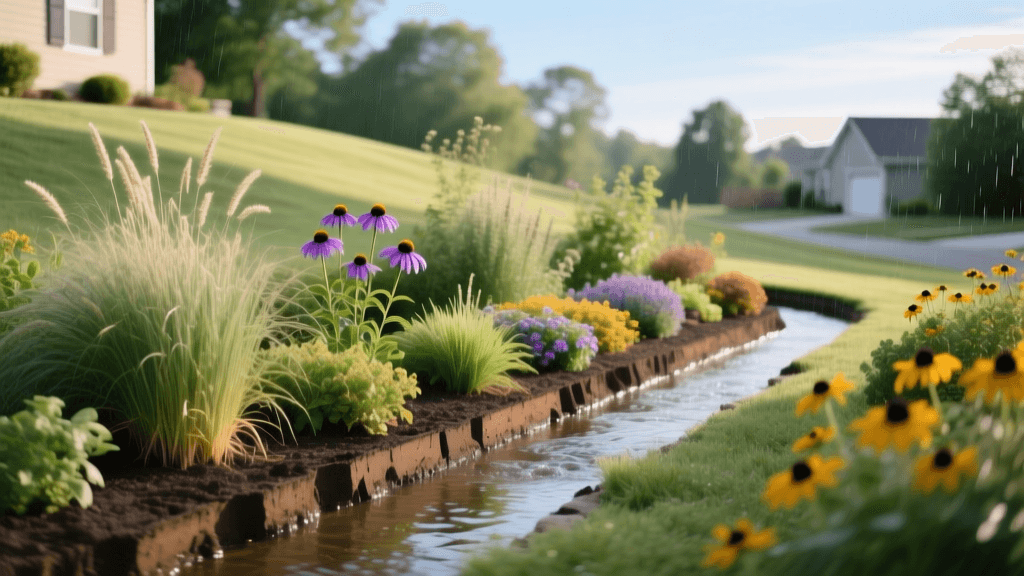
Designing a Rain Garden for Drainage and Curb Appeal
The Ultimate Guide to Planning a Backyard Rain Garden
If you struggle with soggy patches of lawn, standing water after heavy storms, or erosion near your downspouts, a rain garden might be the perfect landscaping solution. A rain garden is a shallow, planted depression designed to capture, filter, and slowly absorb stormwater runoff from roofs, driveways, and lawns. Not only does this sustainable hardscaping and softscaping project solve chronic drainage issues, but it also creates a stunning focal point that boosts your property's curb appeal while supporting local pollinators.
Planning a rain garden requires careful consideration of soil type, water flow, and native plant selection. In this comprehensive design guide, we will walk you through the exact measurements, material costs, and step-by-step planning strategies needed to build a thriving, low-maintenance rain garden in your own yard.
Understanding Rain Garden Hydrology and Benefits
Before breaking ground, it is essential to understand how a rain garden functions. Unlike a water garden or a bog, a rain garden is designed to hold water temporarily—typically for no more than 24 to 48 hours—before it infiltrates the soil. This rapid drainage prevents mosquito breeding and protects nearby foundations.
According to the United States Environmental Protection Agency (EPA), a properly designed rain garden can remove up to 90% of nutrients and chemicals, and up to 80% of sediments from stormwater runoff, significantly reducing the pollution load entering municipal water systems and local watersheds.
By integrating a rain garden into your landscape design, you achieve three major goals:
- Erosion Control: Slows down fast-moving water from impervious surfaces like concrete driveways.
- Groundwater Recharge: Allows filtered water to percolate back into the local aquifer.
- Habitat Creation: Provides vital nectar and shelter for native bees, butterflies, and birds.
Step 1: Site Selection and Safety Planning
Choosing the right location is the most critical phase of the planning process. You cannot simply dig a hole where water naturally pools, as the soil there is likely already compacted and impermeable. Instead, you must intercept the water on its way to the low spot.
Crucial Placement Rules
- Distance from Structures: Always locate your rain garden at least 10 feet away from your home’s foundation to prevent basement leaks and structural damage.
- Utility Lines: Call 811 before you dig to have underground utility lines marked. Never build over a septic system or leach field.
- Slope Limitations: Rain gardens work best in areas with a natural slope of less than 12%. If your yard is steeper, you will need to build a reinforced berm or integrate a terraced retaining wall system.
- Sun Exposure: Aim for a site that receives full to partial sun (at least 6 hours of direct sunlight daily) to support a diverse range of flowering native plants and accelerate evaporation.
The Percolation Test
To ensure your soil can handle the influx of water, perform a simple percolation test. Dig a test hole about 8 inches deep and 8 inches wide in your proposed location. Fill it with water and let it drain completely to saturate the soil. Then, fill it a second time and measure how long it takes for the water level to drop. If the water drops at a rate of at least 1 inch per hour, your native soil has adequate drainage. If it drains slower, you will need to excavate deeper and amend the soil heavily with sand and compost.
Step 2: Sizing, Excavation, and Cost Breakdown
The size of your rain garden depends on the square footage of the impervious surface draining into it (such as a roof or driveway) and your soil's infiltration rate. For an average residential downspout draining a 500-square-foot roof section into loamy soil, a garden measuring 50 to 75 square feet is typically sufficient.
Excavation Measurements
A standard rain garden is excavated to a depth of 4 to 8 inches, with gently sloping sides (a 3:1 slope ratio) to prevent erosion and allow easy access for maintenance. The bottom should be perfectly level to ensure water distributes evenly across the entire basin.
Estimated Project Costs
Below is a cost comparison chart for a standard 60-square-foot residential rain garden. Prices vary by region and material availability.
| Project Component | DIY Approach (Materials Only) | Professional Installation |
|---|---|---|
| Excavation & Grading | $0 (Sweat Equity) | $800 - $1,500 |
| Soil Amendment Mix | $75 - $150 | $250 - $400 |
| Native Plants (15-20) | $200 - $400 | $400 - $800 |
| Hardwood Mulch | $30 - $50 | $75 - $125 |
| Riprap / River Stone | $40 - $80 | $150 - $300 |
| Total Estimated Cost | $345 - $680 | $1,675 - $3,125 |
Step 3: Engineering the Perfect Soil Mix
If your percolation test revealed heavy clay soil, you must replace or heavily amend the native dirt to prevent the garden from turning into a permanent mud pit. The gold standard for rain garden soil media is a highly porous, nutrient-rich blend that retains moisture without waterlogging plant roots.
The ideal engineered soil mix consists of:
- 50% to 60% Coarse Builder’s Sand: Provides structural integrity and rapid drainage. Do not use fine play sand, which compacts easily.
- 20% to 30% Topsoil: Offers a base for root anchorage and holds essential minerals.
- 20% Organic Compost: Introduces beneficial microbes, retains necessary moisture during dry spells, and filters heavy metals from runoff.
Mix these components thoroughly in a wheelbarrow or via a skid-steer loader before backfilling the excavated basin. Leave a 2-inch gap below the surrounding lawn grade to create the necessary bowl shape for water capture.
Step 4: Plant Selection and Zoning Strategy
A successful rain garden design mimics natural wetland ecosystems by organizing plants into distinct hydrological zones. The center of the garden experiences the deepest, longest-lasting moisture, while the outer edges dry out quickly. Selecting the right plant for the right zone is crucial for long-term survival and reduced maintenance.
Rain Garden Plant Zoning Guide
| Zone Location | Moisture Profile | Recommended Native Species | Design Function |
|---|---|---|---|
| Zone 1: Center Basin | Wet to Saturated (Holds water 24+ hours) | Blue Flag Iris (Iris versicolor), Swamp Milkweed (Asclepias incarnata), Cardinal Flower (Lobelia cardinalis) | Water filtration, vibrant focal colors, deep root systems to break up soil. |
| Zone 2: Side Slopes | Alternating Wet and Dry | New England Aster (Symphyotrichum novae-angliae), Coneflower (Echinacea purpurea), Switchgrass (Panicum virgatum) | Erosion control on slopes, mid-season pollinator support, structural height. |
| Zone 3: Outer Edges | Mostly Dry (Standard garden conditions) | Black-Eyed Susan (Rudbeckia hirta), Butterfly Weed (Asclepias tuberosa), Wild Geranium (Geranium maculatum) | Seamless transition into surrounding lawn, drought tolerance, border definition. |
When purchasing plants, opt for deep-rooted native perennials over shallow-rooted ornamentals. Native grasses like Switchgrass and Prairie Dropseed are particularly valuable, as their roots can extend 5 to 8 feet deep, acting as natural biological pipes that pull water deep into the subsoil.
Step 5: Hardscaping, Mulching, and Inflow Design
To protect your newly planted garden from the sheer force of water exiting a downspout, you must incorporate hardscaping elements to dissipate the water's energy.
- Inflow Protection: Place a 2-foot by 2-foot pad of flat river stone or riprap directly under the downspout or at the garden's entry point. This prevents the water from carving a trench through your mulch and soil.
- Swales and Trenches: If the garden is located far from the water source, dig a shallow, grass-lined swale or install a 4-inch perforated PVC pipe to direct the water seamlessly into the basin.
- Mulching: Apply 2 to 3 inches of double-shredded hardwood mulch. Avoid lightweight pine bark or wood chips, as they will float away during the first heavy rainstorm. Hardwood mulch knits together, suppressing weeds while allowing water to penetrate.
Long-Term Maintenance and Care
While rain gardens are designed to be low-maintenance once established, the first two years require active care to ensure deep root development and long-term sustainability.
Year One Maintenance Checklist
- Watering: Water deeply 1 to 2 times per week during dry periods in the first growing season. Native plants need time to push their roots deep into the soil profile before they become fully drought-tolerant.
- Weeding: Hand-pull invasive weeds monthly. Avoid using chemical herbicides, as they will wash directly into the groundwater during the next rain event.
- Sediment Removal: Inspect the inflow area after major storms. If sediment from the roof or driveway has accumulated, carefully remove it to maintain the garden's holding capacity.
Year Two and Beyond
By the second year, your rain garden should be largely self-sustaining. You will only need to replenish the hardwood mulch annually in the spring, cut back dead perennial stalks in late winter, and divide overcrowded plants like Daylilies or Irises every three to four years. By planning carefully and respecting the natural hydrology of your yard, your rain garden will provide decades of effective drainage, environmental stewardship, and breathtaking seasonal beauty.

