
Landscaping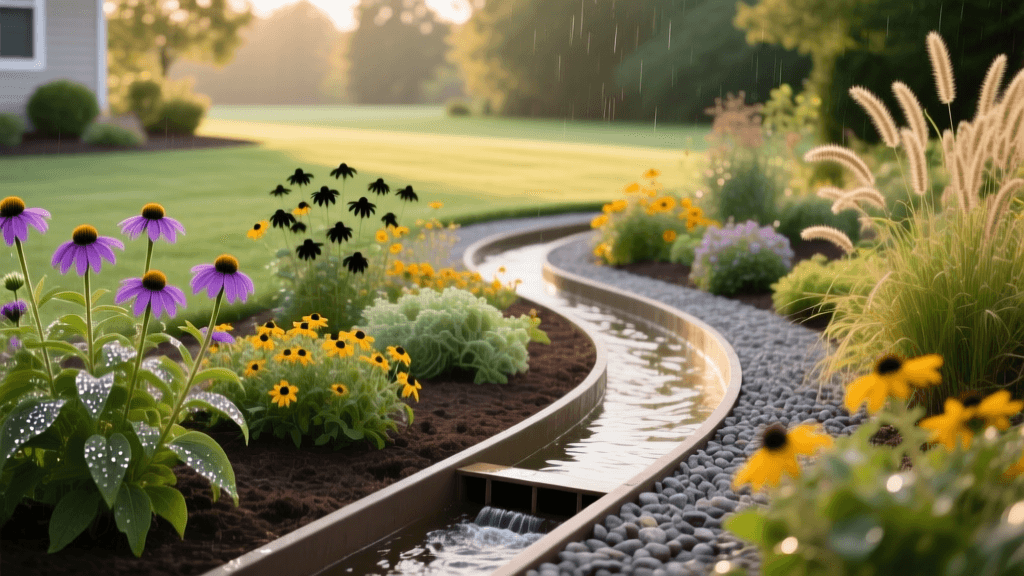
Designing a Rain Garden: Planning for Drainage and Appeal
Transforming Yard Drainage with a Rain Garden
If you struggle with standing water, soggy lawns, or downspouts that erode your topsoil, a rain garden is one of the most effective and aesthetically pleasing landscaping solutions available. A rain garden is a shallow, landscaped depression designed to capture and filter stormwater runoff from impervious surfaces like roofs, driveways, and patios. Beyond solving chronic drainage issues, a well-planned rain garden dramatically boosts curb appeal by introducing vibrant, deep-rooted native plants to your yard.
According to the United States Environmental Protection Agency (EPA), residential rain gardens can reduce stormwater runoff pollutants by up to 90%, protecting local watersheds from fertilizers, pesticides, and automotive fluids. However, a successful rain garden requires meticulous planning, precise site assessment, and an understanding of hydrology and landscape design.
Step 1: Site Selection and Drainage Assessment
The success of your rain garden hinges on its location. You are looking for a natural low point in your yard where water already tends to flow, but you must also respect structural and utility boundaries.
Crucial Placement Rules
- Foundation Distance: Always locate the rain garden at least 10 feet away from your home’s foundation to prevent basement flooding and structural compromise.
- Utility Lines: Call 811 before you dig to have underground utilities marked. Never place a rain garden over a septic drain field.
- Sunlight: Choose a site that receives full to partial sun (at least 6 hours of direct sunlight daily) to support robust plant growth and maximize evaporation.
- Slope: The ideal location has a gentle slope of less than 12%. Steeper slopes require extensive terracing and retaining walls, which drastically increases costs.
The Percolation Test
Before finalizing your design, you must test the soil's infiltration rate. Dig a test hole 12 inches deep and 6 inches wide. Fill it with water and let it drain completely to saturate the soil. Refill it to the top and measure how many inches the water level drops per hour. According to the University of Wisconsin-Madison Extension, your soil must drain at a minimum rate of 0.5 inches per hour to be suitable for a rain garden without requiring an underdrain pipe.
Step 2: Sizing and Excavation Planning
A common mistake in landscape planning is sizing the garden based on available space rather than hydrological need. As a general rule of thumb, your rain garden should be roughly 10% to 15% of the total impervious surface area draining into it. For example, if a 1,000-square-foot section of your roof drains into a single downspout, your rain garden should be between 100 and 150 square feet.
Excavation Dimensions
The ideal depth for a residential rain garden is between 4 and 8 inches. This depth allows for adequate water storage while ensuring the garden drains completely within 24 to 48 hours, which is critical for preventing mosquito breeding. The bottom of the basin should be perfectly level, while the sides slope gently outward at a 3:1 ratio to prevent erosion and create a natural, blended transition into the surrounding lawn.
Step 3: Soil Engineering and Material Costs
Native clay soils hold water too long, while pure sand drains it too quickly and lacks nutrients. To engineer the perfect rain garden soil, landscape architects recommend a specific bioretention mix. The University of Wisconsin-Madison Extension recommends a mix of 50-60% coarse washed sand, 20-30% topsoil, and 20-30% organic compost. This blend ensures rapid infiltration while providing enough organic matter to sustain native flora.
Estimated Cost Breakdown
Below is a planning budget for a standard 100-square-foot rain garden, excavated to a depth of 6 inches, assuming DIY labor and mid-tier materials.
| Material / Service | Quantity Needed | Estimated Cost |
|---|---|---|
| Coarse Washed Sand | 1.5 cubic yards | $45 - $75 |
| Topsoil (Screened) | 0.75 cubic yards | $30 - $50 |
| Organic Compost | 0.75 cubic yards | $35 - $60 |
| Double-Shredded Hardwood Mulch | 1.5 cubic yards | $45 - $65 |
| Native Plants (Plugs & 1-Gallon) | 25 - 35 plants | $150 - $350 |
| River Rock / Boulders (Spillway) | 0.5 tons | $60 - $120 |
| Total Estimated DIY Cost | $365 - $720 |
Note: Hiring a professional landscaping contractor to handle excavation, soil mixing, and planting will typically add $1,500 to $3,500 to the total project cost, depending on regional labor rates and site accessibility.
Step 4: Plant Selection and Zonal Design
A rain garden is not a uniform environment; it features distinct microclimates based on moisture levels. To ensure long-term survival and continuous visual interest, you must plan your plant layout using a zonal approach.
The Three Zones of a Rain Garden
- Zone 1 (The Basin Bottom): This area experiences the most extreme conditions—submerged during heavy storms and bone-dry during summer droughts. Plants here must tolerate 'wet feet' and occasional flooding.
- Zone 2 (The Slopes): The transitional areas that experience fluctuating moisture levels. These plants need moderate drought tolerance and strong root systems to hold the soil in place.
- Zone 3 (The Edges and Berm): The highest, driest points of the garden. Plants here rarely see standing water and must be highly drought-resistant once established.
Recommended Native Plant Palette
| Garden Zone | Common Name | Botanical Name | Key Characteristics |
|---|---|---|---|
| Zone 1 (Bottom) | Blue Flag Iris | Iris versicolor | Loves wet soil, stunning purple blooms in late spring. |
| Zone 1 (Bottom) | Swamp Milkweed | Asclepias incarnata | Essential for Monarch butterflies, tolerates deep saturation. |
| Zone 2 (Slopes) | New England Aster | Symphyotrichum novae-angliae | Provides vital late-fall nectar, deep roots stabilize slopes. |
| Zone 2 (Slopes) | Purple Coneflower | Echinacea purpurea | Drought-tolerant, attracts goldfinches, blooms mid-summer. |
| Zone 3 (Edges) | Little Bluestem | Schizachyrium scoparium | Ornamental grass with brilliant copper fall color, highly drought-resistant. |
| Zone 3 (Edges) | Black-Eyed Susan | Rudbeckia hirta | Cheerful yellow blooms, thrives in dry, well-draining soil. |
Step 5: Hardscaping and Curb Appeal Enhancements
To elevate your rain garden from a simple drainage ditch to a premier landscape feature, integrate hardscaping elements. Use large, natural river boulders to create a 'spillway' where the downspout or French drain enters the garden. This dissipates the energy of rushing water, preventing soil erosion and mulch displacement.
Consider lining the overflow weir (the lowest point of the berm where excess water escapes during massive storms) with decorative pea gravel or flagstone. This ensures that when the garden reaches capacity, the escaping water does not carve a trench into your lawn. Adding a dry creek bed leading away from the overflow weir can further enhance the visual flow of your yard while safely directing surplus water to the street or a municipal storm drain.
Maintenance and Long-Term Care
While native plants are low-maintenance once established, the first two years require active planning and care. Water the garden deeply once a week during dry spells for the first two growing seasons to encourage deep root penetration. Apply a 2-to-3-inch layer of double-shredded hardwood mulch annually. Avoid pine bark or wood chips, as their light weight causes them to float away during heavy rain events. Finally, inspect the inlet and overflow areas after major storms to remove debris and sediment buildup, ensuring your drainage system functions flawlessly for decades to come.
Pro Tip: Leave the dried stalks of native coneflowers and asters standing through the winter. Not only does this provide architectural interest in the snowy landscape, but it also offers crucial overwintering habitat for native pollinators and a food source for foraging birds.

