
Landscaping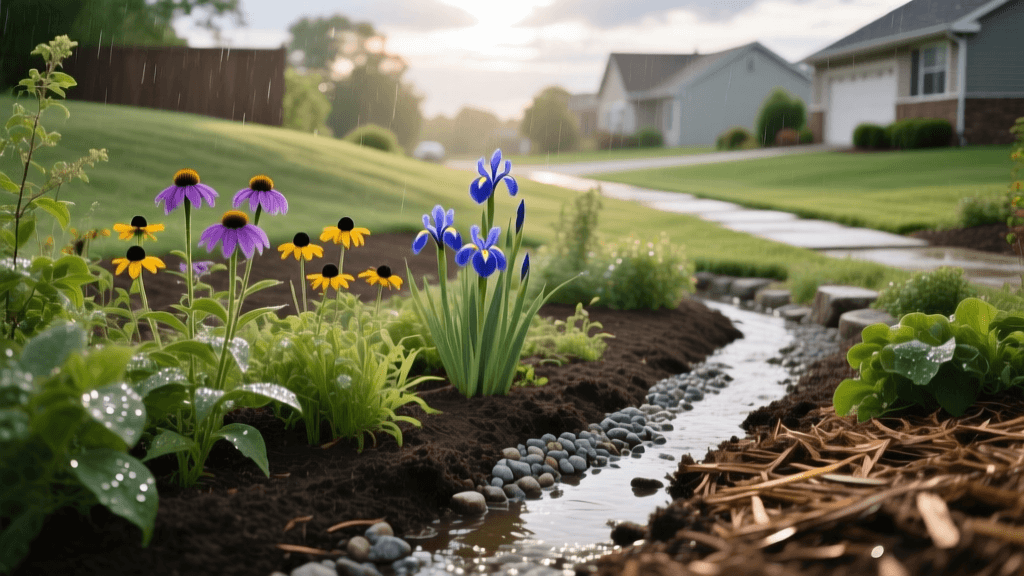
How to Plan and Design a Rain Garden for Yard Drainage
Transforming Yard Drainage with Rain Garden Design
Dealing with a soggy lawn, standing water, or aggressive runoff from your downspouts? Traditional landscaping often treats water as a nuisance to be whisked away into municipal sewer systems. However, modern sustainable landscape design embraces water as a valuable resource. Enter the rain garden: a beautifully landscaped, shallow depression designed to capture, filter, and slowly absorb stormwater runoff back into the local water table. Not only does a well-planned rain garden solve chronic yard drainage issues, but it also reduces soil erosion, mitigates flooding, and creates a vibrant micro-habitat for local pollinators and beneficial insects.
Planning a rain garden requires a strategic approach to site selection, soil engineering, and plant zoning. Unlike a standard garden bed, a rain garden must endure extreme fluctuations in moisture—acting as a temporary pond during heavy downpours and a dry, drought-tolerant landscape feature during summer heatwaves. This comprehensive guide will walk you through the essential design ideas and planning steps to build a functional, aesthetically pleasing rain garden in your own backyard.
Step 1: Site Selection and Water Flow Observation
The success of your rain garden hinges entirely on proper placement. Before you pick up a shovel, spend a few rainy days observing how water naturally moves across your property. Look for natural low spots where water tends to pool, or trace the path of water exiting your downspouts and driveway. However, aesthetic appeal and drainage efficiency must be balanced with structural safety.
When selecting your site, adhere to these critical landscaping safety rules:
- The 10-Foot Rule: Never place a rain garden within 10 feet of your home's foundation to prevent water from seeping into your basement or compromising the structural integrity of your footing.
- Avoid Septic Systems: Do not build over or near a septic drain field, as the added water volume can overwhelm the system and cause catastrophic failure.
- Check the Slope: Ideal rain garden sites have a gentle slope of 1% to 5%. If your yard is entirely flat, you will need to engineer a berm to hold the water. If the slope exceeds 5%, you may need to incorporate terracing or retaining walls to prevent the water from simply washing through the garden.
- Utility Check: Always call your local utility marking service (like 811 in the United States) before digging to ensure you won't sever underground gas, water, or electrical lines.
Step 2: Sizing Your Rain Garden and the Percolation Test
How big should your rain garden be? As a general rule of thumb in landscape planning, a rain garden should be sized to capture about 20% to 30% of the total impervious surface area (roof, driveway, patio) that drains into it. For example, if a 500-square-foot section of your roof drains into a single downspout, your rain garden should ideally be between 100 and 150 square feet.
Before finalizing the dimensions, you must conduct a percolation test to determine your soil's natural drainage rate. Dig a test hole about 8 inches deep and 6 inches wide in your proposed location. Fill it with water and let it drain completely to saturate the soil. Then, refill it and measure how many inches the water level drops per hour. If the water drains at a rate of at least 0.5 inches per hour, the site is viable. If the water sits for more than 24 hours, you are dealing with heavy clay soil, and you will need to significantly amend the soil or install an underdrain pipe connected to a daylight exit or dry well.
Step 3: Soil Engineering and Excavation
Most residential soils are heavily compacted and lack the porosity required for rapid stormwater infiltration. Therefore, excavating and replacing the native soil is a non-negotiable step in rain garden design. You will need to dig out the depression to a depth of 6 to 8 inches below the surrounding grade, and build up the edges with a berm to create a bowl that can hold 4 to 6 inches of standing water.
The secret to a thriving rain garden lies in a highly permeable, nutrient-rich soil mix that prevents compaction while retaining enough moisture to sustain plants during dry spells. The industry-standard bioretention soil mix consists of three primary components.
| Material | Volume Ratio | Purpose in the Rain Garden |
|---|---|---|
| Coarse Washed Sand | 50% | Ensures rapid drainage, prevents soil compaction, and creates pore space for water infiltration. |
| Native Topsoil | 25% | Provides essential minerals, structural stability, and a familiar medium for native plant root systems. |
| Organic Compost | 25% | Retains moisture during dry periods, supplies slow-release nutrients, and fosters beneficial microbial life. |
Thoroughly mix these components before backfilling your excavated depression. Leave the soil slightly mounded in the center, as it will settle over the first few weeks of watering and rainfall.
Step 4: Zoning and Plant Selection
A rain garden is not a monolith; it features distinct microclimates based on water depth and duration. Professional landscape designers divide the garden into three distinct zones to ensure plant survival and visual harmony. Selecting native, deep-rooted perennials is highly recommended, as their extensive root systems act as natural biological filters and help break up compacted subsoil.
Zone 1: The Bottom (Inundation Zone)
This is the lowest point of the garden, where water collects and may sit for up to 24 hours. Plants here must tolerate 'wet feet' and temporary flooding.
- Swamp Milkweed (Asclepias incarnata): A crucial host plant for monarch butterflies that thrives in saturated soils.
- Blue Flag Iris (Iris versicolor): Provides striking architectural foliage and beautiful purple blooms in late spring.
- Cardinal Flower (Lobelia cardinalis): Produces vivid red spikes that are irresistible to hummingbirds.
Zone 2: The Slopes (Fluctuation Zone)
The sides of the rain garden experience rapid shifts between saturated and dry conditions. Plants here must be highly adaptable.
- Switchgrass (Panicum virgatum): A tough, native ornamental grass with deep roots that stabilize the slopes against erosion.
- New England Aster (Symphyotrichum novae-angliae): Offers vital late-season nectar for pollinators and handles moisture swings beautifully.
- Joe-Pye Weed (Eutrochium purpureum): A towering perennial that provides dramatic vertical interest and thrives in fluctuating moisture.
Zone 3: The Edges (Upland Zone)
The top of the berm and the outer edges rarely see standing water. These plants should be drought-tolerant and prefer well-draining soil.
- Black-Eyed Susan (Rudbeckia hirta): A cheerful, drought-tolerant classic that blooms prolifically from mid-summer to fall.
- Purple Coneflower (Echinacea purpurea): Deep taproots allow it to survive dry spells while providing seeds for goldfinches in winter.
- Daylilies (Hemerocallis): Highly adaptable, dense growers that help knit the outer edges of the garden together.
Step 5: Mulching, Edging, and Overflow Management
Mulch is critical in a rain garden, but standard shredded bark will simply float away during the first heavy storm. Instead, use double- or triple-shredded hardwood mulch, which tends to knit together and stay in place. Apply a 2-to-3-inch layer over the soil, keeping it slightly away from the crowns of your plants to prevent rot.
Furthermore, every rain garden must have a designated overflow mechanism for extreme weather events (like a 100-year storm). Plan a low spot on the berm and line it with river rock or cobblestones. This creates a stable spillway that allows excess water to safely exit the garden and flow into a secondary drainage swale or storm drain without eroding the soil.
Project Timing and Estimated Costs
Timing your project correctly will save you immense frustration. The best time to plan and excavate a rain garden is in late summer or early fall when the ground is relatively dry, making excavation easier and allowing you to establish the soil before winter. However, the best time to plant is in the spring or early fall, avoiding the peak heat of mid-summer which stresses new transplants.
Regarding budget, a DIY rain garden typically costs between $5 and $15 per square foot, factoring in soil amendments, native plants, and river rock. If you choose to hire a professional landscape architect or design-build firm to handle the engineering, excavation, and planting, expect to pay between $25 and $45 per square foot. While the upfront cost and labor are significant, the long-term benefits of eliminated lawn flooding, reduced irrigation needs, and enhanced curb appeal make it a highly rewarding landscape investment.
According to research published by Penn State Extension, a properly designed and maintained rain garden can reduce the volume of stormwater runoff from a residential property by up to 30 percent, while simultaneously filtering out harmful pollutants like heavy metals, nitrogen, and phosphorus before they reach local watersheds.
By carefully planning your site, engineering the soil, and selecting the right native plants for each hydrological zone, you can transform a problematic, waterlogged corner of your yard into a stunning, eco-friendly landscape feature that works in harmony with nature.

