Lawn Care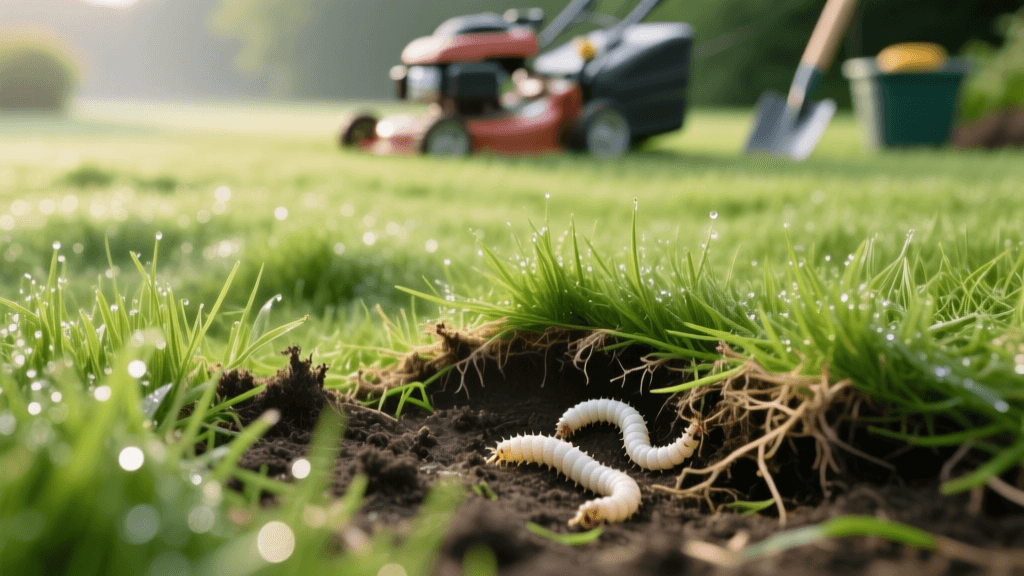
How to Diagnose and Treat White Grub Damage in Lawns
The Hidden Threat Beneath Your Turf
There are few things more frustrating for a homeowner than watching a lush, green lawn rapidly deteriorate into patchy, brown wastelands despite proper watering and fertilization. While drought stress and fungal diseases are common culprits, one of the most destructive threats to your turfgrass hides entirely out of sight: the white grub. White grubs are the larval stage of scarab beetles, including Japanese beetles, June bugs, and European chafers. These C-shaped, cream-colored insects with distinct brown heads feed aggressively on the root systems of cool-season and warm-season grasses, severing the plant's ability to uptake water and nutrients. If left untreated, a severe grub infestation can destroy an entire lawn in a matter of weeks, necessitating costly and time-consuming total renovations. This comprehensive guide focuses on the precise diagnosis of grub damage and provides actionable, science-backed solutions to eradicate the pests and restore your turf.
Understanding the White Grub Lifecycle
To effectively diagnose and treat a grub problem, you must first understand their lifecycle, as timing is the most critical factor in turfgrass pest management. Adult beetles emerge from the soil in early summer to mate and lay eggs in the turf. By mid-to-late summer (typically July and August), these eggs hatch into young larvae. These first-instar grubs are small, highly active, and feed voraciously on grass roots near the soil surface. As autumn approaches and soil temperatures drop, the grubs burrow deep below the frost line to overwinter. In the spring, they migrate back to the surface to feed briefly before pupating into adult beetles, restarting the cycle. The most severe root damage occurs during the late summer and early fall feeding frenzy, which is why diagnosis and treatment timing must align with these biological stages.
How to Diagnose Grub Damage in Your Lawn
Diagnosing grub damage requires moving beyond surface-level observations. Brown patches can indicate a dozen different lawn care issues, so you must perform physical tests to confirm the presence of root-feeding larvae.
The Tug Test
The most immediate indicator of grub damage is turf that feels spongy underfoot and detaches easily from the soil. Walk through the transition zones between your green grass and the brown, dying patches. Grab a handful of the affected grass and pull gently. If the grass has been severed from its roots, it will pull up effortlessly, rolling back like a freshly laid carpet or a loose rug. If the grass resists and you have to exert significant force to uproot it, the roots are likely intact, pointing you toward drought stress or a surface-level fungal issue rather than grubs.
The Dig and Count Test
Once you suspect grubs via the tug test, you need to quantify the infestation to determine if chemical or biological intervention is necessary. Using a sharp spade or a half-moon edger, cut three sides of a 12-inch by 12-inch square in the affected turf. Cut about 2 to 3 inches deep, then peel the sod back like a hinge. Carefully inspect the exposed soil and the underside of the sod for C-shaped white larvae. Break apart the top inch of soil to find grubs hiding just beneath the surface. Count the number of grubs found in this one-square-foot area, then replace the sod and water it heavily to prevent it from drying out.
Evaluating the Damage Threshold
Not every grub requires a full-scale chemical assault. Turfgrass health dictates the damage threshold. According to entomologists at Purdue University Extension, a healthy, well-fertilized, and deeply rooted lawn can tolerate up to 8 to 15 grubs per square foot without showing significant aesthetic damage. However, if your lawn is already stressed by shade, poor soil compaction, or drought, the threshold drops to 5 to 7 grubs per square foot. If your dig test reveals numbers exceeding these thresholds, immediate treatment is required.
Differentiating Grub Damage from Other Lawn Problems
Misdiagnosis leads to wasted money and ineffective treatments. Here is how to distinguish grub damage from other common turf issues:
- Drought Stress: Grass turns bluish-gray and wilts before turning brown. Unlike grub damage, drought-stressed grass remains firmly rooted in the soil and will not pass the tug test.
- Dog Urine Spots: Nitrogen burn from pet urine creates distinct brown spots, but these are typically surrounded by a dark green 'halo' of rapidly growing grass due to the localized fertilizer effect. The roots remain intact.
- Fungal Diseases (e.g., Brown Patch): Fungus attacks the grass blades and crowns, not the roots. Inspect the grass blades at the edge of the brown patch for dark lesions, water-soaked tissue, or white mycelium in the morning dew. The roots will still be anchored.
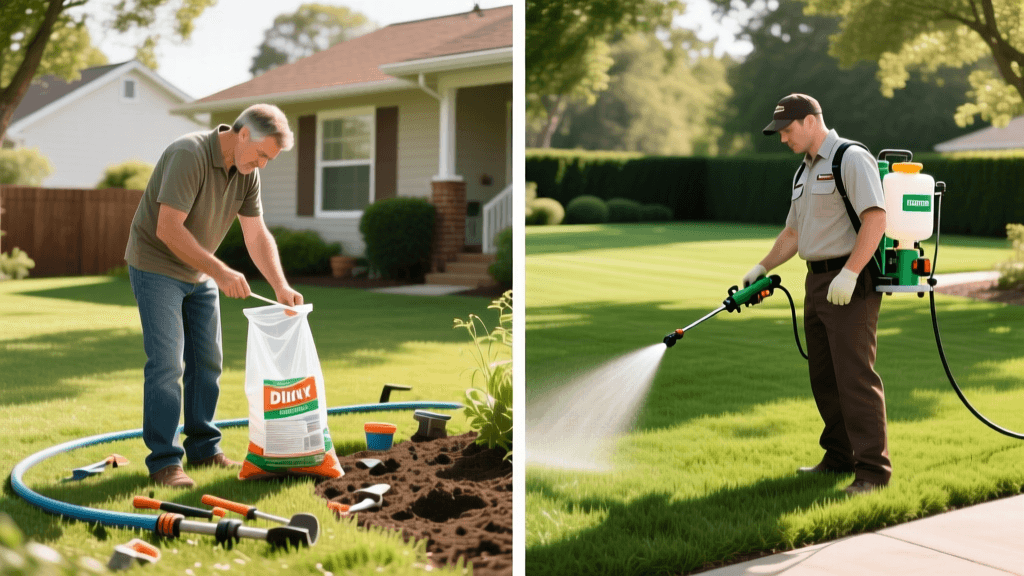
Treatment Solutions: Preventative vs. Curative
Once you have confirmed a grub infestation that exceeds the damage threshold, you must select the appropriate treatment strategy. Grub control products are strictly divided into two categories: preventatives and curatives. Using the wrong product at the wrong time of year is the number one reason homeowners fail to control these pests.
Preventative Grub Control
Preventative treatments are designed to be applied before the eggs hatch or when the newly hatched grubs are extremely small and vulnerable. These products contain long-residual active ingredients that remain in the soil for months, killing the grubs as they begin to feed.
- Chlorantraniliprole: Widely available under the brand name Scotts GrubEx, this is the gold standard for preventative care. It is highly effective, safe for pollinators once watered in, and has a long application window. Apply between April and early June. It takes 60 to 90 days to fully activate in the soil profile, which is why early application is mandatory. Cost: Approximately $25 to $30 per 5,000 square feet.
- Imidacloprid: Found in products like Bayer Advanced Merit, this neonicotinoid is applied slightly later, from May to mid-July. It is highly effective against young grubs but degrades faster than chlorantraniliprole. Cost: Approximately $30 per 5,000 square feet.
Curative Grub Control
If you missed the preventative window and discover grubs in late summer or early fall (August through October) while they are actively destroying roots, you need a fast-acting curative product. Curatives have a short residual life but deliver a rapid 'knockdown' effect.
- Trichlorfon: Sold as Dylox or Bayer Advanced 24 Hour Grub Killer, this is the most effective curative chemical. It penetrates the soil quickly and kills actively feeding grubs within 24 to 48 hours. It must be applied when grubs are near the surface and the soil is moist. Cost: Approximately $35 to $45 per 5,000 square feet.
- Carbaryl: Available as Sevin, this is an older curative option. It is generally less effective than trichlorfon on larger, older grubs and can be harsh on beneficial earthworms. It is best used as a secondary option if trichlorfon is unavailable.
Organic and Biological Solutions
For homeowners seeking eco-friendly alternatives, biological controls can be highly effective if timed correctly. Beneficial nematodes, specifically the species Heterorhabditis bacteriophora (available in products like NematodeSmart or BioLogic), are microscopic worms that seek out and parasitize grubs. They must be applied in late summer when the soil is consistently moist and temperatures are above 60°F. Because they are living organisms, they require immediate irrigation and protection from UV light. Another organic option is Milky Spore, a bacteria targeting Japanese beetle grubs; however, it can take 2 to 3 years to establish in the soil and is ineffective against other scarab species.
Grub Control Strategy Comparison Chart
| Strategy | Active Ingredient | Brand Examples | Application Timing | Speed of Control |
|---|---|---|---|---|
| Preventative | Chlorantraniliprole | Scotts GrubEx, Acelepryn | April to Early June | Slow (60-90 days) |
| Preventative | Imidacloprid | Bayer Advanced Merit | May to Mid-July | Moderate (30-60 days) |
| Curative | Trichlorfon | Dylox, Bayer 24-Hour | Late August to October | Fast (24-48 hours) |
| Curative | Carbaryl | Sevin | August to September | Moderate (3-5 days) |
| Organic | H. bacteriophora | NematodeSmart, BioLogic | Late Summer (Moist Soil) | Moderate (7-14 days) |
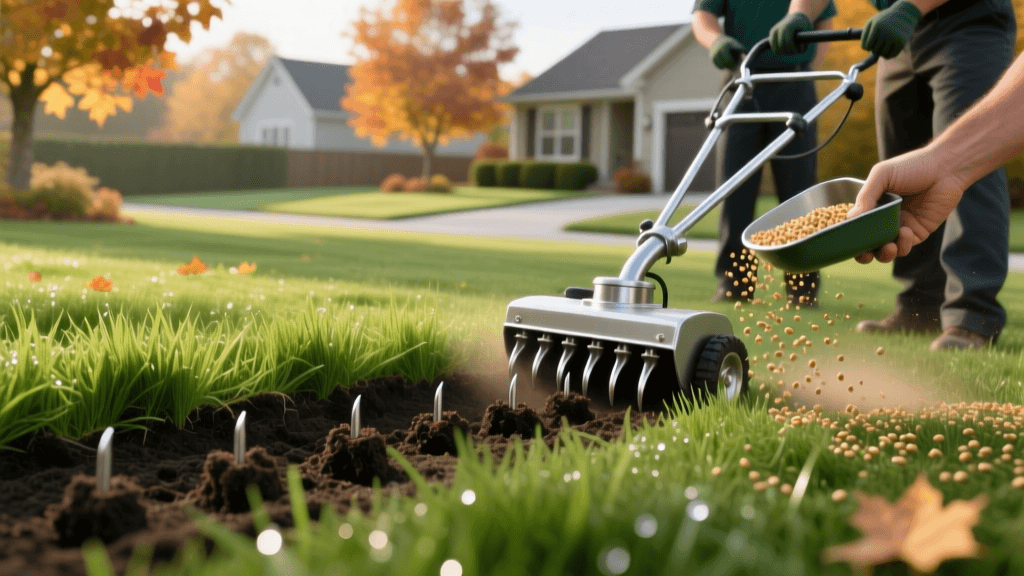
Crucial Application Rules for Success
Purchasing the right product is only half the battle; proper application dictates success. All granular grub control products—whether preventative or curative—must be watered into the soil immediately after application. Grubs live in the root zone, not on the grass blades. If the product sits on the thatch layer, UV degradation and chemical binding will render it useless. Apply at least 0.5 inches of irrigation immediately following application to wash the active ingredient down to the soil surface. Furthermore, avoid mowing the lawn for 24 hours after watering to allow the soil to fully absorb the treatment.
Dealing with Secondary Wildlife Damage
Often, the first sign of a grub infestation is not the brown grass itself, but the destruction caused by local wildlife. Skunks, raccoons, armadillos, and crows are highly adept at smelling grubs beneath the soil. They will tear up large sections of your lawn, peeling back the sod like a banana peel to feast on the larvae. If you notice irregular, deep divots and shredded turf, you have a secondary wildlife problem driven by a primary grub problem. While treating the grubs with a curative product like trichlorfon will eventually drive the animals away by removing their food source, you may need to use temporary physical deterrents. Bird netting staked tightly over the affected areas, or the application of Milorganite (an organic nitrogen fertilizer known for its strong odor that repels deer and small mammals), can protect your remaining soil structure while the curative treatment takes effect.
Lawn Recovery and Overseeding
Once the grubs have been eradicated, the damaged areas of your lawn will not magically turn green again; the roots are gone, and the grass is dead. Recovery requires active renovation. Begin by using a heavy thatch rake to remove all dead, brown grass and debris from the affected patches, exposing the bare soil. Use a manual core aerator or a garden fork to loosen the compacted topsoil to a depth of three inches. Apply a high-phosphorus starter fertilizer (such as a 10-18-10 NPK ratio) to encourage rapid root development. Next, broadcast a high-quality grass seed that matches your existing turf—such as Kentucky bluegrass or tall fescue for cool-season lawns, or Bermuda grass for warm-season zones. Rake the seed lightly into the soil to ensure seed-to-soil contact. Finally, water the renovated patches lightly two to three times a day for the first 14 days to keep the top inch of soil consistently moist until germination is complete.
Expert Insights and Citations
Effective lawn care relies on peer-reviewed turfgrass science rather than anecdotal guesswork. The diagnostic thresholds and chemical recommendations outlined in this guide are supported by leading agricultural institutions. According to Purdue University Extension's comprehensive publication, 'Managing White Grubs in Turfgrass', the economic and aesthetic injury threshold for healthy lawns is generally 8 to 15 grubs per square foot, emphasizing the importance of the dig test before applying chemicals. Additionally, Ohio State University Extension highlights the critical importance of soil moisture when applying curative treatments like trichlorfon, noting that dry soil prevents the chemical from reaching the root zone where the larvae feed. By integrating these university-backed diagnostic methods with precise, timed chemical or biological interventions, homeowners can successfully defend their lawns against subterranean threats and maintain a resilient, vibrant landscape year after year.