
Gardening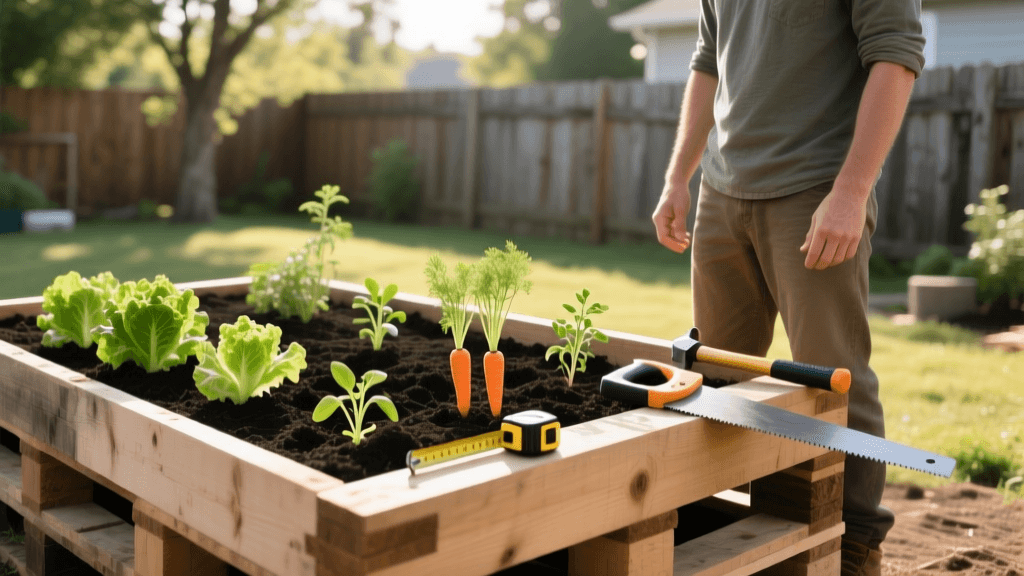
Build DIY Pallet Raised Garden Beds on a Tight Budget
Why Build Raised Beds from Reclaimed Pallets?
Building a thriving vegetable garden is one of the most rewarding home improvement projects you can undertake, but the upfront costs of materials can quickly derail a tight budget. In recent years, the price of traditional raised bed materials like untreated cedar or galvanized steel has skyrocketed. For the budget-conscious gardener, sourcing materials locally and sustainably is the key to keeping costs low without sacrificing quality or yield.
Enter the humble shipping pallet. Reclaimed wooden pallets offer an incredibly cost-effective, durable, and eco-friendly alternative to store-bought lumber. According to the Environmental Protection Agency, reusing materials like wooden pallets diverts significant waste from landfills and reduces the demand for newly harvested timber. By upcycling these heavy-duty structures, you can build a robust 4x4-foot raised garden bed for a fraction of the cost of a commercial kit.
Crucial First Step: Reading Pallet Safety Stamps
Before you start prying apart wood, you must ensure the pallets are safe for growing food. Not all pallets are created equal; some are treated with harsh chemicals to prevent pest infestations during international shipping. You must look for the IPPC (International Plant Protection Convention) stamp burned into the wood.
- HT (Heat Treated): This is the gold standard for garden use. It means the wood was heated to a specific temperature to kill pests, using no toxic chemicals.
- MB (Methyl Bromide): Avoid these at all costs. Methyl bromide is a highly toxic pesticide that can leach into your soil and contaminate your vegetables.
- Unmarked Pallets: If a pallet has no stamp, it was likely used for domestic shipping and is generally safe, but you cannot be 100% certain of its history. Avoid pallets that look stained, smell like chemicals, or have been used to transport industrial solvents.
For a comprehensive guide on decoding these stamps, refer to the National Wooden Pallet & Container Association. Always prioritize HT-stamped pallets sourced from local hardware stores, garden centers, or small businesses that receive non-toxic goods.
Materials and Tools Needed
To build a standard 4x4-foot raised bed (approximately 11 inches deep), you will need to dismantle two standard 48x40-inch pallets. Here is your budget-friendly shopping and scavenging list:
Tools
- Crowbar or heavy-duty pry bar
- Reciprocating saw or handsaw (for stubborn nails)
- Power drill with a Phillips head bit and a drill bit for pilot holes
- Orbital sander or sanding block (80-grit and 120-grit)
- Measuring tape and carpenter's square
- Hammer and safety gloves
Materials
- 2 Heat-Treated (HT) wooden pallets (Cost: $0 - $10)
- 1 box of #9 2.5-inch exterior star-drive screws (Cost: ~$12)
- 1 roll of 3oz woven landscape fabric, cut to 5x5 feet (Cost: ~$15)
- 4 wooden stakes (can be cut from pallet stringers) for corner reinforcement
- Raw linseed oil for non-toxic sealing (Cost: ~$15)
Total Estimated Cost: $42 - $52 (Compared to $150+ for a new cedar kit).
Step-by-Step Construction Guide
Step 1: Dismantling the Pallets
This is the most labor-intensive part of the process. Slide your pry bar between the top deck boards and the underlying stringers. Gently lever the boards upward, working your way across to avoid snapping the brittle, dry wood. If a nail refuses to budge, use a reciprocating saw with a metal-cutting blade to slice through the nail between the board and the stringer. You will need roughly fourteen 1x4 or 1x6 deck boards and the thick 3.5x3.5-inch corner stringers.
Step 2: Sizing and Sanding
Measure and cut your deck boards into eight 4-foot lengths. Take the time to sand the rough edges and corners. Pallet wood is notoriously rough, and sanding prevents splinters while giving your finished bed a polished, intentional look rather than a scrap-wood appearance.
Step 3: Assembling the Frame
Lay out two 4-foot boards on the ground. Cut four 11-inch blocks from the thick pallet stringers to serve as internal corner braces. Stand the stringer blocks upright at the corners of your base boards. Drill pilot holes through the face of the deck boards into the corner blocks to prevent the dry wood from splitting, then secure them with your 2.5-inch exterior screws. Repeat this process, stacking and screwing the boards one row at a time until your box is three boards high.
Step 4: Ground Prep and Lining
Level the ground where your bed will sit. Remove any large rocks or persistent weeds. Lay down cardboard directly on the soil to smother existing grass. Next, staple your woven landscape fabric to the inside walls of the bed and let it drape across the bottom. This prevents soil from washing out while allowing earthworms and beneficial microbes to migrate up from the native soil below. As noted by the University of Minnesota Extension, proper lining and drainage are essential for the longevity of wooden beds and the health of deep-rooting crops like carrots and parsnips.
Budget Soil Filling: The Hugelkultur Method
Filling a 4x4-foot raised bed requires roughly 16 cubic feet of soil. Buying bagged raised bed mix can easily cost over $100, entirely defeating the purpose of a budget build. Instead, utilize a modified Hugelkultur (hill culture) layering technique to build rich, moisture-retentive soil for pennies.
- Bottom Layer (4 inches): Fill the base with rotting logs, thick branches, and twigs scavenged from your yard. As this wood decomposes, it acts like a sponge, retaining water and slowly releasing nutrients.
- Middle Layer (4 inches): Add a mix of dried autumn leaves, grass clippings, and kitchen compost scraps.
- Top Layer (3-4 inches): Cap the bed with a mix of bulk topsoil (delivered or bought in bulk bags) and finished compost.
This method cuts your soil purchasing needs in half and creates a biologically active, self-fertilizing ecosystem that mimics the forest floor.
Raised Bed Material Cost Comparison
How does the pallet method stack up against other popular raised bed materials? The table below illustrates the financial and practical differences for a standard 4x8-foot bed configuration.
| Material Type | Estimated Cost (4x8 Bed) | Expected Lifespan | Toxicity / Safety Risk |
|---|---|---|---|
| Reclaimed HT Pallets | $40 - $60 | 3 - 5 Years | None (if HT stamped) |
| Untreated Cedar | $250 - $350 | 10 - 15 Years | None |
| Galvanized Steel Kits | $120 - $180 | 15 - 20 Years | Low (Zinc leaching over time) |
| Composite / Recycled Plastic | $300 - $450 | 20+ Years | None |
| Pressure-Treated Pine | $100 - $140 | 10 - 15 Years | High (Copper/Arsenic leaching) |
Sealing and Maintaining Your Pallet Bed
Pallet wood is generally made from oak or pine and is not naturally rot-resistant like cedar. To extend the life of your budget raised bed without introducing toxic chemical sealants, treat the exterior wood with raw linseed oil. Raw linseed oil is a natural, plant-based preservative that repels moisture and protects against UV damage. Avoid 'boiled' linseed oil, which contains metallic drying agents that are not safe for organic gardening.
Apply a generous coat of raw linseed oil with a rag to the exterior walls once a year in early spring before planting. With proper soil layering, annual sealing, and careful material selection, your DIY pallet raised beds will provide a beautiful, high-yielding foundation for your garden for years to come, proving that exceptional gardening results do not require an exceptional budget.

