
Gardening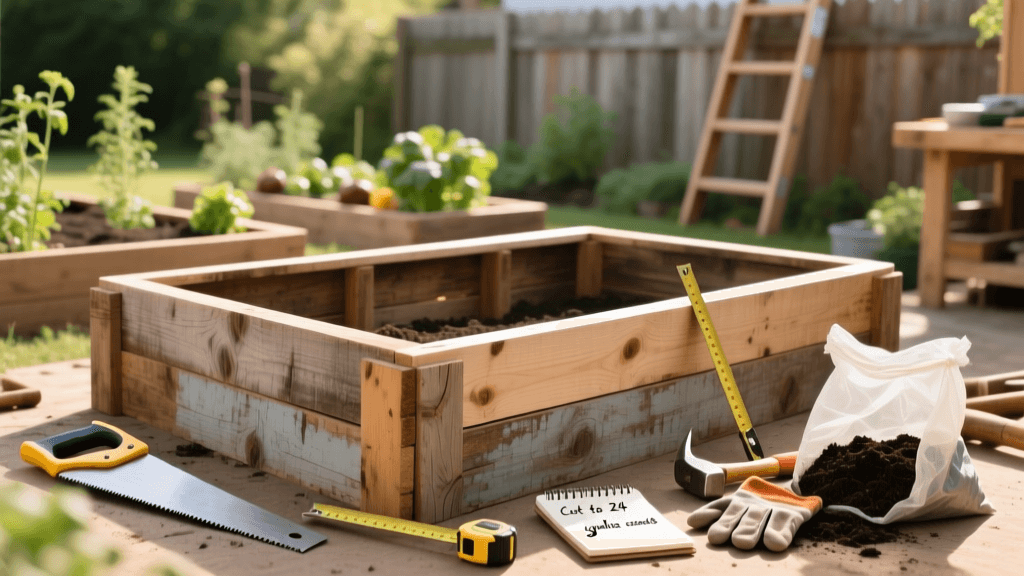
Budget-Friendly DIY Raised Garden Beds Using Reclaimed Wood
The True Cost of Raised Bed Gardening
Raised garden beds are the cornerstone of a productive, organized, and accessible home garden. They offer superior drainage, warmer soil in the spring, and an effective barrier against many ground-dwelling pests. However, the initial investment can be staggering. A standard 4x8 foot cedar or composite raised bed kit from a big-box home improvement store typically costs between $150 and $350. If you are planning a multi-bed garden, these expenses multiply rapidly, turning a budget-friendly hobby into a significant financial burden.
Fortunately, there is a highly effective, sustainable, and incredibly cheap alternative: building your own raised beds using reclaimed wood and shipping pallets. By sourcing free or low-cost materials and putting in a little elbow grease, you can construct durable, beautiful raised beds for a fraction of the retail price. This guide will walk you through the entire process, from safely sourcing materials to assembling and filling your new garden beds on a strict budget.
Why Choose Reclaimed Wood?
Using reclaimed lumber or pallet wood for your garden beds offers several distinct advantages beyond just saving money. First, it is an environmentally sustainable choice. By repurposing wood that might otherwise end up in a landfill or be chipped into mulch, you are reducing your carbon footprint. Second, reclaimed wood often possesses a rustic, weathered charm that new, uniform lumber simply cannot replicate. It adds instant character and a farmhouse aesthetic to your outdoor space. Finally, the physical act of dismantling and building the beds yourself provides a deep sense of accomplishment and connection to your garden before you even plant a single seed.
Crucial Safety Warning: Identifying Safe Wood
Not all reclaimed wood is safe for growing edible plants. This is the most critical step in your budget-friendly DIY project. You must avoid wood treated with toxic chemicals that can leach into your soil and be absorbed by your vegetables.
Understanding Pallet Stamps
When sourcing shipping pallets, you must look for the IPPC (International Plant Protection Convention) stamp burned into the wood. This stamp tells you how the wood was treated to prevent the spread of invasive insects.
- HT (Heat Treated): This is the gold standard for garden use. The wood was heated to a specific temperature to kill pests without the use of chemicals. Always choose HT pallets.
- KD (Kiln Dried): Similar to heat-treated, this wood was dried in a kiln and is safe for gardening.
- MB (Methyl Bromide): This is a highly toxic pesticide and fungicide. Never use MB-stamped pallets for any garden project, especially those involving edible crops.
- Unmarked Pallets: If a pallet has no stamp, its origin and treatment history are unknown. It is best to err on the side of caution and avoid them.
Other Woods to Avoid
Avoid using old railroad ties, which are heavily treated with creosote, a known carcinogen. Additionally, avoid pressure-treated lumber manufactured before 2004, which often contains Chromated Copper Arsenate (CCA). According to the University of Maryland Extension, while modern pressure-treated wood (using ACQ or copper azole) is considered safer for garden use by the EPA, many organic gardeners still prefer to avoid it entirely in favor of natural, untreated, or heat-treated woods.
Pro Tip: If you are unsure about the safety of a piece of reclaimed wood, use it only for ornamental flower beds, or line the inside of your raised bed with a heavy-duty, food-safe polyethylene plastic barrier (not PVC) to prevent direct contact between the wood and the soil.
Tools and Materials Needed (Under $50)
To keep this project strictly budget-friendly, we assume you have access to basic hand tools or can borrow them from a neighbor or local tool library. Here is what you need to build one 4x8 foot raised bed.
Materials
- Reclaimed Wood: 2 to 3 heat-treated (HT) shipping pallets, or rough-cut untreated cedar/fir from a local sawmill (often sold cheaply as "cull" or "rough" lumber).
- Fasteners: 1 box (1 lb) of #9 3-inch exterior-grade deck screws (approx. $8).
- Corner Braces: 4 pieces of scrap 4x4 wood (offcuts from a local carpenter or hardware store) cut to 10-inch lengths, or heavy-duty steel mending plates.
- Weed Barrier: Plain, uncoated brown cardboard (free from appliance or grocery stores).
Tools
- Circular saw or reciprocating saw (for dismantling pallets)
- Power drill with a Phillips head bit and a pilot-hole drill bit
- Tape measure and carpenter's square
- Crowbar or heavy-duty pry bar
- Safety glasses and heavy leather work gloves
Step-by-Step Construction Guide
Step 1: Dismantling the Pallets
Dismantling pallets can be labor-intensive. Put on your safety glasses and gloves. Use a reciprocating saw with a metal-cutting blade to cut through the nails holding the deck boards to the stringers. This is much faster and results in less broken wood than trying to pry them apart with a crowbar. Once you have your deck boards, remove any protruding nails or staples using the claw of a hammer or pliers.
Step 2: Cutting to Size
A standard raised bed is 4 feet wide by 8 feet long. This width ensures you can reach the center of the bed from either side without stepping on the soil, which prevents compaction. Cut your reclaimed boards to 8-foot lengths for the long sides and 4-foot lengths for the short ends. If your pallet boards are only 4 feet long, you will need to join them together using scrap wood on the inside of the bed to create the 8-foot span.
Step 3: Assembling the Frame
Lay your boards out on a flat, level surface like a driveway or patio. Position your 10-inch scrap 4x4 corner braces at the inside corners. Drill pilot holes through the long boards into the corner braces, then drive your 3-inch exterior deck screws in. Attach the 4-foot end boards to the corner braces in the same manner. For a standard 11-inch deep bed, you will likely stack two layers of boards. Ensure the seams of the top layer overlap the seams of the bottom layer for structural integrity.
Step 4: Site Preparation and Placement
Choose a location that receives at least 6 to 8 hours of direct sunlight daily. Clear the area of large rocks and debris. Level the ground as best as you can using a shovel and a rake. Lay down overlapping sheets of brown cardboard directly over the grass or weeds inside the bed's footprint. The cardboard will smother existing vegetation and eventually break down, adding organic matter to the soil while allowing earthworms to travel freely between the ground and your bed.
Cost Comparison: DIY Reclaimed vs. Store-Bought
To truly understand the value of this DIY approach, let us compare the costs of building a standard 4x8 foot raised bed (approx. 11 inches deep) using different methods. As highlighted by the Oregon State University Extension, the initial infrastructure is often the highest barrier to entry for new gardeners.
| Bed Type | Material Cost | Hardware/Fasteners | Estimated Total Cost | Durability (Years) |
|---|---|---|---|---|
| Premium Cedar Kit (Retail) | $180.00 - $250.00 | Included | $180.00 - $250.00 | 10 - 15 |
| Composite/Plastic Kit | $200.00 - $350.00 | Included | $200.00 - $350.00 | 20+ |
| New Untreated Pine (Hardware Store) | $40.00 - $60.00 | $15.00 | $55.00 - $75.00 | 3 - 5 |
| DIY Reclaimed HT Pallets | $0.00 - $10.00 | $10.00 | $10.00 - $20.00 | 5 - 8 |
By utilizing reclaimed pallets, you save upwards of $200 per bed. Even if you factor in the cost of a new saw blade and a few hours of your own labor, the financial return on investment is undeniable.
Filling Your Bed on a Budget: The Hugelkultur Method
Building the bed is only half the battle; filling a 4x8x1 foot raised bed requires approximately 32 cubic feet of soil. Buying bags of premium raised bed mix from the garden center can cost $150 or more per bed. To maintain your budget-friendly approach, utilize a modified Hugelkultur (hill culture) method to fill the bottom half of your bed for free.
Layering Guide
- Bottom Layer (4-5 inches): Fill the bottom with rotting logs, thick branches, and twigs gathered from your yard. This wood will slowly decompose, acting like a sponge to retain moisture and providing long-term nutrients.
- Middle Layer (3-4 inches): Add a mix of fall leaves, grass clippings, straw, or composted manure sourced from local farms (often available for free or very cheap).
- Top Layer (3-4 inches): Fill the remaining top section with a high-quality mix of topsoil and compost. This is where your plant roots will live during the first season. You can buy topsoil and compost in bulk from a local landscape supply yard for a fraction of the cost of bagged soil.
According to The Old Farmer's Almanac, layering organic matter in this way not only saves money but also creates a rich, biologically active soil ecosystem that improves year over year, reducing the need for synthetic fertilizers.
Conclusion
Gardening should not require a second mortgage. By taking the time to source heat-treated reclaimed pallets, carefully dismantling them, and utilizing natural yard waste to fill your beds, you can create a thriving, productive vegetable garden on a shoestring budget. The physical effort required to break down pallets and haul branches is a small price to pay for the thousands of dollars you will save over the lifespan of your garden, all while keeping perfectly good materials out of the landfill.

