
Gardening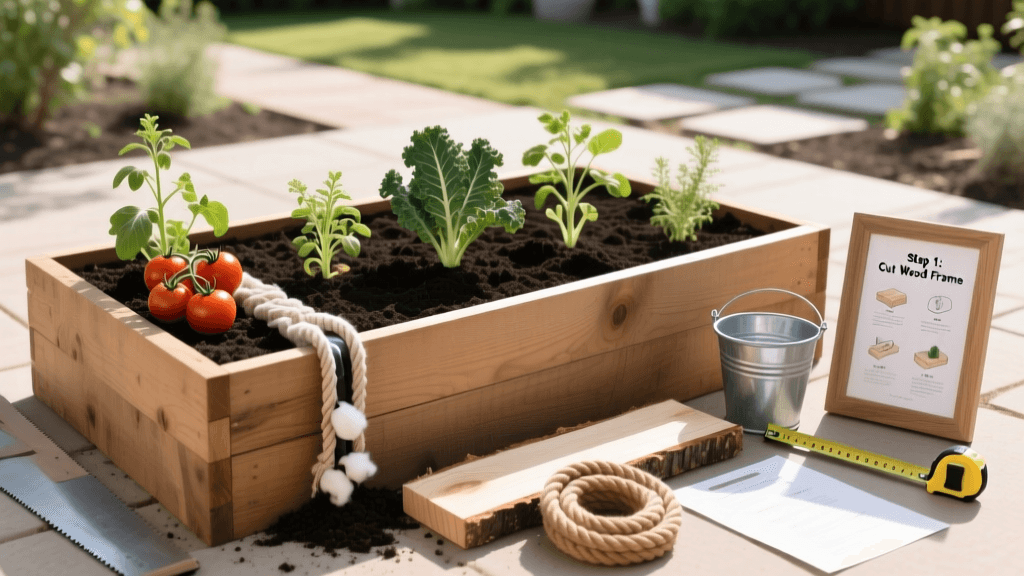
Build a Wicking Raised Bed for Drought-Resilient Gardens
The Ultimate Water-Wise Solution: Wicking Raised Beds
As climate patterns shift and summer droughts become more severe, home gardeners are increasingly searching for sustainable ways to grow food without exhausting municipal water supplies. Traditional raised beds, while excellent for drainage and soil control, are notoriously inefficient when it comes to water retention. The loose, aerated soil that makes raised beds great for root growth also causes water to evaporate and drain away rapidly, often requiring daily watering during peak summer heat.
Enter the wicking raised bed: a revolutionary, water-wise gardening system that utilizes capillary action to deliver moisture directly to plant roots from a hidden underground reservoir. According to the EPA WaterSense program, outdoor water use can account for up to 30% of total household water consumption, with a significant portion lost to evaporation and runoff. Wicking beds virtually eliminate both issues, reducing outdoor water usage by up to 80% compared to conventional top-watering methods.
How Capillary Action Saves Water
The science behind a wicking bed is simple but highly effective. At the base of the raised bed, a waterproof liner holds a reservoir of water and gravel. A permeable geotextile fabric separates this reservoir from the soil above. As the soil dries out, capillary action—the same physical process that allows water to move up the trunk of a tree—draws moisture upward from the reservoir through the fabric and into the soil matrix. This ensures that water is only used when the plants actually need it, and because the surface soil remains relatively dry, weed seeds struggle to germinate and fungal diseases are drastically reduced.
Materials and Tools Required
Building a standard 4-foot by 8-foot wicking bed requires an initial investment, but the long-term savings on water bills and plant replacement make it highly cost-effective. Expect to spend between $350 and $500 depending on material choices. The Colorado State University Extension recommends a depth of at least 18 to 24 inches for raised beds to accommodate deep-rooted vegetables; for a wicking bed, this depth is mandatory to allow room for both the water reservoir and the soil column.
- Frame Materials: 4x8 ft untreated cedar, redwood, or composite boards (18-24 inches deep). (Cost: ~$150)
- Waterproof Liner: 45-mil EPDM pond liner or heavy-duty polyethylene (10x14 ft to allow for overlap). (Cost: ~$70)
- Reservoir Aggregate: 1/2-inch crushed gravel or pea gravel (approx. 25 cubic feet for a 12-inch reservoir). (Cost: ~$100)
- Separation Layer: Non-woven geotextile landscape fabric (8x10 ft). (Cost: ~$25)
- Fill Tube: 4-inch diameter PVC pipe (3 ft length) with a removable cap to prevent mosquito breeding. (Cost: ~$20)
- Overflow Pipe: 1-inch PVC or flexible tubing to prevent waterlogging the soil layer. (Cost: ~$10)
- Soil Mix: High-quality wicking soil blend (approx. 40 cubic feet). (Cost: ~$120)
Step-by-Step Construction Guide
Step 1: Site Preparation and Leveling
Unlike traditional beds, a wicking bed must be perfectly level. If the ground is sloped, the water reservoir will pool at one end, leaving the other end dry and potentially drowning the plants on the lower side. Use a long spirit level and a tamper to create a flat, compacted base. Remove any sharp rocks or roots that could puncture the liner.
Step 2: Build and Line the Frame
Assemble your wooden or composite frame. Once placed in its final location, drape the EPDM pond liner over the entire structure, pressing it firmly into the corners and against the walls. Allow the excess liner to hang over the outside edges (you will trim this later). Do not staple or nail through the bottom of the liner, as any hole will compromise the water reservoir.
Step 3: Install the Overflow Pipe
Determine where the top of your gravel reservoir will sit (usually 12 inches from the bottom). Exactly two inches below this line, punch a hole through the liner and the wooden frame. Insert your 1-inch overflow pipe. This critical step ensures that heavy rainfall cannot flood the soil zone; excess water will simply drain out of the overflow pipe.
Step 4: Add the Fill Tube and Gravel Reservoir
Stand the 4-inch PVC fill tube vertically in one corner of the bed, ensuring its bottom rests on the liner. Fill the bed with your 1/2-inch gravel to a depth of 12 inches, keeping the gravel level. The fill tube allows you to easily insert a hose directly into the reservoir without disturbing the soil above.
Step 5: Lay the Geotextile Barrier and Fill with Soil
Drape the non-woven geotextile fabric over the gravel layer, tucking it slightly up the sides. This fabric allows water to pass through but prevents soil particles from migrating down into the gravel, which would eventually clog the reservoir. Finally, fill the remaining 12 to 18 inches of the bed with your wicking soil mix. Water the soil heavily from the top once to initiate the capillary connection, then switch to filling the reservoir via the PVC tube.
Comparison: Wicking Bed vs. Traditional Raised Bed
| Feature | Wicking Raised Bed | Traditional Raised Bed |
|---|---|---|
| Watering Frequency (Peak Summer) | Every 2 to 4 weeks | Every 1 to 3 days |
| Water Loss to Evaporation | Near Zero | High |
| Weed Germination Rate | Low (dry surface soil) | High (frequent surface moisture) |
| Initial Setup Cost | High ($350 - $500) | Moderate ($150 - $250) |
| Fungal Disease Risk | Low | Moderate to High |
The Ideal Soil Mix for Capillary Action
You cannot use heavy garden topsoil or clay in a wicking bed; it will compact, suffocate roots, and fail to wick moisture evenly. The Texas A&M AgriLife Extension emphasizes the vital role of organic matter in retaining soil moisture while maintaining structure. For a wicking bed, you need a mix that holds water like a sponge but remains structurally light.
The Ultimate Wicking Soil Recipe:
- 40% High-Quality Compost: Provides nutrients and excellent moisture retention.
- 30% Coconut Coir or Peat Moss: Acts as the primary capillary wick, drawing water upward efficiently.
- 20% Coarse Vermiculite or Perlite: Ensures aeration and prevents the soil from becoming waterlogged.
- 10% Worm Castings and Mineral Amendments: Adds slow-release fertility and essential trace minerals.
Best Crops for Wicking Beds
Because the bottom few inches of the soil profile will remain consistently moist, wicking beds are ideal for heavy-feeding, deep-rooted crops that typically suffer from blossom end rot or drought stress. Tomatoes, peppers, eggplants, and zucchini thrive in this environment. Leafy greens like kale, Swiss chard, and spinach also benefit from the consistent moisture, which prevents them from bolting prematurely in the heat.
Avoid planting shallow-rooted Mediterranean herbs like rosemary, lavender, or thyme in a wicking bed, as they prefer to dry out completely between waterings and may succumb to root rot in the consistently humid lower soil layers.
Seasonal Maintenance and Winterization
A properly built wicking bed can go weeks without rainfall or manual watering, making it the ultimate tool for drought resilience and low-maintenance gardening.
To maintain your wicking bed, flush the reservoir once a year in early spring. Run a hose down the PVC fill tube until water flows out of the overflow pipe, clearing out any accumulated mineral salts or anaerobic buildup. In late autumn, after the first frost, drain the reservoir completely by removing the overflow pipe cap or using a submersible pump. Leaving the reservoir full during freezing winter temperatures can cause the water to expand, potentially cracking your wooden frame or tearing the EPDM liner.
Top-dress the bed with 2 inches of fresh compost and a layer of organic mulch (like straw or shredded leaves) before winter. This protects the soil structure, feeds the microbial life, and ensures your drought-resilient garden is ready to explode with growth the moment spring arrives.

