
Landscaping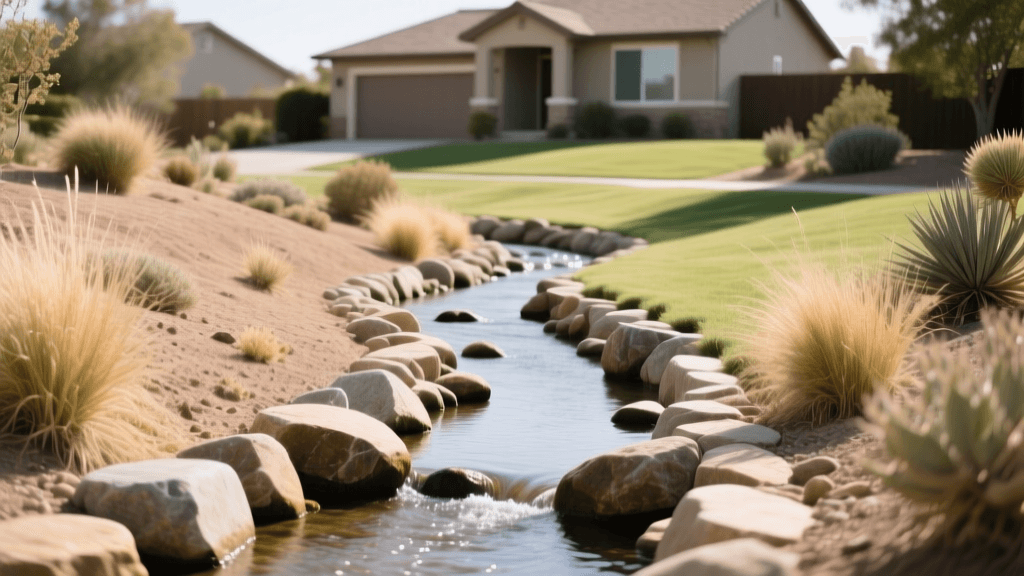
Designing a Dry Creek Bed for Landscape Drainage
The Dual Purpose of Dry Creek Beds in Landscape Design
Water pooling in your yard after a heavy rainstorm is not just a nuisance; it is a direct threat to your home's foundation, your hardscaping, and your lawn's root system. While traditional drainage solutions like corrugated pipes or concrete channels are highly functional, they often detract from the visual appeal of your landscape. Enter the dry creek bed: a brilliant landscape design feature that seamlessly merges essential water management with stunning natural aesthetics.
A dry creek bed is essentially a shallow, meandering trench lined with landscape fabric and filled with varying sizes of natural stone, river rock, and boulders. During dry spells, it serves as a beautiful focal point that mimics a natural, dried-up streambed, adding texture and curb appeal to your property. However, when heavy rains hit, it transforms into a highly effective channel that captures surface runoff, slows down water velocity, and safely directs excess moisture away from vulnerable areas of your yard.
Planning a dry creek bed requires a careful balance of hydrology and landscape architecture. You must consider the volume of water your yard collects, the natural topography of your property, and the surrounding softscaping. In this comprehensive guide, we will walk you through the design principles, material selection, and step-by-step planning required to build a dry creek bed that solves your drainage woes while elevating your outdoor living space.
Dry Creek Bed vs. French Drain: Choosing the Right Solution
Before breaking ground, it is crucial to determine if a dry creek bed is the correct tool for your specific drainage problem. Homeowners often confuse dry creek beds with French drains, but they serve distinctly different purposes in landscape planning.
A French drain is a subsurface drainage system consisting of a perforated pipe surrounded by gravel, designed to intercept and redirect groundwater and subsurface water. It is entirely hidden beneath the soil. A dry creek bed, on the other hand, is a surface drainage solution designed to manage stormwater runoff, rain gutter downspout discharge, and surface pooling.
Comparison Chart: Dry Creek Bed vs. French Drain
| Feature | Dry Creek Bed | French Drain |
|---|---|---|
| Primary Function | Surface water runoff management | Subsurface groundwater redirection |
| Visual Impact | High; adds natural hardscape beauty | None; completely buried |
| Installation Cost | $5 to $15 per linear foot | $20 to $30+ per linear foot |
| Maintenance | Clearing debris, resetting rocks | Flushing pipes, checking for clogs |
| Best Used For | Slopes, downspout runoff, swales | Soggy lawns, retaining wall bases |
Planning the Route and Calculating Slope
The success of your dry creek bed hinges entirely on proper route planning and slope calculation. Water is lazy; it will always take the path of least resistance. Your goal is to create an artificial path that is more inviting than your lawn or garden beds.
Start by observing your yard during a heavy rainstorm. Take note of where the water originates, how it flows, and where it naturally pools. Your dry creek bed should begin at the primary source of the runoff—such as a downspout or a low-lying swale—and terminate at a safe discharge area, such as a municipal storm drain, a dry well, or a heavily wooded area on your property where excess water can safely percolate into the soil without causing erosion.
The 1% Rule for Drainage Slope
For water to flow consistently through your creek bed without pooling in the trench, you must maintain a minimum slope of 1%. This means the trench must drop 1 inch in elevation for every 10 feet of horizontal distance. If your yard is exceptionally flat, you may need to increase the slope to 2% (a 2-inch drop per 10 feet) or widen the trench to accommodate slower-moving water.
To measure this during the planning phase, drive a wooden stake at the starting point and another at the termination point. Tie a mason line between the two stakes and attach a line level to the string. Adjust the string until the bubble is perfectly centered, then measure the distance from the string down to the ground at the termination point to calculate your natural grade. If the natural grade is insufficient, you will need to dig deeper at the termination point or build up the starting point with compacted soil.
Material Selection and Cost Breakdown
A natural-looking dry creek bed relies on a diverse mix of stone sizes. Using only one size of gravel will make the feature look like a driveway rather than a natural streambed. You will need large anchor boulders, medium cobbles for the banks, and smaller river rock for the main channel.
Estimated Costs and Material Requirements
| Material | Size / Specification | Purpose | Estimated Cost |
|---|---|---|---|
| Woven Geotextile Fabric | 4 oz to 6 oz weight | Weed suppression and soil stabilization | $0.50 - $0.80 per sq. ft. |
| Fieldstone / Boulders | 12 to 24 inches | Anchoring edges, creating visual flow | $150 - $250 per ton |
| River Cobble | 1 to 3 inches | Transition zones and bank edging | $90 - $130 per ton |
| River Rock | 3 to 5 inches | Main channel bed, slows water flow | $80 - $120 per ton |
| Landscape Pins | 6-inch steel U-pins | Securing fabric to the trench base | $15 per 50-pack |
Step-by-Step Installation Guide
Step 1: Trenching and Shaping
Mark the boundaries of your creek bed using landscaping spray paint. Aim for a width of 3 to 4 feet, but allow the width to vary slightly to mimic nature. Dig the trench to a depth of 12 to 18 inches. Crucially, do not dig a flat-bottomed, V-shaped trench. Instead, carve a shallow, U-shaped profile with a deeper, narrower channel running through the center. This inner channel will guide low-volume water flow, while the wider, shallower outer benches will handle heavy storm surges.
Step 2: Laying the Geotextile Fabric
Line the entire trench with heavy-duty woven geotextile fabric. Avoid cheap, non-woven plastic sheeting, as it will trap water, tear easily, and kill beneficial soil microbes. Overlap the fabric seams by at least 6 inches and extend the fabric a full 12 inches beyond the edges of the trench onto the surrounding soil. Secure the fabric tightly against the soil using 6-inch steel landscape pins spaced every 3 feet.
Step 3: Placing Boulders and Cobble
Before adding the smaller rock, place your large anchor boulders. Bury the bottom third of each boulder in the soil or rest them securely on the fabric so they look like natural outcroppings rather than rocks dropped on the surface. Place them in clusters of odd numbers (groups of three or five) along the outer bends of the creek bed to simulate natural erosion patterns. Follow up by lining the immediate edges of the trench with the 1-3 inch river cobble to create a transitional border.
Step 4: Filling with River Rock
Fill the main channel and the surrounding benches with the 3-5 inch river rock to a depth of 2 to 3 inches. Do not overfill the trench; the rocks should sit slightly below the surrounding soil grade to ensure surface water easily spills into the creek bed rather than flowing around it. Rake the rocks into varied, undulating patterns to break up water tension and create a natural, randomized appearance.
Softscaping the Banks: Plant Selection for Erosion Control
A dry creek bed is only half of the design equation. The softscaping along the banks is what truly integrates the hardscape into your overall landscape design. Plants serve a dual purpose here: their root systems stabilize the soil to prevent trench collapse, and their foliage softens the harsh edges of the stone.
When selecting plants, choose species that can tolerate both periods of drought and temporary inundation. For the upper banks that stay relatively dry, use deep-rooted ornamental grasses like Karl Foerster Feather Reed Grass (Calamagrostis x acutiflora) or Prairie Dropseed (Sporobolus heterolepis). These grasses add vertical movement and thrive in full sun. For the lower banks and inner curves that will see frequent water flow, opt for moisture-loving perennials such as Ostrich Fern (Matteuccia struthiopteris), Astilbe, and Japanese Iris (Iris ensata). To spill over the edges of the rocks and soften the hardscape lines, plant Creeping Jenny (Lysimachia nummularia) or Blue Star Creeper (Isotoma fluviatilis).
Long-Term Maintenance and Care
While dry creek beds are remarkably low-maintenance compared to traditional lawns, they are not entirely maintenance-free. Over time, wind-blown soil, decaying leaves, and organic debris will settle between the rocks, eventually creating a medium for weed seeds to germinate. Furthermore, heavy sediment buildup can reduce the permeability of the trench and hinder water flow.
To maintain your dry creek bed, use a leaf blower on a low setting to clear autumn leaves and organic debris before they have a chance to decompose into the rock crevices. For weeds that do manage to take root, avoid using harsh chemical herbicides that will wash into your local watershed during the next rainstorm. Instead, hand-pull weeds or apply a targeted, organic horticultural vinegar solution directly to the weed foliage. Every three to five years, you may need to rent a high-pressure water hose to flush out accumulated silt from the river rock, or manually rake the stones to expose the clean, washed surfaces beneath.
According to the University of Minnesota Extension, integrating surface drainage features like dry creek beds and rain gardens is a critical component of sustainable landscaping. 'By slowing down runoff and allowing it to infiltrate the soil, homeowners can significantly reduce the volume of pollutants, such as fertilizers and pesticides, that ultimately end up in local lakes and rivers.' Properly planned hardscaping not only protects your property but also supports local watershed health.
By carefully planning your route, calculating the proper slope, and selecting a diverse array of natural stones and resilient plants, you can transform a problematic, soggy yard into a stunning landscape feature. A well-designed dry creek bed proves that practical drainage solutions and exceptional curb appeal can coexist beautifully in any outdoor space.

