
Tree Care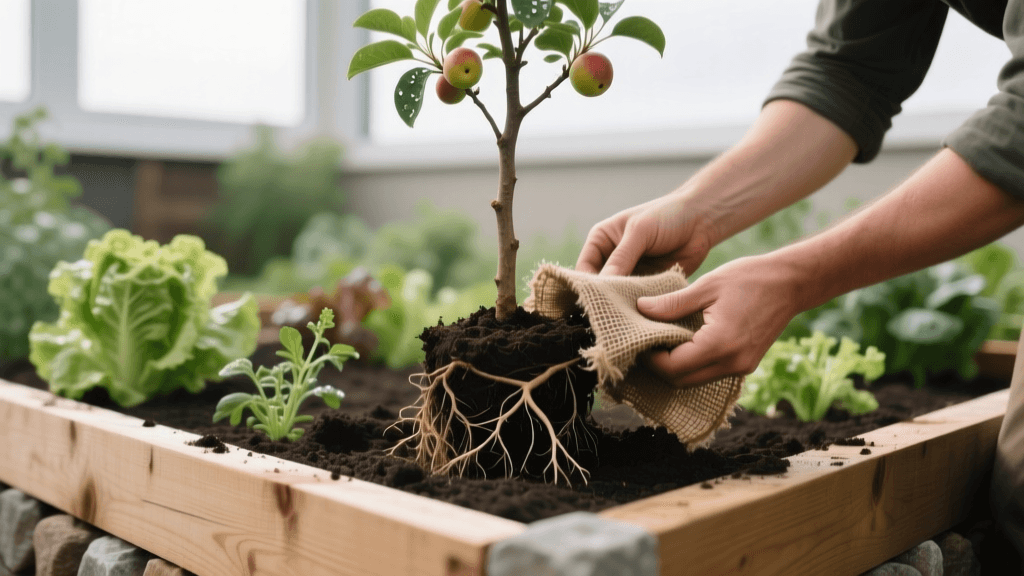
2026 Tree Root Ball Prep & Burlap Removal for Raised Beds
The 2026 Trend: Integrating Trees into Raised Bed Vegetable Gardens
In recent years, and particularly as we move through the 2026 growing season, urban homesteaders and permaculture enthusiasts have increasingly embraced the integration of dwarf fruit trees directly into or immediately adjacent to raised bed vegetable gardens. This space-saving technique maximizes yields, creates beneficial microclimates, and utilizes the superior drainage of raised beds. However, planting a balled-and-burlapped (B&B) tree into a raised vegetable bed presents unique challenges that traditional ground-planting does not. The most critical of these challenges is proper root ball preparation and complete burlap removal.
When you plant a tree in a standard landscape bed, roots eventually spread into the surrounding native soil. In a raised bed vegetable garden, the soil profile is entirely different. Raised beds are typically filled with a loose, highly aerated mix of compost, peat or coco coir, and vermiculite. If a tree's root ball is not properly prepared and the burlap is not completely removed, the tree roots will fail to penetrate the interface between the raised bed soil and the native ground below. Worse, the roots may circle within the bed, competing aggressively with your shallow-rooted vegetables like tomatoes, peppers, and leafy greens, ultimately stunting your entire garden's harvest.
Why Root Ball Preparation is Critical in Raised Beds
According to the University of Minnesota Extension, failing to remove burlap and wire baskets from B&B trees is a leading cause of transplant failure and root girdling. In the context of a raised bed, this risk is magnified. The loose soil of a vegetable bed offers zero resistance to roots, meaning any circling roots caused by left-behind burlap or twine will rapidly expand, choking the tree's vascular system and creating a dense mat that blocks water from reaching the deeper native soil.
Furthermore, synthetic burlap—which has become increasingly common in commercial nursery stock as of 2026—will not decompose. If left in the raised bed, it acts as a moisture barrier, creating a dry pocket around the root ball while the surrounding vegetable bed soil remains wet. This discrepancy leads to severe transplant shock and localized root rot.
Identifying Your Burlap: Natural vs. Synthetic
Before you begin planting, you must identify the type of burlap wrapping your tree's root ball.
- Natural Burlap: Usually a tan or brown color with a loose, fibrous weave. It feels rough and organic. While some older gardening guides suggest you can leave natural burlap in the ground, modern arboriculture standards dictate that it should always be removed, especially in raised beds where soil biology and moisture dynamics are highly managed.
- Synthetic Burlap: Often slightly shiny, with a tighter weave, and sometimes treated with a green or blue dye. It feels plasticky to the touch and will not melt or burn like natural fibers if you hold a lighter to a loose thread (it will melt into a hard bead). This must be 100% removed to prevent permanent root girdling and soil contamination.
Tools Needed for 2026 Raised Bed Tree Planting
To properly prepare a root ball and remove burlap without damaging the tree or your raised bed infrastructure, gather the following tools:
- Heavy-duty tarp (to catch soil and protect your vegetable bed paths)
- Bolt cutters or lineman's pliers (for cutting wire baskets)
- Sharp utility knife or heavy-duty landscaping shears
- Hand trowel and a root-washing bucket or gentle hose nozzle
- Mycorrhizal fungi inoculant (highly recommended for 2026 soil interfaces)
Step-by-Step Burlap Removal and Root Ball Prep
Step 1: Positioning and Depth Check
Before cutting anything, place the tree in the dug-out hole within your raised bed. The hole should be twice as wide as the root ball but no deeper. The most crucial metric is the root flare (where the trunk widens into the roots). In a raised bed, the root flare must sit slightly above the surrounding bed soil level to account for settling. If the tree is planted too deep in a raised bed, the loose soil will suffocate the trunk base, inviting fungal pathogens.
Step 2: Wire Basket and Twine Removal
Once depth is verified, use your bolt cutters to snip the vertical wires of the basket. Do not attempt to pull the entire basket out from under the heavy root ball, as this can cause the root ball to fracture and snap vital anchor roots. Instead, cut the basket away in sections. Next, locate the thick twine tied tightly around the trunk base. This twine is often hidden beneath the folded burlap. Cut and remove all twine; leaving it will strangle the tree as the trunk expands over the next few growing seasons. The Arbor Day Foundation emphasizes that removing all binding materials is non-negotiable for long-term tree health.
Step 3: Burlap Extraction
Using your utility knife, carefully slice the burlap from the top of the root ball down to the base. Peel the burlap back gently. If the root ball is stable, pull the burlap completely out from underneath. If the soil begins to crumble, leave the very bottom piece of natural burlap temporarily, but slice it into a grid pattern to allow roots to escape. If it is synthetic burlap, you must meticulously slide it out from the bottom, even if it requires two people to gently tilt the root ball.
Step 4: Root Shaving and Teasing
Once the burlap is gone, inspect the outer edges of the root ball. B&B trees often have circling roots from their time in nursery grow-bags before being balled. Use a sharp hori-hori knife or pruning shears to shave off the outer 1/2 inch of the root ball. This 'root pruning' stimulates new, outward-growing feeder roots that will push into your raised bed soil and down into the native earth below, rather than continuing to circle.
Soil Interface and Drainage Considerations
When backfilling the hole around the prepared root ball, do not use the heavy native soil you dug out from beneath the raised bed. Instead, use the same soil mix that fills the rest of your raised vegetable bed. This prevents the 'textural interface' problem, where water refuses to move from one soil type to another. However, because vegetable bed soil is so rich in nitrogen, you must balance the nutrient profile. High nitrogen promotes leafy green growth at the expense of fruit production and winter hardiness in fruit trees.
| Planting Factor | Native Ground Planting | Raised Bed Vegetable Garden Planting |
|---|---|---|
| Soil Texture | Variable, often compacted clay or loam | Highly aerated, compost-rich, loose |
| Burlap Removal | Critical to prevent girdling | Absolute necessity to prevent moisture barriers in loose soil |
| Root Competition | Minimal, spread over large area | High, must be directed deep below bed to save vegetables |
| Nutrient Profile | Standard landscape fertilization | Must avoid high-nitrogen vegetable fertilizers near tree zone |
| Watering Needs | Deep, infrequent soaking | Frequent, shallow watering for veggies can drown tree roots if not mounded |
Post-Planting Care for Mixed Beds
After backfilling and watering deeply, apply a 2-inch layer of arborist wood chips around the tree's root zone within the raised bed. Keep this mulch at least 3 inches away from the trunk flare. This mulch ring serves a dual purpose: it retains moisture for the establishing tree and acts as a physical barrier to prevent your aggressive vegetable crops (like squash or cucumbers) from encroaching on the tree's immediate root zone.
In 2026, many advanced gardeners are also utilizing wireless soil moisture sensors placed at two different depths within the raised bed—one at 6 inches (for the vegetables) and one at 18 inches (for the establishing tree roots). This ensures that the frequent, light watering required by your lettuce and radishes does not lead to waterlogged conditions deeper down where the tree's anchor roots are trying to establish themselves in the native soil beneath the bed.
By meticulously preparing the root ball, completely removing all burlap and wire, and managing the unique soil dynamics of a raised vegetable bed, you can successfully integrate productive dwarf fruit trees into your garden layout. This synergy not only saves space but creates a resilient, multi-layered ecosystem that will yield both fresh vegetables and homegrown fruit for decades to come.

