
Landscaping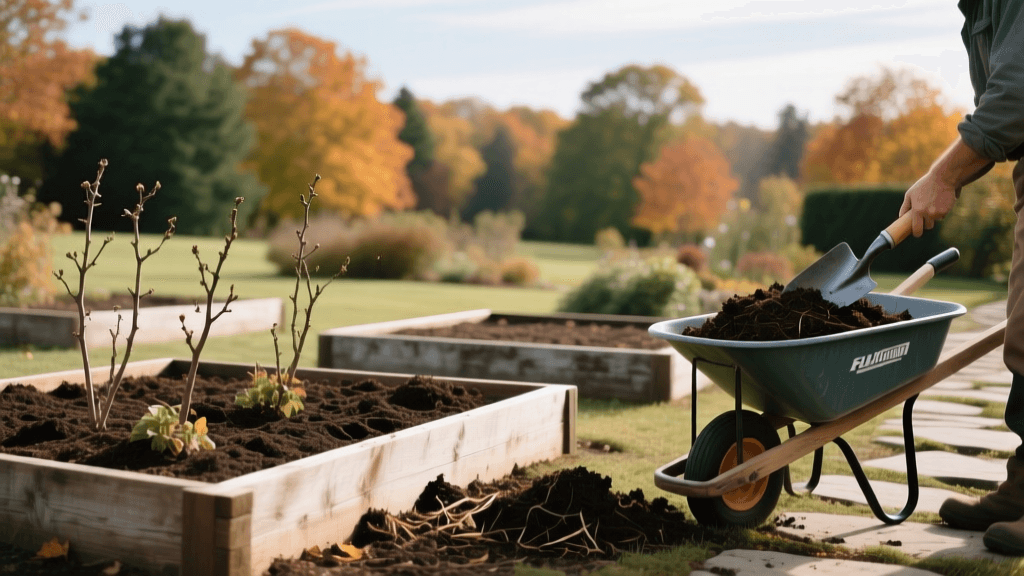
Fall Landscape Bed Maintenance: Mulch and Winterize
The Philosophy of Fall Landscape Health
As autumn leaves begin to fall and the growing season winds down, many homeowners mistakenly believe their landscaping duties are over. In reality, fall is the most critical season for ensuring the long-term health, vitality, and structural integrity of your landscape beds. Seasonal maintenance during the autumn months bridges the gap between the active growth of summer and the dormancy of winter. Proper fall landscape bed maintenance focuses on three core pillars: disease and pest management, soil nutrient restoration, and physical insulation against freezing temperatures. By dedicating a few weekends to strategic winterization, you can prevent costly spring replacements, reduce weed pressure, and promote vigorous early growth when the soil warms again. This comprehensive guide will walk you through the exact steps, products, and timings required to winterize your garden beds like a professional landscaper.
Step 1: Clearing Debris and Managing Pathogens
The first step in fall landscape bed maintenance is a thorough cleanup, but it must be done with an eye toward plant pathology. Fallen leaves and decaying plant matter can harbor overwintering fungal spores and insect eggs. According to the Cornell University Cooperative Extension, leaving diseased foliage in the garden bed is a primary cause of recurring annual infections like powdery mildew, black spot, and botrytis blight.
What to Remove
- Diseased Foliage: Any leaves showing signs of rust, mildew, or spotting must be removed and disposed of in the municipal trash. Do not compost diseased material, as home compost piles rarely reach the 140°F (60°C) required to kill resilient pathogens.
- Annual Weeds: Pull winter annual weeds like henbit and chickweed before they establish deep taproots. Removing them now prevents them from flowering and setting seed in early spring.
- Spent Annuals: Uproot dead summer annuals, including their root systems, to eliminate hiding spots for slugs and snails.
What to Leave Behind
Not all debris should be removed. If your perennials are healthy, consider leaving some seed heads intact. Plants like purple coneflower (Echinacea) and black-eyed Susan (Rudbeckia) provide essential winter forage for birds such as goldfinches and chickadees. Furthermore, leaving a light layer of shredded leaves in naturalized woodland beds mimics forest floor ecology and provides overwintering habitat for beneficial pollinators like native solitary bees and luna moths.
Step 2: Soil Testing and Late-Season Amendments
Winter is a time of dormancy for plants, but soil biology remains active at a reduced rate. Fall is the ideal time to amend your soil because it gives organic matter and minerals several months to break down and integrate before the spring planting rush. Begin by conducting a soil test. You can purchase a basic DIY kit for $15 to $30 or send a sample to your local university extension office for a more comprehensive analysis.
Adjusting pH and Nutrients
Based on your soil test results, you may need to adjust the pH of your landscape beds. If your soil is too acidic (below 6.0) and you are growing plants that prefer neutral soil, apply pelletized lime at the rate recommended by your test—typically around 5 to 10 pounds per 100 square feet. Conversely, if your soil is too alkaline, apply elemental sulfur.
Fall is also the best time to incorporate slow-release organic fertilizers and compost. Top-dressing your beds with a half-inch layer of high-quality organic compost adds essential micronutrients and improves soil structure. Avoid high-nitrogen synthetic fertilizers in the fall; excess nitrogen can stimulate tender new growth that will be immediately killed by the first hard frost, causing severe stress to the plant's vascular system. Instead, look for fertilizers with a higher potassium content (the third number in the N-P-K ratio), such as a 0-0-60 potash or a specialized winterizer blend, which helps plants regulate water and build cellular winter hardiness.
Step 3: Strategic Mulching for Winter Insulation
Mulching is arguably the most visible and impactful fall maintenance task. A proper layer of mulch insulates the soil, preventing the rapid freeze-thaw cycles that can cause frost heaving—a phenomenon where plants are literally pushed out of the ground by expanding ice lenses. However, improper mulching can be just as damaging as no mulch at all.
The Danger of Volcano Mulching
According to the Penn State Extension, piling mulch high against the trunks of trees and the stems of shrubs—a practice known as "volcano mulching"—is highly detrimental. It traps moisture against the bark, leading to fungal cankers, rot, and girdling roots. Furthermore, deep mulch mounds provide a warm, protected winter habitat for voles and mice, which will chew through the bark and sever the plant's vascular cambium. Always practice the "donut method," keeping mulch at least 3 to 4 inches away from the base of woody stems.
Mulch Material Comparison
Choosing the right mulch depends on your aesthetic preferences, budget, and the specific needs of your landscape beds. Below is a comparison of common mulching materials:
| Mulch Type | Insulation Rating | Decomposition Rate | Avg Cost per Cubic Yard | Best Application |
|---|---|---|---|---|
| Shredded Hardwood | High | Medium (1-2 years) | $30 - $45 | General shrub and perennial beds |
| Pine Bark Nuggets | Medium | Slow (2-3 years) | $35 - $50 | Flat beds, slopes (if large nuggets) |
| Pine Straw | High | Fast (6-9 months) | $25 - $40 | Acid-loving plants, slopes |
| Leaf Mold | Very High | Fast (3-6 months) | Free (DIY) | Woodland gardens, soil building |
| Rubber Mulch | Low | None | $60 - $90 | Play areas (Not recommended for plant health) |
Timing and Depth: Do not apply winter mulch too early. Wait until after the first hard freeze (when temperatures drop below 28°F for several hours). Applying mulch while the soil is still warm delays dormancy and can invite rodent nesting. Apply a uniform layer 2 to 4 inches deep. If using fine materials like leaf mold, stick to 2 inches to prevent water runoff and soil suffocation.
Step 4: Pruning Rules: What to Cut and What to Leave
Pruning in the fall requires a nuanced understanding of plant biology and blooming cycles. The general rule of thumb is to avoid heavy pruning of woody shrubs and trees in the autumn. Pruning stimulates new growth, and any late-season flushes will not have time to harden off before winter, resulting in severe dieback.
What to Prune in Fall
- Dead, Damaged, or Diseased Wood: The "Three Ds" can be removed at any time of year. Use sterilized bypass pruners (wiped with 70% isopropyl alcohol between cuts) to remove broken branches that could tear and cause further damage during heavy winter snows.
- Herbaceous Perennials: Plants that die back to the ground, such as hostas, daylilies, and peonies, should be cut down to a height of 2 inches after the first killing frost. This tidies the bed and removes foliage that harbors foliar nematodes and fungal spores.
What to Leave Until Spring
- Spring-Blooming Shrubs: Azaleas, rhododendrons, lilacs, and mophead hydrangeas (Hydrangea macrophylla) set their flower buds in late summer. Pruning them in the fall will remove next year's blooms.
- Ornamental Grasses: Leave grasses like miscanthus and fountain grass standing. Their dried plumes provide beautiful winter interest, catch snow to insulate the crown, and offer shelter for overwintering beneficial insects.
Step 5: Hardscape and Irrigation Winterization
Landscape health extends beyond the plants to the infrastructure that supports them. Water is the enemy of hardscaping in the winter. When moisture penetrates cracks in pavers, retaining walls, or stone veneers and subsequently freezes, it expands by up to 9%, causing severe spalling, cracking, and structural failure.
Hardscape Protection
Inspect all landscape bed borders, stone walls, and paver edges. Fill any gaps in mortar or polymeric sand. Apply a high-quality, breathable siloxane-based masonry sealer to natural stone and concrete retaining walls. This sealer penetrates the pores and repels liquid water while allowing water vapor to escape, preventing the freeze-thaw damage that plagues unsealed hardscapes. Expect to pay around $40 to $60 per gallon of sealer, which typically covers 150 to 200 square feet.
Irrigation Blow-Outs
If your landscape beds are equipped with drip irrigation or sprinkler zones, they must be winterized. Simply draining the system is rarely sufficient, as low spots in the PVC or polyethylene piping will trap water. Hire a professional to perform an irrigation blow-out using an industrial air compressor. The compressor should be regulated to 50 to 80 PSI (never exceeding the pipe's pressure rating) to force all residual water out through the emitters and sprinkler heads. Professional blow-out services typically cost between $75 and $150 for a standard residential system, a small price to pay compared to the hundreds of dollars required to replace burst underground pipes and shattered valve manifolds in the spring.
Conclusion
Effective fall landscape bed maintenance is an investment in the future vitality of your outdoor spaces. By systematically clearing pathogens, amending the soil based on scientific testing, applying mulch with precision, pruning selectively, and protecting your hardscape infrastructure, you fortify your landscape against the harsh realities of winter. When spring finally arrives, your landscape beds will emerge healthy, structurally sound, and perfectly primed for a vibrant season of growth.

