
Tree Care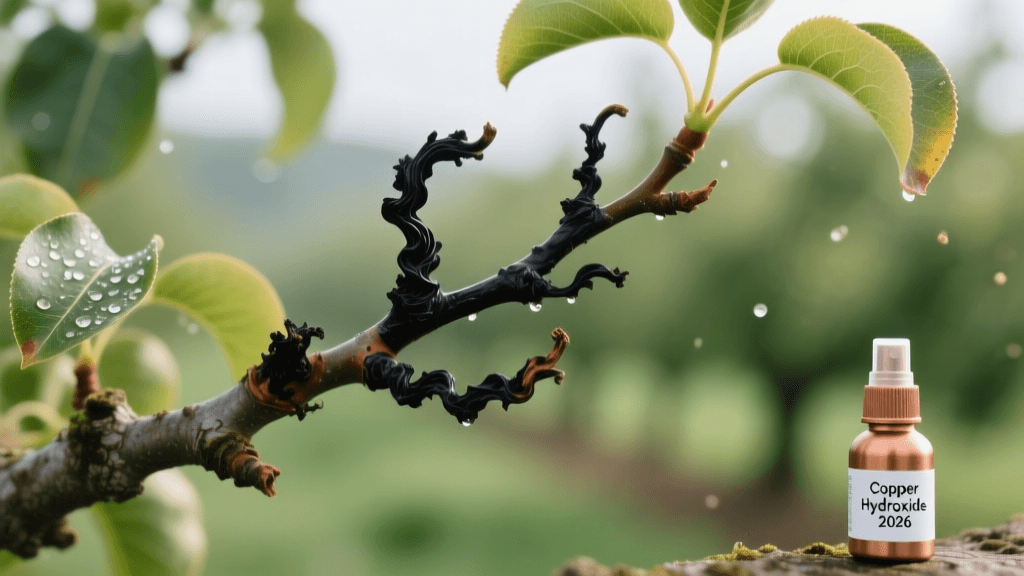
Fire Blight Photo Guide & Copper Spray Prevention 2026
The Intersection of Tree Care and Garden Documentation
As we navigate the 2026 growing season, the role of the home gardener and urban orchardist has evolved significantly. Garden photography is no longer just about capturing the aesthetic beauty of your landscape; it has become a vital diagnostic tool for tracking plant health, identifying diseases, and documenting treatment efficacy. One of the most destructive bacterial diseases affecting trees in the Rosaceae family—such as apples, pears, crabapples, and hawthorns—is fire blight (Erwinia amylovora). When left unchecked, this pathogen can devastate an entire orchard in a single season.
Accurate identification and proactive prevention are your best defenses. By combining macro photography techniques with a rigorous copper spray prevention schedule, you can create a comprehensive visual and chemical defense strategy. This guide will teach you how to document fire blight symptoms through your lens and implement the most effective copper-based preventative sprays available in 2026.
Identifying Fire Blight Through the Lens
Fire blight gets its name from the scorched appearance it leaves on infected trees. However, early identification requires a keen eye and the right photographic approach. Documenting these specific symptoms will help you confirm the disease and track its progression.
The Shepherd's Crook
The most iconic symptom of fire blight is the 'shepherd's crook,' where the tips of infected shoots wilt, bend over, and eventually turn black or dark brown. When photographing this symptom, use a mid-range telephoto lens (70-200mm) to compress the background and isolate the bent shoot against the sky. Shoot during the 'golden hour' just after sunrise or before sunset; the low-angle light will highlight the necrotic tissue and cast long shadows that emphasize the unnatural bend of the branches.
Bacterial Ooze and Cankers
In high humidity or after rain, infected branches and cankers may exude a sticky, amber-colored bacterial ooze. This is highly infectious and easily spread by pollinators and rain splash. Capturing this ooze requires macro photography. Equip your camera with a 90mm or 100mm macro lens and use a narrow aperture (f/8 to f/11) to ensure the entire droplet is in sharp focus. Pro Photography Tip: Use an off-camera LED light or a small flashlight held at a 45-degree angle to the bark. This side-lighting technique will cause the translucent amber ooze to glow against the dark bark, making it highly visible in your diagnostic photos.
Blossom Blight
Often the first point of entry in spring, blossom blight causes flowers to turn water-soaked, then shrivel and turn brown or black. To document this, place a standardized color calibration card and a small ruler next to the blossom cluster before taking the photo. This provides scale and accurate color representation, which is crucial if you need to send the images to a university extension lab for remote diagnosis.
Copper Spray Prevention Strategies for 2026
It is critical to understand that copper sprays are preventative, not curative. Once the fire blight bacteria have entered the plant tissue, copper will not stop the infection. Therefore, timing your sprays based on your photographic documentation of tree phenology is essential.
In 2026, the formulation of copper fungicides has seen refinements to reduce phytotoxicity (plant damage) while maintaining high efficacy. Products like Monterey Liqui-Cop and Bonide Liquid Copper Fungicide utilize lower Metallic Copper Equivalent (MCE) rates combined with advanced adjuvants. This prevents the 'russeting' (rough, brown netting) on apple and pear skins that was a common complaint with older, harsher Bordeaux mixtures.
According to the University of California Statewide IPM Program, copper sprays are most effective when applied during the dormant season and early bud break. The American Phytopathological Society notes that reducing the bacterial inoculum on the bark surface before the blossoms open is the single most important step in managing fire blight in home orchards.
Sanitation and Pruning Documentation
If you identify active fire blight during the growing season, you must prune out the infected wood. Cut at least 12 to 18 inches below the visible margin of the canker into healthy wood. Sterilize your pruning shears with 70% isopropyl alcohol between every single cut. Document the pruning cuts with wide-angle photos to track where the disease was removed, ensuring you can monitor those specific limbs for recurrence in 2027.
Creating a Photographic Treatment Log
Maintaining a visual treatment log ensures you never miss a critical application window. Below is the recommended 2026 documentation and copper spray schedule for susceptible apple and pear trees.
| Phenological Stage | Photographic Focus | Copper Spray Action | Documentation Notes |
|---|---|---|---|
| Late Dormant (Winter) | Overall tree structure, old canker margins | Apply high-rate dormant copper spray | Photo-log any bark cracks or old blight scars |
| Silver Tip to Green Tip | Macro shots of bud scales separating | Apply reduced-rate fixed copper | Track bud development to time bloom sprays |
| Pink Bud (Pre-Bloom) | Coloration of unopened blossom clusters | Final preventative copper application | STOP copper once flowers open to protect bees |
| Full Bloom | Open flowers, pollinator activity | NO COPPER. Apply biologicals (e.g., Serenade) | Monitor for early blossom water-soaking |
| Petal Fall | Shedding petals, early fruit set | Resume low-rate copper if disease pressure is high | Check for shepherd's crook on new shoots |
Best Camera Gear and Settings for Tree Pathology
You do not need a professional studio setup to document tree diseases effectively, but having the right gear makes identification much easier. In 2026, mirrorless cameras with advanced autofocus tracking are ideal for capturing small, moving targets like blossoms in the wind.
- Lens: A dedicated 90mm or 100mm f/2.8 macro lens is mandatory for capturing bacterial ooze and early leaf lesions.
- Lighting: A portable, rechargeable LED panel with adjustable color temperature (3200K to 5600K). This allows you to simulate daylight even in the shaded lower canopy of dense pear trees.
- Polarizing Filter: A circular polarizer (CPL) is crucial for removing the waxy glare from leaf surfaces, allowing the camera sensor to capture the true color of chlorotic (yellowing) or necrotic (dead) tissue.
- Scale Reference: Always carry a standard 6-inch ruler and a gray card in your garden bag to include in your diagnostic frames.
When to Call an Arborist
While photographic documentation and copper sprays are excellent for prevention and early management, severe fire blight infections require professional intervention. If your photos reveal that the main trunk or major structural scaffold branches are oozing or show dark, sunken cankers, it is time to call a certified arborist. Penn State Extension advises that once the bacteria reach the main trunk, the tree is often a total loss and poses a risk of spreading the pathogen to neighboring properties.
When contacting an arborist or your local university extension office, email them your well-lit, in-focus macro photos with scale references. This high-quality documentation will allow them to provide a rapid, accurate diagnosis and recommend whether the tree can be saved through aggressive surgical pruning or if removal is the only viable option to protect the rest of your 2026 garden.

