
Landscaping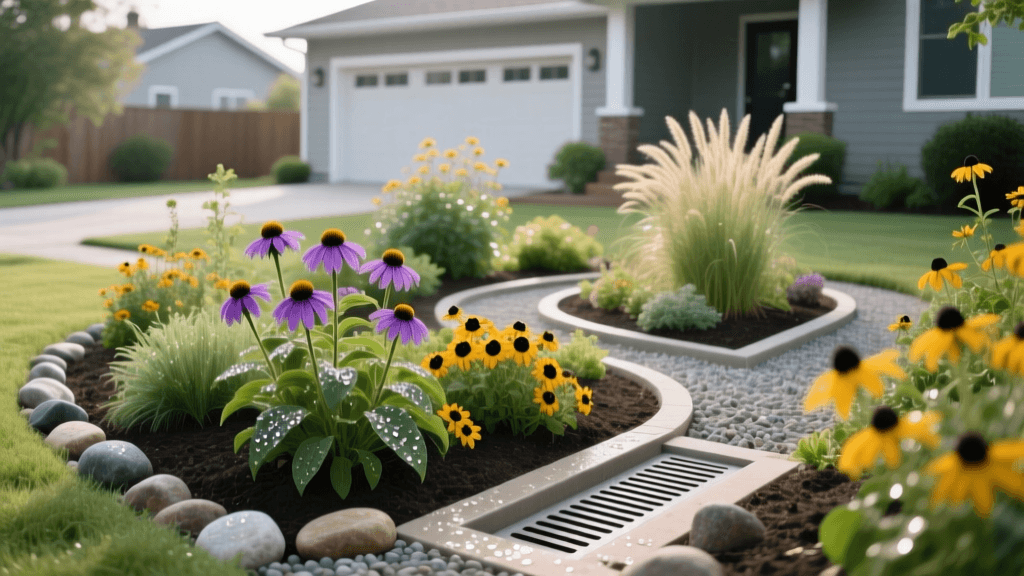
Planning a Front Yard Rain Garden: Design and Plant Guide
The Intersection of Curb Appeal and Stormwater Management
Front yard landscaping traditionally prioritizes visual aesthetics, often relying on expansive turfgrass and ornamental shrubs that demand heavy irrigation and chemical fertilizers. However, modern landscape design principles increasingly emphasize sustainable drainage solutions that enhance curb appeal while solving practical runoff issues. Planning a front yard rain garden is one of the most effective ways to merge ecological responsibility with striking visual design. A rain garden is a shallow, planted depression designed to capture, filter, and slowly infiltrate stormwater runoff from impervious surfaces like roofs, driveways, and sidewalks. By strategically designing this feature, homeowners can eliminate soggy lawn patches, reduce municipal stormwater burden, and create a vibrant, pollinator-friendly focal point. According to the United States Environmental Protection Agency (EPA), a typical rain garden allows about 30 percent more water to soak into the ground compared to a conventional patch of turfgrass. This comprehensive planning guide will walk you through the precise measurements, soil engineering, budgeting, and plant selection required to design a functional and beautiful front yard rain garden.
Step 1: Strategic Site Selection and Safety Clearances
The foundation of a successful rain garden design lies in proper site selection. You are looking for a naturally low-lying area in your front yard that intercepts runoff before it reaches the street or storm drain. However, safety and structural integrity must dictate your final placement. Always maintain a minimum clearance of 10 feet from your home's foundation to prevent hydrostatic pressure from compromising your basement or crawl space. Additionally, avoid placing the garden directly over septic systems, underground utility lines, or the shallow roots of mature, protected trees. Call 811 at least three business days before you plan to excavate to have local utility companies mark underground gas, water, and electrical lines. Evaluate the natural slope of your yard; an ideal location sits on a gentle slope of 1 to 5 percent. If your yard is entirely flat, you will need to design a slightly larger, shallower basin to ensure water moves efficiently into the depression. Conversely, if the slope exceeds 5 percent, you will need to incorporate a terraced retaining wall or a rock check dam to prevent erosion and water bypass.
Step 2: Calculating Dimensions and Catchment Area
Sizing your rain garden correctly ensures it can handle the volume of water generated during a standard storm event without overflowing into unwanted areas. The size depends on three primary factors: the square footage of the impervious catchment area (usually the roof footprint draining to a specific downspout), the soil infiltration rate of your native yard, and the depth of the planned garden. For a standard residential design, a depth of 6 to 8 inches is optimal. This depth allows water to pond temporarily while ensuring it drains completely within 24 to 48 hours, which is critical for preventing mosquito breeding. To calculate the required square footage, first determine your roof's catchment area by multiplying the length and width of the house footprint. If only one downspout feeds the garden, divide that total by the number of downspouts. Next, perform a simple percolation test: dig a hole 8 inches deep and 8 inches wide, fill it with water, and measure how many inches drain per hour. Sandy soils drain at 2.0 inches per hour or more, while heavy clay soils drain at less than 0.5 inches per hour. For average loamy soils, a general rule of thumb provided by landscape architects is to make the rain garden approximately 20 percent the size of the roof catchment area. For example, if a single downspout drains 500 square feet of roof, your rain garden should be roughly 100 square feet (e.g., 10 feet by 10 feet).
Step 3: Excavation, Soil Engineering, and Material Costs
Native soils, particularly heavy clays common in many suburban developments, rarely possess the drainage capacity required for a functional rain garden. Therefore, soil replacement is a non-negotiable step in the planning phase. The industry-standard bioretention soil mix consists of 50 percent coarse builder's sand, 25 percent topsoil, and 25 percent organic compost. This specific ratio provides the necessary macropores for rapid water infiltration while retaining enough organic matter to support plant life and filter pollutants like heavy metals and excess phosphorus. When budgeting your project, anticipate excavation and soil costs to be your largest expense. Renting a mini-excavator for a day typically costs between $300 and $500, while hiring a professional landscaping crew to excavate, remove native clay, and deliver the custom soil mix will range from $15 to $35 per square foot. For a 150-square-foot garden, DIY material costs (including soil delivery, river rock for the inlet, and plants) usually fall between $600 and $1,200. Professional installation for the same footprint generally ranges from $2,250 to $4,500. To protect the garden's inlet from erosion, plan to install a 12-inch layer of washed river rock (1.5 to 3 inches in diameter) where the downspout extension or French drain enters the basin.
Step 4: Hydro-Zone Plant Selection and Layout Design
A well-planned rain garden is divided into three distinct hydro-zones based on moisture tolerance. The bottom zone (Zone 1) experiences the most prolonged inundation and requires facultative wetland plants that can survive temporary flooding but tolerate dry spells. The side slopes (Zone 2) experience fluctuating moisture levels and require highly adaptable transitional species. The top edges and berms (Zone 3) drain quickly and rely solely on rainfall, necessitating drought-tolerant upland plants. Utilizing native perennials and ornamental grasses is highly recommended, as their deep root systems—often extending 4 to 8 feet underground—act as natural biological pipes that break up compacted soil and enhance infiltration.
| Hydro-Zone | Location | Recommended Native Plant | Botanical Name | Mature Height |
|---|---|---|---|---|
| Zone 1 (Wet) | Basin Bottom | Blue Flag Iris | Iris versicolor | 24 - 30 inches |
| Zone 1 (Wet) | Basin Bottom | Swamp Milkweed | Asclepias incarnata | 36 - 48 inches |
| Zone 2 (Moist) | Side Slopes | New England Aster | Symphyotrichum novae-angliae | 36 - 60 inches |
| Zone 2 (Moist) | Side Slopes | Joe-Pye Weed | Eutrochium purpureum | 60 - 84 inches |
| Zone 3 (Dry) | Top Edge / Berm | Purple Coneflower | Echinacea purpurea | 24 - 36 inches |
| Zone 3 (Dry) | Top Edge / Berm | Little Bluestem Grass | Schizachyrium scoparium | 24 - 36 inches |
Step 5: Mulching, Hardscaping Edges, and Overflow Planning
Mulch is critical in a rain garden to retain soil moisture, suppress weeds, and protect plant roots during extreme temperature fluctuations. However, standard shredded hardwood mulch will float away during heavy rain events. Instead, use twice-shredded hardwood mulch that knits together, or opt for a 2-inch layer of pine straw, which interlocks beautifully and resists floating. For a more refined, architectural curb appeal, border the outer edge of Zone 3 with natural stone edging, corten steel landscape rings, or a dry-stacked limestone retaining wall. This hardscape border not only defines the space visually for passersby but also prevents turfgrass from encroaching into the garden bed. Furthermore, every rain garden must have a planned overflow mechanism for extreme, 100-year storm events. Design a shallow, 3-inch-deep swale at the lowest point of the berm, lined with river rock, to safely direct excess water away from the garden and toward the street or a secondary drainage catch basin.
Establishment Timeline and Long-Term Maintenance
The timing of your planting phase is crucial for minimizing transplant shock and reducing irrigation needs. The optimal window for installing a rain garden is early spring or early autumn, when soil temperatures are moderate and natural rainfall is more consistent. During the first growing season, the deep roots of native plants are establishing themselves, meaning you will need to supplement with 1 inch of water per week during dry spells. By the second year, a properly designed rain garden planted with native species should require zero supplemental irrigation. Maintenance shifts from watering to seasonal management. In late fall or early spring, cut back dead perennial stalks and ornamental grasses to a height of 4 inches to allow new growth to emerge. Annually, inspect the inlet rock and the basin floor for sediment accumulation; remove excess silt to maintain the soil's infiltration capacity.
Authoritative Guidelines and Local Regulations
Before breaking ground, it is imperative to consult local municipal codes and authoritative landscaping resources. Many local governments and water conservation districts now offer financial rebates, ranging from $250 to $1,000, for homeowners who install verified stormwater management features. The University of Minnesota Extension and the Penn State University Cooperative Extension both publish extensive, peer-reviewed manuals on residential bioretention and rain garden engineering.
As noted by the Penn State Extension's Master Watershed Steward program: 'A properly constructed rain garden not only reduces the volume of runoff leaving a property but also significantly reduces the pollutant load entering local waterways by filtering out nitrogen, phosphorus, and suspended solids.'
By adhering to these university-backed design principles, homeowners can confidently transform a problematic, waterlogged front yard into a sustainable, low-maintenance landscape masterpiece that elevates neighborhood curb appeal while protecting local watersheds.

