
Landscaping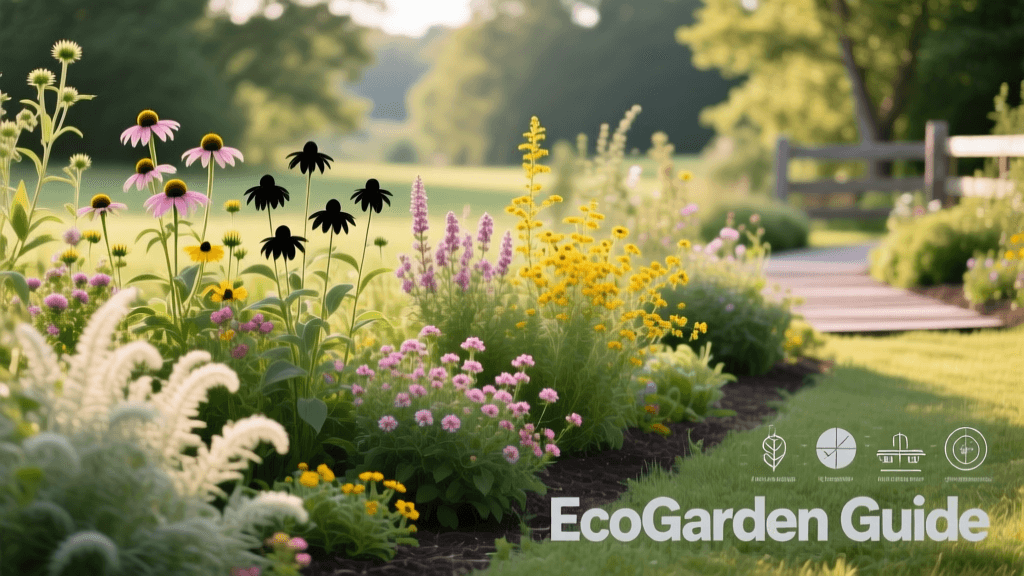
Beginner's Guide to Growing Native Perennials in Landscape Beds
Why Choose Native Perennials for Your Landscape?
Landscaping with native perennials is one of the most rewarding and sustainable projects a beginner can undertake. Unlike exotic ornamentals that require constant coddling, native plants have evolved over thousands of years to thrive in your specific regional climate, soil types, and rainfall patterns. For new homeowners and novice gardeners, this translates to a stunning, vibrant landscape that demands a fraction of the maintenance, water, and chemical inputs required by traditional garden beds.
When you integrate native perennials into your landscape design, you are doing much more than improving your curb appeal. You are building a resilient ecosystem. Native plants possess incredibly deep root systems—often extending 5 to 15 feet underground—which act as natural sponges. These roots dramatically improve soil structure, increase water infiltration, and reduce yard drainage issues and runoff. Furthermore, they provide essential nectar, pollen, and shelter for local pollinators, birds, and beneficial insects, helping to restore local biodiversity right in your front or backyard.
Planning Your Native Perennial Landscape Bed
Before purchasing a single plant, you must understand the microclimate of your proposed landscape bed. Success in gardening begins with observation and soil preparation. Skipping this step is the most common mistake beginners make.
1. Map Your Sunlight
Observe your chosen garden bed over the course of a full day. Track how many hours of direct, unfiltered sunlight the area receives.
- Full Sun: 6 or more hours of direct sunlight (ideal for coneflowers, black-eyed Susans, and asters).
- Part Sun/Part Shade: 3 to 6 hours of direct sunlight, preferably in the cooler morning hours.
- Full Shade: Less than 3 hours of direct sunlight (ideal for woodland natives like ferns and wild ginger).
2. Conduct a Soil Drainage Test
Native plants are adapted to specific moisture levels. To test your soil's drainage, perform a simple percolation test. Dig a hole 12 inches deep and 12 inches wide in your landscape bed. Fill it completely with water and let it drain. Once empty, fill it a second time and measure how long it takes for the water level to drop. If it drops at a rate of 1 to 2 inches per hour, you have well-draining loamy soil. If it drains faster than 3 inches per hour, you have sandy soil that dries out quickly. If it takes hours to drain, you have heavy clay that retains moisture, and you should select moisture-tolerant natives.
Top Beginner-Friendly Native Perennials
Choosing the right plant for the right place is the golden rule of landscaping. Below is a comparison chart of five highly resilient, beginner-friendly native perennials that provide multi-season interest, support pollinators, and tolerate a range of conditions.
| Common Name | Botanical Name | Hardiness Zones | Light Requirements | Mature Size | Bloom Time |
|---|---|---|---|---|---|
| Purple Coneflower | Echinacea purpurea | 3 - 8 | Full Sun | 2-4 ft tall, 1-2 ft wide | Summer to Fall |
| Black-Eyed Susan | Rudbeckia hirta | 3 - 7 | Full Sun | 2-3 ft tall, 1-2 ft wide | Summer |
| Wild Bergamot | Monarda fistulosa | 3 - 9 | Full to Part Sun | 2-4 ft tall, 2-3 ft wide | Mid to Late Summer |
| Swamp Milkweed | Asclepias incarnata | 3 - 6 | Full Sun | 3-4 ft tall, 1-2 ft wide | Summer |
| New England Aster | Symphyotrichum novae-angliae | 4 - 8 | Full Sun | 3-6 ft tall, 2-3 ft wide | Late Summer to Fall |
Purple Coneflower is the undisputed king of the beginner native garden. It is highly drought-tolerant once established, and its seed heads provide vital winter forage for goldfinches. Swamp Milkweed is an absolute must-have if you wish to support Monarch butterflies, as it serves as both a nectar source and a host plant for their caterpillars. Unlike common milkweed, it does not spread aggressively via underground rhizomes, making it perfect for structured landscape beds.
Step-by-Step Planting Guide
Timing is crucial. The best time to plant native perennials is in early fall (at least 6 weeks before your first hard frost) or in mid-spring after the danger of frost has passed. Fall planting allows the plant to focus energy on establishing its deep root system rather than producing top growth and flowers.
Step 1: Bed Preparation and Soil Amendment
Clear the area of all existing turf grass and weeds. Avoid using chemical herbicides if you plan to attract pollinators. Instead, smother the grass with layers of cardboard and compost for a few months prior to planting, or manually remove the sod. Once cleared, amend the top 6 to 8 inches of soil with organic matter. A cubic yard of premium organic compost typically costs between $30 and $60 at local landscape supply yards and is enough to cover a 100-square-foot bed with a 3-inch layer. Till or fork the compost into the native soil to improve aeration and nutrient retention.
Step 2: Spacing and Layout
Resist the urge to plant your perennials too closely together. While nursery pots look small, native plants will expand significantly. Use a staggered, triangular grid layout rather than straight rows for a more natural, professional landscape appearance. Measure the mature width of your chosen plants and space them accordingly. For example, if a coneflower grows 2 feet wide, space the centers of the plants 18 to 24 inches apart to allow for air circulation, which prevents fungal diseases like powdery mildew.
Step 3: Digging and Planting
Dig a hole that is twice as wide as the nursery pot but no deeper than the root ball. Planting too deep is a primary cause of perennial crown rot. Gently remove the plant from its pot and tease out the outer roots with your fingers to break up any circling root patterns. Place the plant in the hole so the top of the root ball is level with the surrounding soil grade. Backfill with the native soil you removed, gently tamping it down with your hands to eliminate large air pockets.
Step 4: Mulching the Landscape Bed
Apply a 2 to 3-inch layer of shredded hardwood or cedar mulch over the entire bed to retain moisture and suppress weeds. A standard 2-cubic-foot bag of mulch costs around $4 to $6 and covers roughly 12 square feet at a 2-inch depth. Crucial Tip: Keep the mulch at least 2 inches away from the base (crown) of the perennial. Piling mulch directly against the stems, a practice known as 'volcano mulching,' traps moisture and invites rot and pest infestations.
Seasonal Care and Maintenance
The first year of a native perennial's life is all about root establishment. During this period, you must provide supplemental watering. Aim to provide 1 inch of water per week, either from rainfall or a garden hose. Water deeply and infrequently rather than giving them a light sprinkle every day. Deep watering encourages those signature drought-resistant roots to grow downward.
By the second and third years, your native landscape bed should be largely self-sufficient, requiring watering only during severe droughts. Unlike traditional garden plants, native perennials generally do not require synthetic fertilizers. In fact, over-fertilizing can cause them to produce weak, leggy stems that flop over in the wind and produce fewer flowers. An annual top-dressing of an inch of compost in the spring is all the nutrition they need.
Winterizing and Pruning
In late fall, do not cut your native perennials back to the ground. Leave the dead stems and seed heads standing throughout the winter. They provide architectural interest in the snowy landscape, offer essential overwintering habitat for native bees, and supply seeds for foraging birds. Wait until early spring, when daytime temperatures consistently stay above 50°F (10°C), to cut back the dead foliage to about 4 inches above the ground.
Expert Insights and Authoritative Sources
The shift toward native landscaping is backed by extensive horticultural research. According to the University of Minnesota Extension, native plants are fundamentally better equipped to handle local environmental stressors than non-native species.
'Native plants have deep root systems that make them highly drought-tolerant and excellent for preventing soil erosion. Once established, they require minimal watering, no fertilizers, and fewer pesticides, making them an environmentally friendly and cost-effective choice for sustainable landscaping.' — University of Minnesota Extension, 'Landscaping with Native Plants'
By following this beginner-friendly guide, you are not just planting a garden; you are installing a living, breathing landscape feature that will mature and beautify your property for decades. Start small, choose the right plants for your soil and sun conditions, and let nature do the heavy lifting. Your landscape beds will reward you with vibrant blooms, buzzing pollinators, and a profound sense of connection to your local environment.

