Lawn Care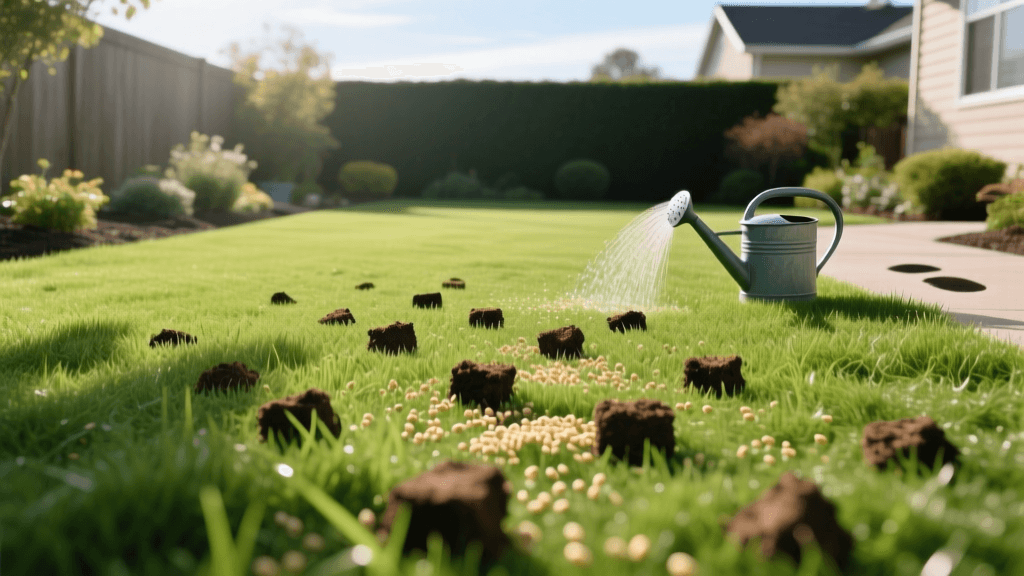
Step-by-Step Guide to Aerating and Overseeding Lawns
The Ultimate How-To Guide for Aerating and Overseeding Cool-Season Lawns
If your once-lush cool-season lawn is looking thin, compacted, or patchy, the combination of core aeration and overseeding is the most effective rehabilitation strategy available to homeowners. Cool-season grasses like Kentucky Bluegrass, Tall Fescue, and Perennial Ryegrass endure heavy foot traffic, summer heat stress, and soil compaction. Over time, this creates a hostile environment for root growth. By pairing core aeration with overseeding, you relieve soil compaction while simultaneously introducing new, disease-resistant grass cultivars directly into the soil.
Step 0: Perform a Soil Test
Before spending money on seed and fertilizer, conduct a soil test. You can purchase a mail-in soil test kit from your local university cooperative extension office for about $15 to $25. This test will reveal your soil pH and baseline nutrient levels. Cool-season grasses thrive in a pH range of 6.0 to 7.0. If your soil is too acidic (below 6.0), you will need to apply pelletized limestone. If it is too alkaline, elemental sulfur may be required. Amending the soil based on test results ensures your new seedlings can actually absorb the nutrients you provide.
Why Combine Core Aeration and Overseeding?
Core aeration involves using a machine to extract small plugs of soil and thatch from the lawn. This process creates micro-environments that allow oxygen, water, and nutrients to penetrate deep into the root zone. When you overseed immediately after aerating, the grass seeds fall directly into these aeration holes. This ensures optimal seed-to-soil contact, which is the single most critical factor for successful germination. Seeds resting on top of thatch or compacted soil are highly vulnerable to drying out, washing away, or being eaten by birds. Furthermore, breaking up the thatch layer prevents fungal diseases that thrive in stagnant, moist organic matter.
Optimal Timing: When to Execute the Plan
Timing is everything. According to turfgrass specialists at the Purdue University Extension, the absolute best time to aerate and overseed cool-season lawns is in late summer to early fall (typically late August through mid-September, depending on your USDA hardiness zone). During this window, soil temperatures are still warm enough to encourage rapid seed germination, but air temperatures are beginning to cool, reducing heat stress on young seedlings. Aim for soil temperatures between 50°F and 65°F, which correlates with daytime air temperatures of 60°F to 75°F. You can measure soil temperature using a simple soil probe thermometer inserted about two inches into the ground. Furthermore, fall offers fewer competing weeds, and the upcoming winter months allow the root system to establish before the brutal summer heat returns.
Tools and Materials Required
Before beginning, gather the necessary equipment. Budget approximately $150 to $250 for a weekend DIY project, depending on lawn size and local rental rates. Investing in premium materials pays dividends in the long run. Cheap contractor grade seed often contains up to 10% inert filler and undesirable weed seeds like Poa annua or rough bluegrass. Always read the seed tag carefully.
- Core Aerator Rental: $80 to $120 for a half-day rental from a local hardware store. Avoid spike aerators; they only compact the soil further.
- Grass Seed: Purchase high-quality, certified seed with zero weed seed content. Budget $30 to $60. Look for NTEP (National Turfgrass Evaluation Program) rated varieties.
- Starter Fertilizer: A high-phosphorus starter fertilizer (e.g., 10-18-10 NPK ratio) to promote root development. Budget $25.
- Broadcast Spreader: For even application of seed and fertilizer.
- Drag Mat or Rake: A piece of chain-link fence or a stiff tine rake to work seeds into the soil.
Step-by-Step Execution Guide
Step 1: Prepare the Lawn
Two days before aerating, water your lawn deeply. Apply at least 1 inch of water. The soil needs to be moist but not muddy; if it is too dry, the aerator tines will not penetrate deeply enough, and if it is too wet, the machine will bog down and tear the turf. On the day of the project, mow your lawn shorter than usual, cutting the grass down to about 1.5 to 2 inches. Bag the clippings to ensure the seeds can reach the soil surface without being blocked by a thick layer of organic debris.
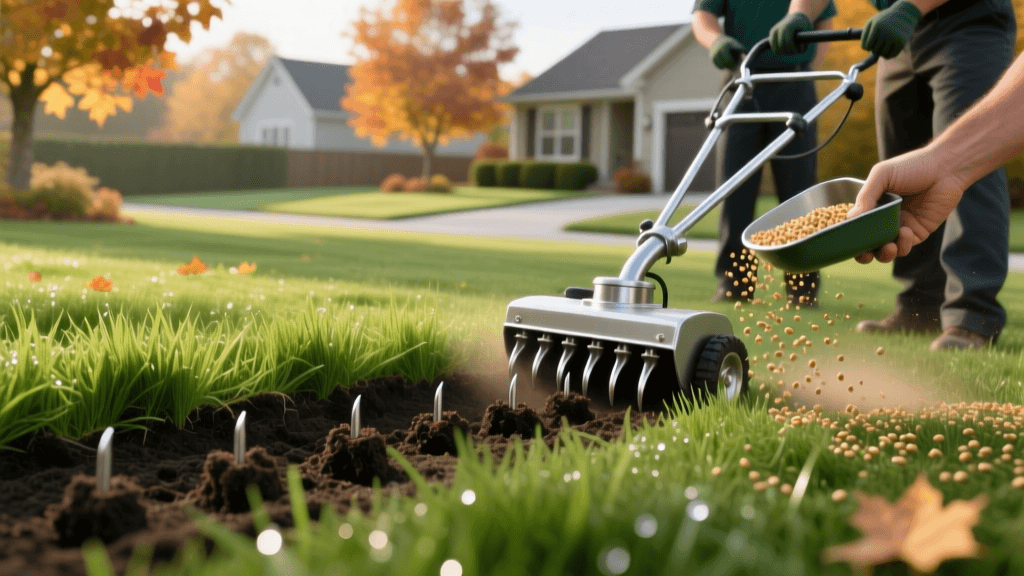
Step 2: Core Aerate the Turf
Rent a walk-behind core aerator. Run the machine over your entire lawn in one direction, and then make a second pass in a perpendicular direction (a crisscross pattern). This double-pass ensures maximum soil relief and creates roughly 20 to 40 holes per square foot. The tines should penetrate at least 2 to 3 inches deep. Leave the extracted soil cores on the lawn; they will break down naturally over the next few weeks and return valuable microbes and nutrients to the surface.
Step 3: Overseed the Lawn
Load your broadcast spreader with your chosen cool-season grass seed. Set the spreader to the rate recommended on the seed bag for overseeding (which is typically half the rate used for establishing a brand new lawn). Walk at a steady, consistent pace. For best coverage, apply half the seed walking in a North-South direction, and the other half walking East-West.
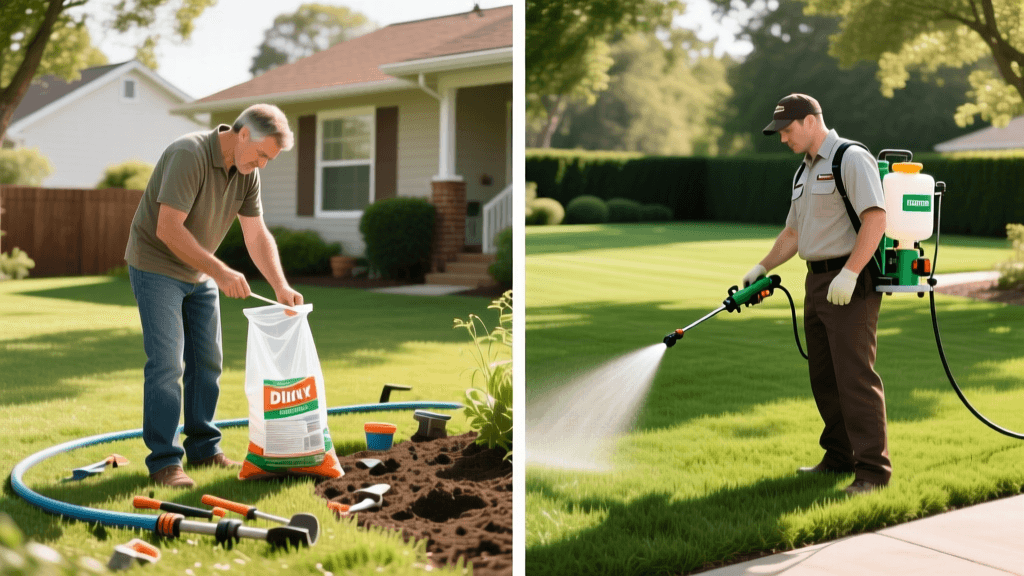
Step 4: Apply Starter Fertilizer and Topdress
Immediately after seeding, apply a starter fertilizer. Phosphorus is crucial for early root development, but be sure to check local ordinances, as some municipalities restrict phosphorus use unless establishing new grass. After fertilizing, use a stiff rake or a drag mat to gently work the seeds and fertilizer into the aeration holes and the soil surface.
Step 5: The Critical Watering Schedule
Germination requires consistent moisture. For the first 14 to 21 days, you must water the lawn lightly two to three times per day. The goal is to keep the top inch of soil consistently moist without creating puddles. Once the new grass reaches about 2 inches tall, transition to deeper, less frequent watering to encourage deep root growth.
Cool-Season Grass Seed Data and Expectations
Choosing the right seed dictates the long-term success of your lawn. Below is a comparison of the most common cool-season grasses used in overseeding projects.
| Grass Type | Overseeding Rate (lbs/1,000 sq ft) | Germination Time (Days) | Best Use Case |
|---|---|---|---|
| Tall Fescue | 4.0 - 6.0 | 7 - 14 | High traffic, drought-prone areas, shade/sun mix |
| Kentucky Bluegrass | 1.5 - 2.5 | 14 - 28 | Sunny areas, rhizomatous spreading for bare patch repair |
| Perennial Ryegrass | 3.0 - 5.0 | 5 - 10 | Quick nurse crop, high wear tolerance, rapid establishment |
| Fine Fescue | 3.0 - 4.0 | 10 - 14 | Heavy shade, low-fertility soils, low-maintenance zones |
Common Mistakes to Avoid
Using a Spike Aerator: Spike aerators simply punch holes into the ground, which actually increases soil compaction along the sides of the hole. Always use a core aerator that physically removes soil plugs.
Applying Pre-Emergent Herbicides: Pre-emergent crabgrass preventers do not discriminate between weed seeds and grass seeds. If you apply a pre-emergent in the spring or early summer, it will inhibit the germination of your newly planted cool-season grass seed in the fall. Wait at least 12 weeks between pre-emergent application and overseeding.
Skimping on Water: Missing even a single day of watering during the first two weeks can cause the delicate new roots to dry out and die. If you cannot commit to watering multiple times a day, consider setting up an automated irrigation timer.
Conclusion
Aerating and overseeding is a labor-intensive weekend project, but the return on investment is a dramatically thicker, greener, and more resilient lawn. By following this practical guide, utilizing proper seed rates, and adhering to the critical fall watering schedule, you can transform a tired, compacted yard into a pristine turfgrass carpet that will be the envy of the neighborhood.