Lawn Care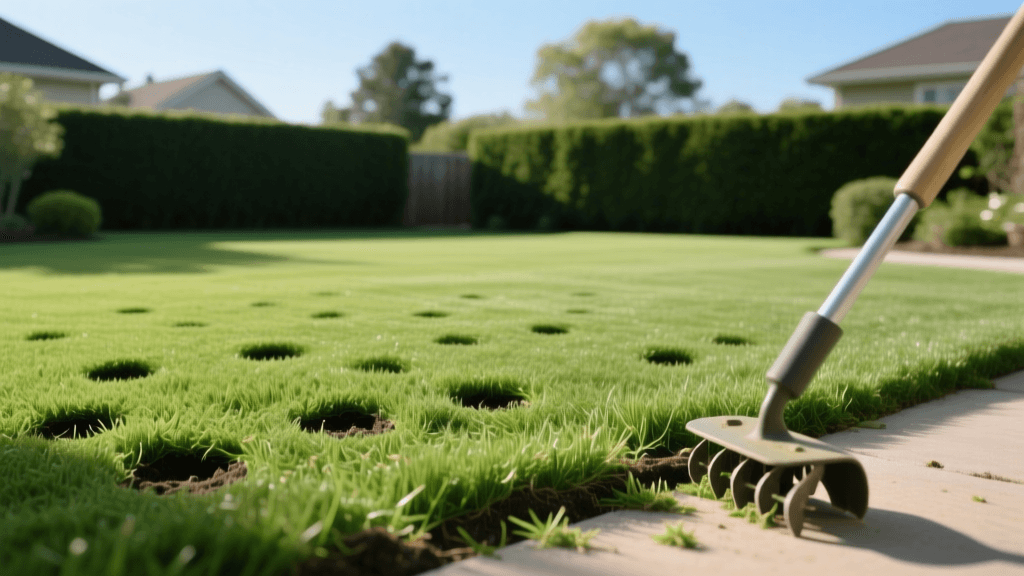
Step-by-Step Guide to Aerating and Overseeding Lawns
Why Aerate and Overseed Your Cool-Season Lawn?
Cool-season grasses, such as Kentucky Bluegrass, Tall Fescue, and Perennial Ryegrass, endure heavy foot traffic, summer heat stress, and natural thatch buildup over the course of a year. As seasons pass, the soil beneath your lawn inevitably becomes compacted. This compaction chokes grassroots, preventing vital water, oxygen, and essential nutrients from reaching the root zone. When roots cannot breathe or feed, the turf thins out, leaving bare patches that are quickly invaded by opportunistic weeds like crabgrass and dandelions.
Core aeration combined with overseeding is the ultimate, proven renovation strategy to combat these issues. By physically removing small plugs of soil and introducing new, resilient grass seed directly into the created channels, you can transform a thin, tired lawn into a thick, vibrant, and disease-resistant carpet of grass. This practical, step-by-step how-to guide will walk you through the exact process, tools, measurements, and costs required to achieve professional-level results on your own property.
The Best Time for Cool-Season Grass Renovation
Timing is the single most critical factor in lawn renovation. For cool-season grasses, the absolute best time to aerate and overseed is in the early fall, typically between late August and mid-October. During this window, soil temperatures are cooling down to the ideal 50°F to 65°F range, which triggers rapid seed germination and deep root establishment.
Fall also offers the advantage of reduced weed competition. Summer annual weeds are dying off, leaving space and resources for your new grass seedlings. Furthermore, the cooler autumn air and increased rainfall reduce the water stress on young grass, giving it 8 to 10 months to establish a deep root system before facing the brutal heat of the following summer.
Tools and Materials Checklist
Before starting your weekend project, gather the necessary equipment. Here is a breakdown of what you will need, along with estimated costs for an average 5,000 square foot lawn:
- Core Aerator (Rental): $70 to $100 for a half-day rental from a local hardware store. Always choose a core aerator that pulls physical soil plugs. Avoid spike aerators, as they actually worsen soil compaction by pushing soil outward.
- Lawn Mower: To scalp the lawn prior to aeration.
- Premium Grass Seed: $50 to $90 for a 50-pound bag of certified, weed-free seed. Look for NTEP (National Turfgrass Evaluation Program) rated cultivars.
- Starter Fertilizer: $40 to $60. Choose a formula high in phosphorus (the middle number, e.g., 10-18-10 or 18-24-12) to promote rapid root growth.
- Broadcast or Drop Spreader: $30 to $50 for even seed and fertilizer distribution.
- Lawn Roller (Optional): $30 to rent, used to ensure seed-to-soil contact.
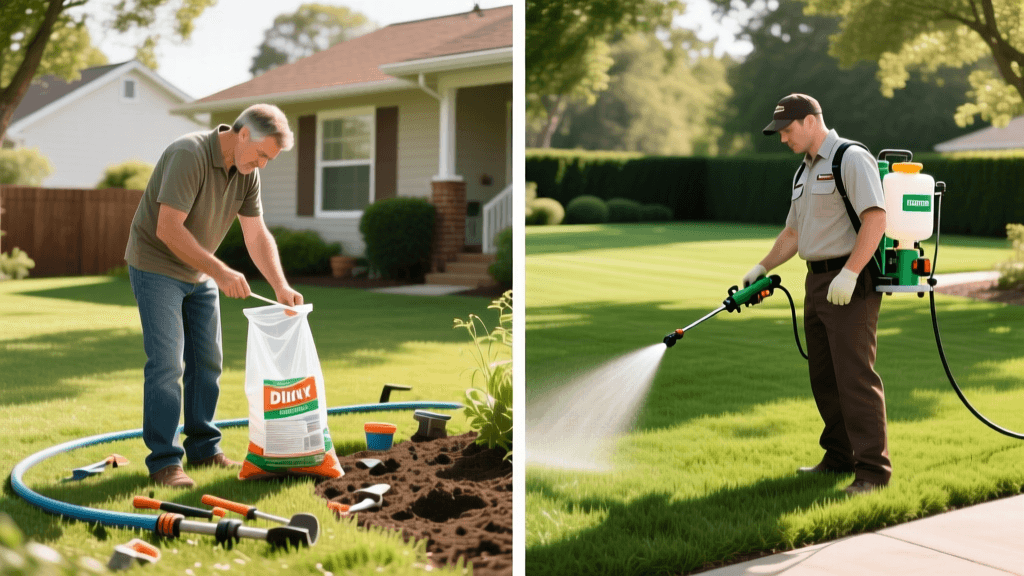
Step 1: Prepare the Lawn
Proper preparation ensures the aerator tines can penetrate deeply and the seed reaches the soil. Begin by mowing your lawn significantly shorter than usual. Lower your mower deck to a height of 1.5 to 2 inches. Bag the clippings to remove excess thatch and expose the soil surface. If your lawn has a thatch layer thicker than 0.5 inches, consider renting a power dethatcher to remove it before aerating.
Next, water your lawn deeply 24 to 48 hours before you plan to aerate. The soil should be moist but not muddy. If the ground is too dry, the aerator tines will not penetrate deeply enough to pull proper cores. If it is too wet, the machine will sink and create a muddy mess, damaging the turf structure.
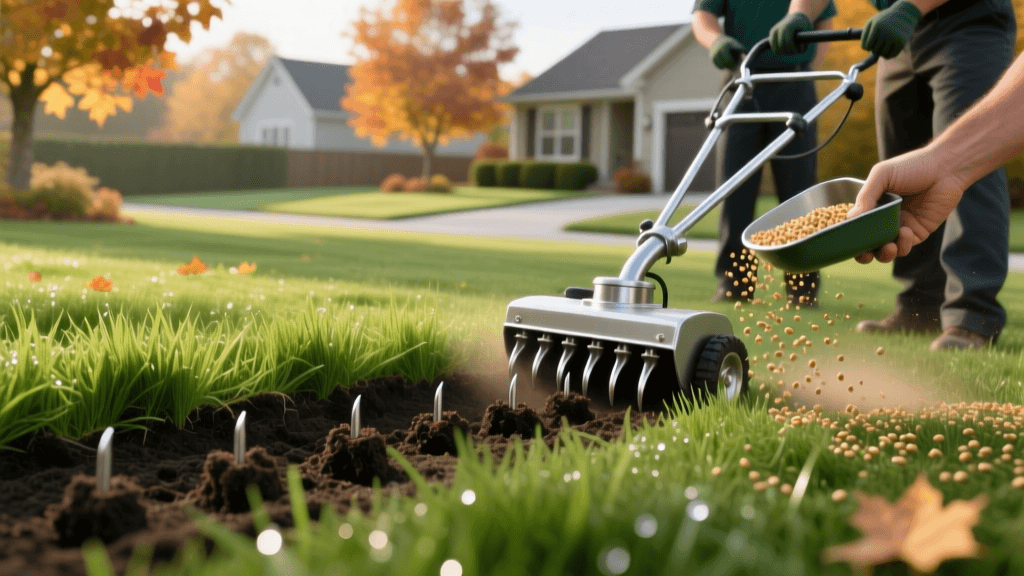
Step 2: Core Aeration
Run the core aerator over your entire lawn. For severely compacted areas or high-traffic zones near driveways and walkways, make two passes in perpendicular directions (a crisscross pattern). Your goal is to pull soil cores that are 2 to 3 inches deep, spaced about 2 to 3 inches apart. The deeper the cores, the better the oxygen and water infiltration will be.
Pro Tip: Do not rake up or remove the soil cores left on the surface of your lawn. These plugs contain valuable microorganisms that will naturally break down over the next two to three weeks, helping to digest the thatch layer and return nutrients to the soil. You can speed up this process by dragging a piece of chain-link fence or a stiff push broom over the lawn to break the cores apart.
Step 3: Overseeding the Lawn
With the soil opened up, it is time to lay down your new grass seed. Calibrate your broadcast spreader according to the seed manufacturer's instructions on the back of the bag. Apply half of your seed walking in a north-south direction, and the other half walking in an east-west direction. This overlapping technique prevents streaking and ensures uniform coverage.
Focus heavily on bare spots, applying an extra layer of seed by hand if necessary. The aeration holes will act as perfect micro-environments for the seed, protecting it from birds and wind while holding moisture close to the germ.
Cool-Season Grass Seeding Rates and Depths
Applying the correct amount of seed is vital. Too little seed results in patchy establishment, while too much seed causes overcrowding, leading to weak seedlings that are highly susceptible to fungal diseases like damping-off. Refer to the table below for precise measurements:
| Grass Type | Overseeding Rate (per 1,000 sq ft) | Ideal Seed Depth | Germination Time |
|---|---|---|---|
| Tall Fescue | 8 - 10 lbs | 1/4 - 1/2 inch | 7 - 14 days |
| Kentucky Bluegrass | 1 - 2 lbs | 1/8 - 1/4 inch | 14 - 28 days |
| Perennial Ryegrass | 4 - 6 lbs | 1/8 - 1/4 inch | 5 - 10 days |
Step 4: Fertilizing and Topdressing
Immediately after seeding, apply a high-quality starter fertilizer. New grass seedlings require readily available phosphorus to develop strong, deep roots. Apply the fertilizer at a rate of 1.0 pound of actual nitrogen per 1,000 square feet. Avoid using standard weed-and-feed products or pre-emergent crabgrass preventers at this stage, as these chemicals will inhibit the germination of your new grass seed.
If your budget and time allow, apply a thin layer (about 1/4 inch) of sifted compost or peat moss over the seeded areas. This topdressing acts as a mulch, retaining critical moisture around the seed while adding organic matter to the soil profile.
Step 5: The Post-Overseeding Watering Schedule
Water is the catalyst for germination. Grass seed must remain consistently moist until it sprouts. You will need to adjust your irrigation system or manually water the lawn 2 to 3 times per day for 10 to 15 minutes per session. The goal is not to deeply soak the soil, but to keep the top 1/2 inch of the soil surface from drying out.
Once the new grass reaches a height of 1.5 to 2 inches, you can begin to reduce the frequency of watering but increase the duration. Transition to watering deeply once a day, and eventually down to 1 to 1.5 inches of water per week (including rainfall) to encourage the new roots to grow deep into the aeration channels.
According to turfgrass specialists at Purdue University Extension, core aeration physically relieves soil compaction and enhances water infiltration, while fall overseeding introduces improved, disease-resistant turfgrass cultivars to an existing stand, fundamentally upgrading the lawn's genetic makeup and resilience.
- Purdue University Extension, Turfgrass Science Program
Conclusion and Ongoing Maintenance
Wait until the new grass has been mowed at least two or three times before resuming any chemical herbicide applications. Your first mow after overseeding should only remove the top 1/3 of the grass blade to avoid stressing the young seedlings. By following this precise, step-by-step aeration and overseeding protocol, you will repair summer damage, eliminate bare patches, and build a dense, weed-resistant turf that will be the envy of your neighborhood come next spring.