Tree Care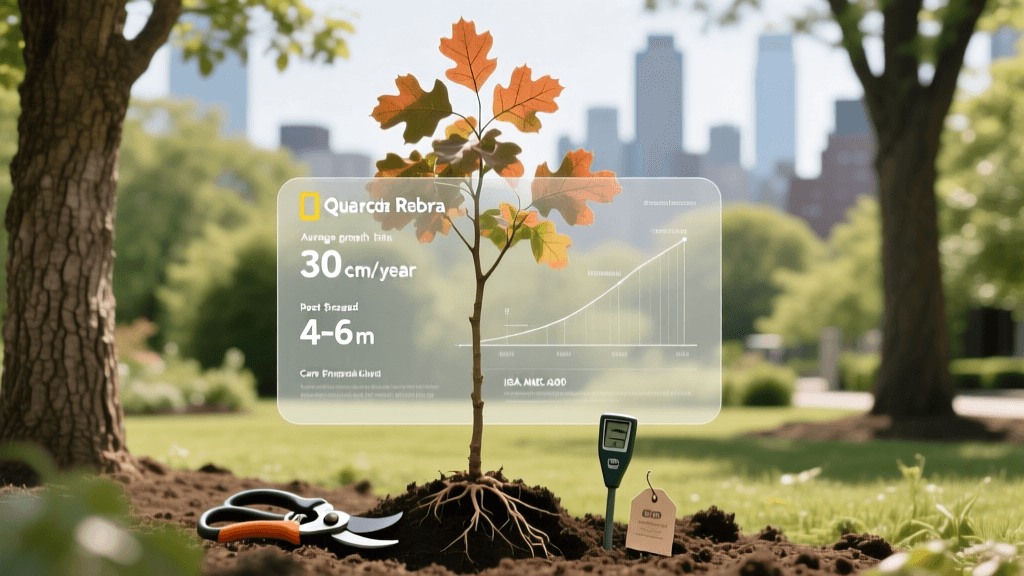
How To Care For Newly Planted Trees
The First Year Is Everything
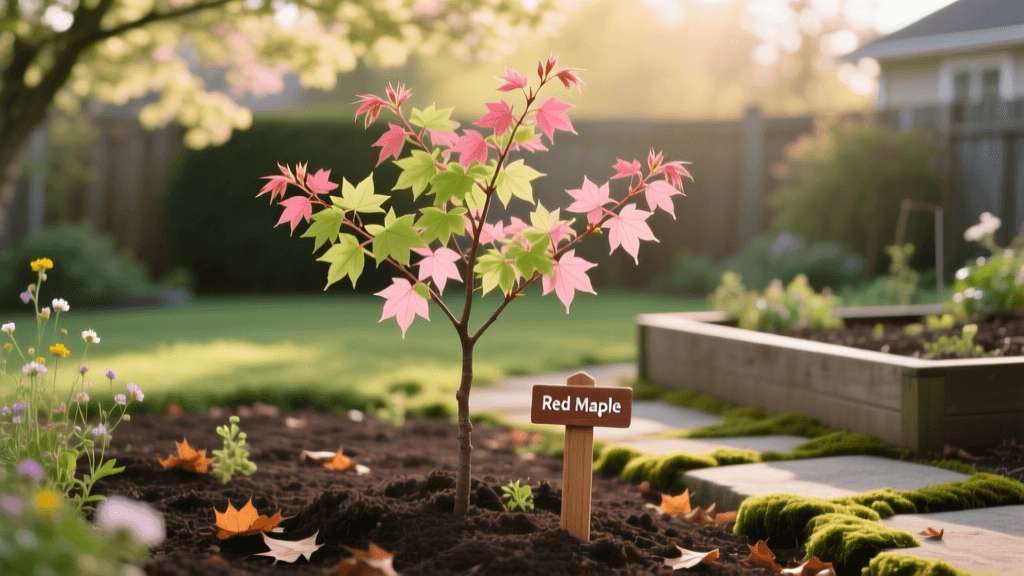
Planting a tree is an investment measured in decades, but what you do in the first twelve months makes or breaks that investment. Newly planted trees go through a rough patch: their roots have been cut, squeezed, or wrapped up, and now they need to rebuild how they take up water and nutrients—all while adjusting to a new spot. Knowing what’s happening underground during this time helps you make smarter care choices above ground.
The International Society of Arboriculture (ISA, 2023) estimates that a transplanted tree loses between 80 and 95 percent of its root system during digging and moving. That explains most of the things new tree owners mistake for disease: leaves drooping on warm afternoons, late leaf-out in spring, smaller leaves than expected, and slow branch growth. These aren’t signs the tree is failing. They’re signs it’s focusing energy on growing new roots—which is exactly what it should be doing.
Watering: The Single Most Important Variable
Too much water and too little water are both common—and both can kill. You want the soil in the root ball and the backfill zone to stay evenly moist, but not soggy. Soggy soil cuts off oxygen and drowns roots. For most species in temperate climates, that usually means watering slowly and deeply two to three times a week during the first growing season, then cutting back to once a week in the second year as roots start reaching into the native soil.
A practical rule from the University of Minnesota Extension (2022) is to apply about 10 gallons of water per inch of trunk diameter at each watering. A 2-inch caliper red maple, for example, needs roughly 20 gallons per session. One easy way to deliver that is a 5-gallon bucket with a small hole drilled in the bottom, placed at the base of the tree and refilled twice. This slow-drip method lets water sink 12 to 18 inches down instead of running off the surface.
Checking Soil Moisture Before You Water
Before grabbing the hose, push a screwdriver or wooden dowel 6 inches into the soil near the root ball. If it slides in easily and comes out with damp soil stuck to it, skip watering today. If it’s hard to push in and comes out dry, water right away. This quick test stops the most common mistake in new tree care: watering on a calendar instead of checking the soil.
Soil type matters a lot here. Sandy soils drain fast and may need daily watering during hot spells, while clay holds moisture longer but can get waterlogged. If your site has heavy clay, try building a low berm around the planting hole to guide water inward, and wait until the top 2 inches of soil feel dry before watering again.
Irrigation Systems and New Trees
Automated irrigation systems are handy but don’t work well for new trees unless you adjust them by hand. Most home systems are set for lawn—frequent, shallow watering that encourages roots to stay near the surface. New trees need less frequent, deeper watering to push roots downward. If you rely on an automated system, add a separate drip zone for each new tree and program it differently from your lawn zones.
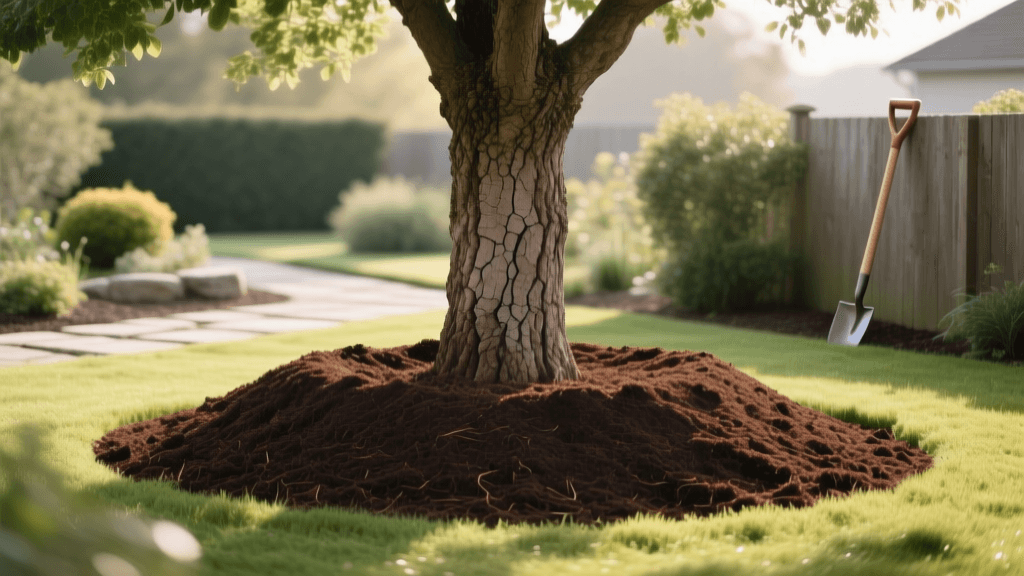
Mulching: Doing More Work Than It Appears
A properly applied mulch ring is one of the best things you can do for a new tree. A 3- to 4-inch layer of organic mulch, spread 3 to 6 feet out from the trunk in all directions, keeps soil temperature steady, holds moisture, keeps grass and weeds from competing, and slowly improves soil as it breaks down. Research at the Morton Arboretum in Lisle, Illinois found that mulched trees grew up to three times faster than unmulched ones under similar conditions during the first few years.
The biggest mistake is the “mulch volcano”—piling mulch high against the trunk like a cone. That keeps the bark constantly wet, inviting rot and fungal problems, and can cause roots to circle the trunk instead of spreading outward. Keep mulch pulled back 2 to 3 inches from the trunk flare—the spot where the trunk widens at ground level. You should always see the trunk flare above the mulch and soil.
Use coarse wood chip mulch instead of dyed bark or fine-textured mulch. Coarse chips let air move through, break down slowly, and won’t pack down and shed water like fine mulches sometimes do. Many municipal tree services and utility companies give away wood chip mulch for free—and it’s often better than bagged stuff.
Species-Specific Establishment Timelines and Root Spread
Trees don’t all settle in at the same pace. A rough guideline is one year of establishment per inch of trunk diameter at planting, but it depends on the species, the site, and the weather. The table below shows typical timelines and root spread for several common species.
| Species | Trunk Diameter at Planting | Estimated Establishment Period | Root Spread at Maturity | Annual Height Growth (Established) |
|---|---|---|---|---|
| Red Maple (Acer rubrum) | 2 in | 2–3 years | 2–3× canopy width | 13–24 in/year |
| Bur Oak (Quercus macrocarpa) | 2 in | 3–4 years | 2–4× canopy width | 12–14 in/year |
| Yoshino Cherry (Prunus × yedoensis) | 1.5 in | 1–2 years | 1.5–2× canopy width | 24–36 in/year |
| Baldcypress (Taxodium distichum) | 2 in | 2–3 years | 2–3× canopy width | 12–24 in/year |
| American Sweetgum (Liquidambar styraciflua) | 2 in | 2–3 years | 2–3× canopy width | 12–24 in/year |
Root spread data matters for planning. The idea that roots stay inside the drip line is wrong. Mature tree roots often stretch two to four times the canopy radius, mostly in the top 12 to 24 inches of soil—where oxygen, water, and nutrients are easiest to reach. Planting a large-growing species within 10 feet of a foundation, sidewalk, or utility line sets up trouble that pruning won’t fix.
Oak Species: Slow to Establish, Long to Reward
Oaks are among the most ecologically valuable trees in North American landscapes, supporting over 500 species of caterpillars and moths, according to entomologist Doug Tallamy at the University of Delaware. They’re also among the slowest to get going after transplanting. A bur oak planted at 2-inch caliper may show almost no top growth for the first two to three years while it puts energy into roots. That’s normal—not a sign something’s wrong.
During this time, hold off on high-nitrogen fertilizer, which pushes leafy growth instead of root development. If a soil test shows a clear deficiency, a slow-release, low-nitrogen fertilizer applied to the soil surface in early spring is okay. Don’t fertilize in late summer or fall—that can spur tender new growth just before frost hits.
Pruning Newly Planted Trees: Less Is More
The old habit of cutting off one-third of a tree’s canopy at planting—to “balance” root loss—has been dropped. Leaves are how the tree makes food; removing them cuts the energy supply it needs to grow new roots. ANSI A300 Part 1 (2017), the industry standard for tree pruning, says not to remove more than 25 percent of a tree’s live crown in a single growing season—and even less for newly planted trees.
At planting, limit pruning to three types of cuts:
- Dead, damaged, or broken branches — cut cleanly at the branch collar
- Crossing or rubbing branches — keep the better-positioned one and remove the other
- Structural defects — co-dominant stems with included bark on young trees can often be fixed with one clean cut; waiting makes it harder and costlier later
Don’t strip off the lower branches during the first few years. These small branches—sometimes called “training branches”—help build trunk thickness and strength. A trunk that grows with them intact ends up sturdier than one stripped bare early on. Remove them gradually over three to five years as the permanent canopy fills in.
Make all pruning cuts just outside the branch collar—the slightly swollen area where the branch meets the trunk or parent branch. Cutting flush removes the collar and interferes with the tree’s natural healing process, opening the door to decay. Wound sealants and pruning paints aren’t recommended by ISA or ANSI standards and studies show they often slow healing instead of helping.
Staking: When It Helps and When It Hurts
Staking only makes sense if the tree can’t stand upright on its own—or if the site gets constant strong winds. Most nursery-grown trees in 2- to 3-inch caliper sizes don’t need staking if planted correctly with a solid root ball. Staking when it’s not needed stops the trunk from swaying, which is how it builds strength and thickness. Trees staked unnecessarily end up weak and dependent—then fail when the stakes come out.
When staking is necessary, follow these guidelines:
- Use two stakes placed outside the root ball—not through it—and position them perpendicular to the prevailing wind
- Attach ties at the lowest point where the tree stands straight—usually no higher than two-thirds of the tree’s height
- Use wide, flexible tie material (like rubber or nylon strapping—not wire) that lets the trunk move 1 to 2 inches
- Remove all staking hardware after one growing season—never leave it longer than 12 months
- Check ties monthly so they don’t dig into the trunk as it grows
"Trees that are allowed to sway in the wind develop stronger wood and better root anchorage than staked trees. The mechanical stress of movement is a growth stimulus, not a threat." — ISA Best Management Practices: Tree Planting (2019)
Fertilization, Soil Health, and Long-Term Establishment
Healthy soil life matters more than fertilizer for newly planted trees. Mycorrhizal fungi—tiny partners that boost a tree’s ability to absorb water and nutrients—are disrupted by transplanting, foot traffic, and synthetic fertilizers. Focusing on soil health—through mulching, keeping foot and vehicle traffic out of the root zone, and limiting herbicide use near the tree—does more for long-term success than any fertilizer plan.
If a soil test from your local cooperative extension service shows a specific nutrient shortage, fix it with targeted amendments. A soil pH far outside your tree’s preferred range will block nutrient uptake no matter how much fertilizer you add. Red maples and sweetgums like slightly acidic soil (pH 5.5–6.5); bur oaks handle alkaline soil up to pH 7.5. Fixing pH takes time and repeated testing.
Don’t apply granular fertilizer within 6 inches of the trunk, and never put it on dry soil. Water the area well before and after applying fertilizer. If a tree looks stressed during establishment, a light foliar spray of diluted liquid fertilizer can help faster than soil-applied products—but it’s a short-term aid, not a substitute for good soil care.
By the end of the second growing season, a well-cared-for tree should show longer new shoots, a fuller canopy, and quicker recovery from heat or dry spells. Those are signs the roots are settling in. By year three to five—depending on the species—the tree should be mostly self-sufficient, needing only routine checks, fresh mulch each year, and occasional structural pruning to keep it healthy and well-shaped.