
Landscaping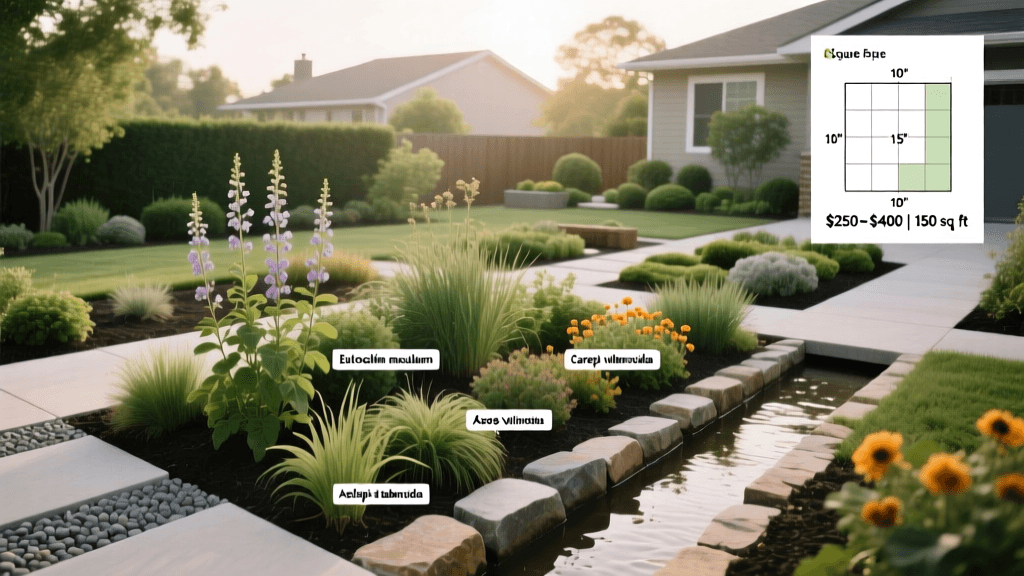
How To Create A Rain Garden In Your Backyard
What a Rain Garden Actually Does
A rain garden is a shallow, planted depression designed to capture stormwater runoff from impervious surfaces—driveways, rooftops, patios, and compacted lawns—and allow it to soak slowly into the soil. Unlike a pond or bog, a properly built rain garden drains completely within 24 to 48 hours, so there’s no standing water or mosquito breeding ground. The idea comes from bioretention principles developed in the 1990s by researchers at the University of Maryland, who found that planted basins placed in the right spots could cut runoff volume by 30 to 40 percent compared to regular turf.
The American Society of Landscape Architects (ASLA) has promoted bioretention cells for years as part of low-impact development (LID). They manage stormwater while also supporting plants that benefit local wildlife. For homeowners, that means a garden that solves a real drainage issue, attracts pollinators and birds, and looks good year-round.
Sizing and Siting Your Rain Garden
Where you put the rain garden matters most. Keep it at least 10 feet from your home’s foundation so water doesn’t seep toward the house, and at least 25 feet from a septic system. Don’t place it over buried utilities, and avoid the bottom of steep slopes—water rushes in faster than the soil can absorb it.
The University of Wisconsin Extension recommends sizing the rain garden at 20 to 30 percent of the area draining into it. If your roof and driveway together add up to 1,000 square feet of hard surface, aim for 200 to 300 square feet. In sandy or loamy soils, you can go with the smaller size. In heavy clay, go bigger and plan to mix in better-draining soil.
Conducting a Percolation Test
Before digging, dig a test hole 6 inches wide and 12 inches deep where you’re thinking of placing the garden. Fill it with water and let it drain all the way. Then fill it again and time how many inches the water drops each hour. A rate of 0.5 to 3 inches per hour works well. Faster than 3 inches may mean the soil won’t filter pollutants well. Slower than 0.5 inches means poor drainage—you’ll likely need to amend the soil or add an underdrain.
Reading the Slope
Rain gardens do best on slopes between 1 and 12 percent. Flatter than 1 percent, and water may not flow reliably into the basin. Steeper than 12 percent, and erosion becomes more likely—and the build gets more complicated. Use a line level and stakes to check the grade before you settle on a spot.
Excavation and Soil Preparation
Most residential rain gardens are 6 to 12 inches deep. Deeper ones hold more water but need more soil work and sturdier plants that handle occasional flooding. Eight inches is a solid starting point for many suburban yards.
Dig out the basin and set the native topsoil aside. If your soil drains poorly, replace the bottom 18 to 24 inches with a bioretention mix: usually 50 to 60 percent coarse sand, 20 to 30 percent compost, and 20 to 25 percent topsoil. The Minnesota Pollution Control Agency recommends this blend in their 2022 stormwater design manual—it drains well but holds enough organic matter to help plants get established.
Level the basin floor so water spreads evenly. Build a berm on the downhill side using the soil you dug out, tamp it down firmly, and cover it with plants or erosion-control fabric while things get settled. The berm should be at least 6 inches higher than the basin floor.
Choosing the Right Plants
This is where the rain garden stops being just a drainage tool and starts looking like part of your yard. Plants need to handle both wet spells during storms and dry stretches between them. Native species adapted to your region’s rainfall patterns are usually the easiest to grow—they rarely need extra watering once they’re settled in.
Group plants by how often their spot gets flooded. The center floods most and stays wettest, so pick the most flood-tolerant species. The middle zone gets wet sometimes but not as long. The outer edges and berm stay mostly dry, so choose plants that just need to handle occasional damp feet.
Recommended Plant Species by Zone
| Zone | Common Name | Latin Name | Height | Notes |
|---|---|---|---|---|
| Center (wet) | Blue flag iris | Iris virginica | 2–3 ft | Tolerates standing water; spring bloom |
| Center (wet) | Swamp milkweed | Asclepias incarnata | 3–4 ft | Monarch host plant; pink summer flowers |
| Middle | Joe-pye weed | Eutrochium purpureum | 4–7 ft | Late summer bloom; attracts swallowtails |
| Middle | Cardinal flower | Lobelia cardinalis | 2–4 ft | Hummingbird magnet; vivid red spikes |
| Middle | Switchgrass | Panicum virgatum | 3–6 ft | Structural interest; winter seed heads |
| Outer edge / berm | Black-eyed Susan | Rudbeckia hirta | 1–3 ft | Drought tolerant once established |
| Outer edge / berm | Wild bergamot | Monarda fistulosa | 2–4 ft | Bee and butterfly magnet; lavender blooms |
Avoid invasive species—even if they tolerate wet conditions. Purple loosestrife (Lythrum salicaria) is one example: it’s sometimes sold for wet areas but spreads aggressively into natural wetlands and is banned in many states. Check your state’s invasive species list before buying anything labeled “wetland tolerant.”
Inlet, Overflow, and Drainage Details
Water needs to enter the rain garden gently, or it’ll wash away soil at the inlet. A simple stone-lined channel or a 12-inch-wide strip of river rock helps slow things down. For downspouts, use a buried 4-inch perforated pipe—or lay a surface channel lined with 3- to 4-inch cobble for the last 3 to 4 feet before the basin.
Every rain garden needs an overflow for storms too big for the basin to hold. A notch cut into the berm works fine, as long as it sends excess water somewhere safe—a lawn, a swale, or a storm drain. Set the overflow 1 to 2 inches below the top of the berm so water flows out in a controlled way instead of spilling over the top.
In heavy clay areas, an underdrain—a perforated pipe buried at the base of the amended soil layer and connected to a storm drain or daylight outlet—keeps the basin from staying wet too long. The Chicago Metropolitan Agency for Planning includes underdrain specs in their green infrastructure guidance, noting they’re a good idea when native soil drains slower than 0.5 inches per hour.
Installation Steps and Timeline
- Mark and call 811. Contact your local utility notification service at least three business days before digging. It’s required by law in all 50 states and takes less than five minutes online.
- Excavate the basin. Remove sod and native soil to the design depth. Save topsoil for building the berm.
- Amend the soil. If native soil drains poorly, replace it with the bioretention mix described above. Rake the basin floor level.
- Build the berm. Pack excavated soil on the downslope side to the design height. Tamp it down in 4-inch layers.
- Install inlet and overflow structures. Place river rock at the inlet; cut the overflow notch in the berm.
- Plant. Space plants according to how wide they’ll get—usually 18 to 24 inches apart for perennials and grasses. Fall or early spring are the best times to plant.
- Mulch. Spread 2 to 3 inches of shredded hardwood mulch across the basin, keeping it clear of plant crowns. Skip dyed mulches—they can leach into the soil.
- Water and monitor. Water once a week during the first growing season unless it rains at least an inch. Watch for erosion at the inlet and fix it right away.
Cost Estimates and Budget Planning
A DIY rain garden around 200 to 300 square feet usually costs $500 to $1,500, depending on your soil and what plants you pick. Soil work and plants are the biggest variables. Bioretention mix runs about $2 to $4 per cubic foot, including delivery. For a 250-square-foot basin with 18 inches of amended soil, you’ll need roughly 35 cubic yards—a major cost that drops if you source compost locally or through a municipal program.
Native plants from a specialty nursery run $8 to $18 per quart-sized container and $15 to $35 per gallon. Plugs and bare-root plants from native plant sales—often hosted by local conservation districts or native plant societies—can cut plant costs by 50 to 70 percent. The Lady Bird Johnson Wildflower Center in Austin, Texas keeps a searchable list of native plant societies by state, many of which hold annual sales with discounted stock.
- Soil amendment (bioretention mix, 35 cu yd): $350–$700
- Plants (30–40 plants for 250 sq ft): $300–$600
- River rock for inlet and edging: $80–$150
- Mulch (3 cubic yards): $60–$120
- Perforated pipe and fittings (if underdrain needed): $100–$200
- Total DIY estimate: $890–$1,770
Hiring a landscape contractor familiar with bioretention usually costs $3,000 to $8,000 for a project this size—including design, labor, materials, and a one-year plant warranty. Many cities offer rebates of $1 to $3 per square foot for certified rain garden installations. Check with your local stormwater utility or public works department before you start.
Maintenance Through the Seasons
Rain gardens need less upkeep than a typical perennial border once plants are settled, but they’re not zero-maintenance. The first two years are the busiest, as plants grow roots deep enough to reach moisture between rains.
In spring, cut back last year’s dead stems to 4 to 6 inches above the soil. Check the inlet and overflow for leaves or sediment and clear anything blocking flow. Add a light layer of compost if the mulch has broken down a lot.
During summer, pull weeds by hand before they go to seed. Weeding matters most in the first two years, before the plants fill in. After year three, a well-chosen native planting usually crowds out most weeds on its own.
In fall, leave seed heads and stems standing through winter. Research from the Xerces Society for Invertebrate Conservation shows hollow and pithy stems give shelter to about 30 percent of native bee species—many of which nest in cavities. Wait until late winter or early spring to cut back, not fall.
"Bioretention areas, when planted with appropriate native species, can reduce total suspended solids in stormwater by up to 90 percent and total phosphorus by 65 to 80 percent, making them among the most effective small-scale stormwater management practices available." — Minnesota Pollution Control Agency, Stormwater Manual, 2022
Every three to five years, check whether the basin still drains within 24 to 48 hours after a heavy rain. If it’s slowing down, the soil may have compacted or filled with fine silt. Loosening the basin floor with a garden fork—or replacing the top 4 to 6 inches of soil mix—usually fixes it without rebuilding the whole thing.
A rain garden built this way handles runoff from a typical suburban roof, cuts down on pollutants going into local streams and lakes, and supports native insects and birds all year. Getting the siting, soil, and plants right upfront means decades of low-cost, high-value function.

