Tree Care
How to Plant a Shade Tree: A Beginner-Friendly Guide
Why Plant a Shade Tree?
Planting a shade tree is one of the most rewarding investments you can make for your landscape. Not only do mature shade trees enhance the aesthetic appeal of your property, but they also provide tangible environmental and economic benefits. According to the United States Department of Energy, strategically planted shade trees can reduce summer air conditioning costs by up to 25 percent. Furthermore, a well-placed tree can increase your property value by as much as 15 percent, making it a smart long-term financial decision.
For beginners, the process of planting a tree might seem daunting. However, with the right guidance, proper tools, and a bit of patience, you can successfully establish a thriving shade tree that will grace your yard for decades. This beginner-friendly growing guide will walk you through every step of the process, from selecting the right species to executing the perfect planting technique.
Site Selection and Sunlight Mapping
Before purchasing your tree, spend a day observing your yard. Most shade trees, including Red Maples and Northern Red Oaks, require full sun, which is defined as at least six to eight hours of direct, unfiltered sunlight per day. Pay close attention to overhead power lines, roof overhangs, and the proximity of your home's foundation. A good rule of thumb is to plant large shade trees at least 15 to 20 feet away from any structure to prevent root interference with foundations and to allow the mature canopy to spread without scraping your roof. Furthermore, consider the mature shadow cast by the tree. Planting deciduous shade trees on the south and west sides of your home will provide cooling shade during the hot summer months, while allowing the bare branches to let warming sunlight penetrate your windows during the winter.
Before finalizing your tree choice, it is highly recommended to conduct a basic soil test. You can purchase a DIY soil test kit from your local garden center for about $15, or send a sample to your local university cooperative extension office. Knowing your soil's pH and drainage characteristics will help you avoid planting an acid-loving tree in highly alkaline soil, which can lead to severe nutrient deficiencies like iron chlorosis.
Choosing the Right Shade Tree for Beginners
When starting out, it is crucial to select a tree species that is resilient, adaptable, and relatively low-maintenance. Avoid fast-growing species with weak wood, such as the Bradford Pear or Silver Maple, as they are prone to storm damage and disease. Instead, opt for robust, long-lived shade trees that tolerate a variety of soil conditions.
Below is a comparison chart of three excellent, beginner-friendly shade trees that thrive in most North American hardiness zones:
| Tree Species | Mature Height / Spread | Growth Rate | Average Cost (15-Gallon) | Best Features |
|---|---|---|---|---|
| Northern Red Oak | 60-75 ft / 45 ft | Fast (2 ft/year) | $80 - $120 | Drought-tolerant, brilliant fall color, strong wood |
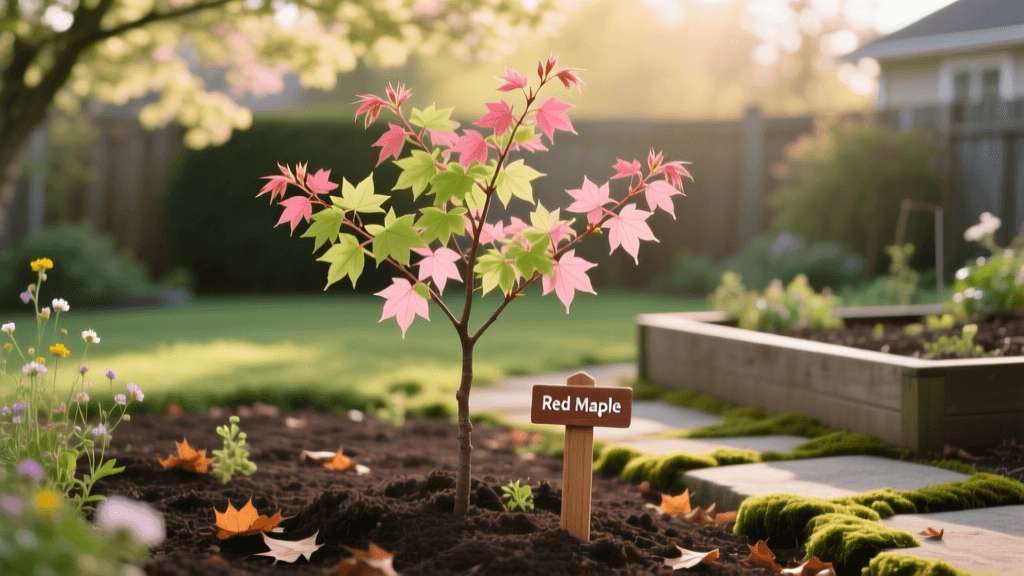
| Red Maple | 40-60 ft / 40 ft | Medium (1.5 ft/year) | $90 - $130 | Adaptable to wet soils, vibrant red autumn foliage |
| Ginkgo Biloba (Male) | 50-75 ft / 35 ft | Slow-Medium (1 ft/year) | $100 - $150 | Extremely pest/disease resistant, urban pollution tolerant |
Note: Always purchase male Ginkgo biloba cultivars (such as 'Autumn Gold') to avoid the foul-smelling fruit produced by female trees.
When to Plant Your Shade Tree
Timing is everything when it comes to tree planting. The absolute best time to plant a shade tree is during the dormant season. In most regions, this means planting in the early fall (after the leaves drop but before the ground freezes) or in the early spring (after the ground thaws but before the buds break). Fall planting is generally preferred because the cooler air temperatures reduce stress on the canopy, while the soil remains warm enough to encourage vigorous root growth before winter sets in.
Tools and Materials You Will Need
Before you head out to the yard, gather the following tools and materials. Investing in the right supplies will make the job easier and ensure your tree gets the best possible start.
- Round-Point Shovel: A high-quality, fiberglass-handled shovel ($30-$45) for digging and moving soil.
- Spade or Trenching Shovel: Useful for cutting through roots and defining the edges of your hole ($25-$35).
- Wheelbarrow: For moving native soil and transporting mulch ($60-$90).
- Organic Hardwood Mulch: You will need approximately 3 to 4 cubic feet of shredded hardwood or pine bark mulch ($4-$6 per bag).
- Mycorrhizal Fungi Inoculant: A granular root stimulant that helps roots absorb water and nutrients ($15-$25).
- Soaker Hose or Tree Watering Bag: A slow-release watering bag (like the Treegator brand) holds up to 20 gallons and releases it slowly ($20-$30).
- Utility Knife or Pruning Shears: For removing burlap, wire baskets, or circling roots ($15-$20).
Step-by-Step Tree Planting Guide
Step 1: Call Before You Dig
Before you break ground, you must call your local utility locating service (dial 811 in the United States) at least a few days in advance. This free service will mark underground gas, water, and electrical lines, preventing dangerous accidents and costly repairs.
Step 2: Dig the Perfect Hole
The most common mistake beginners make is digging a hole that is too deep and too narrow. According to the University of Florida IFAS Extension, a tree planting hole should be two to three times wider than the root ball, but no deeper than the root ball itself. The goal is to create a wide, shallow bowl that allows roots to spread laterally into loose soil. Measure the height of your root ball from the bottom to the root flare (the point where the trunk widens at the base). Dig your hole so that the root flare will sit exactly one to two inches above the surrounding grade to account for settling.
"The most critical factor in tree planting is identifying the root flare and ensuring it remains at or slightly above the soil surface. Planting too deep is the number one cause of transplant failure and long-term decline in urban landscapes." — Dr. Edward Gilman, University of Florida IFAS Extension
Step 3: Prepare the Root Ball
If your tree is in a plastic container, gently slide it out. Inspect the roots for circling or girdling. Use your pruning shears to shave off the outer inch of the root ball or make four vertical slices down the sides to encourage outward growth. If your tree is Balled and Burlapped (B&B), place it in the hole first, then use your utility knife to cut away all synthetic burlap and wire baskets. Natural burlap can be left in the hole, but it should be peeled back from the top of the root ball.
Step 4: Position and Backfill
Carefully lower the tree into the center of the hole, ensuring the root flare is visible and properly elevated. Turn the tree so its best face points toward your primary viewing angle. Backfill the hole using the native soil you just dug out. Do not amend the backfill with compost, peat moss, or potting soil. Amending the soil creates a "bathtub effect," where water pools in the loose amended soil and drowns the roots, while the roots refuse to expand into the denser native clay or sand. Sprinkle a layer of mycorrhizal fungi inoculant over the roots as you backfill to promote symbiotic root growth.
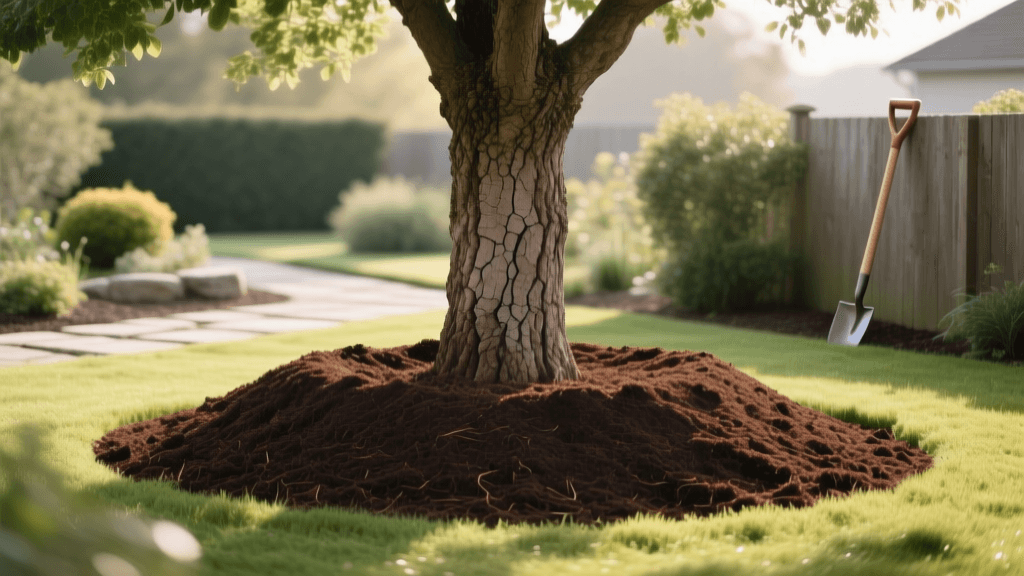
Step 5: Mulch and Water
Create a mulch ring around the base of the tree. Spread 3 to 4 inches of organic hardwood mulch in a wide donut shape, extending at least 3 feet out from the trunk. Crucial: Keep the mulch at least 3 inches away from the actual trunk of the tree to prevent rot and rodent damage. Finally, water the tree deeply immediately after planting to eliminate air pockets in the soil.
First-Year Watering and Care Schedule
Newly planted trees require consistent moisture to establish their root systems. Relying on rainfall is rarely sufficient during the first year. Use the following schedule to ensure your shade tree receives the right amount of water:
- Weeks 1-2: Water daily. Apply 2 to 3 gallons of water per inch of trunk caliper (diameter measured at knee height).
- Weeks 3-12: Water every 2 to 3 days. Gradually increase the volume of water while decreasing the frequency to encourage deep root growth.
- Months 4-12: Water weekly. Provide a slow, deep soaking of 10 to 15 gallons per week, depending on rainfall and temperature.
Pro Tip: Use a slow-release tree watering bag. Filling it once takes five minutes, and it will slowly drip water directly into the root zone over the next 8 hours, preventing runoff and ensuring deep saturation.
Common Beginner Mistakes to Avoid
Even with the best intentions, novice gardeners often fall victim to a few common pitfalls. Avoid these errors to guarantee your tree's survival:
- Volcano Mulching: Piling mulch high against the trunk in a volcano shape traps moisture against the bark, leading to fungal diseases, root girdling, and inviting pests. Always maintain a mulch-free zone directly around the trunk.
- Planting Too Deep: Burying the root flare suffocates the tree's root system and starves it of oxygen. If your tree sinks after planting, you must carefully lift it and add soil underneath.
- Over-Fertilizing: Do not apply high-nitrogen synthetic fertilizers to a newly planted tree. The salt in synthetic fertilizers can burn tender, developing roots. Wait until the tree has completed its first full growing season before applying a slow-release, organic fertilizer.
- Staking the Tree Unnecessarily: The Arbor Day Foundation advises against staking trees unless they are in extremely windy areas or have top-heavy canopies. Trees need to sway in the wind to develop strong, tapered trunks and robust root systems.
Conclusion
Planting a shade tree is a deeply satisfying project that yields dividends for generations. By choosing a resilient species, digging a properly proportioned hole, utilizing native soil, and adhering to a strict first-year watering schedule, you set the stage for a lifetime of vigorous growth. Grab your shovel, follow this beginner-friendly guide, and enjoy the process of adding a magnificent new canopy to your landscape.