
Landscaping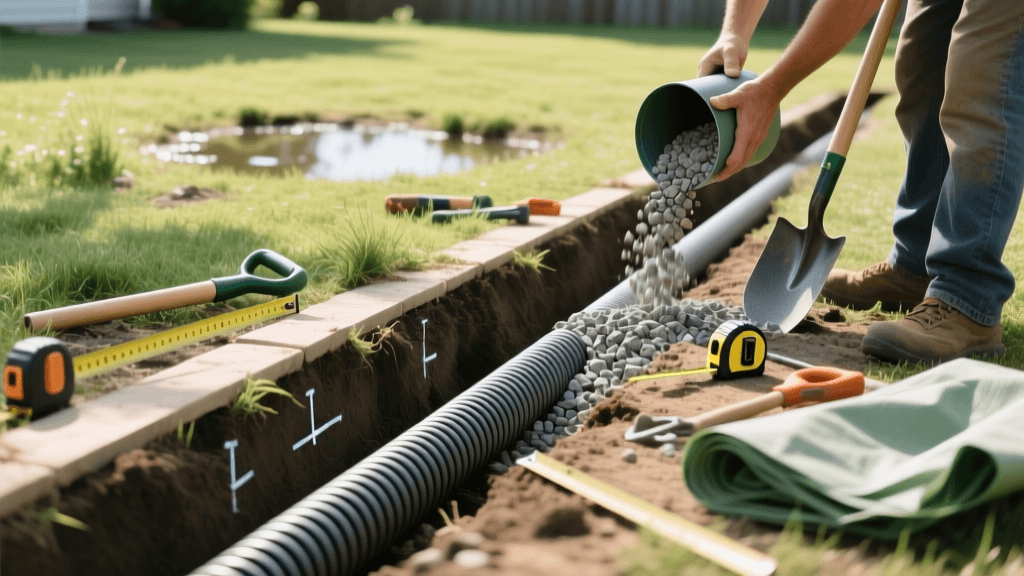
How to Install a French Drain: A Step-by-Step DIY Guide
Why Install a French Drain?
Dealing with a soggy yard, standing water near your foundation, or a perpetually muddy lawn can be incredibly frustrating. Poor drainage not only ruins your curb appeal and kills your turfgrass, but it can also lead to severe structural damage to your home's foundation, basement flooding, and the proliferation of mosquito breeding grounds. When surface grading and downspout extensions are not enough to move water away from your property, it is time to look below the surface.
One of the most effective, time-tested solutions for redirecting subsurface and surface water is the French drain. Originally invented by Henry French in the 19th century, this simple yet highly effective landscaping feature relies on gravity, a gravel-filled trench, and a perforated pipe to channel water away from vulnerable areas. In this comprehensive, step-by-step guide, we will walk you through exactly how to install a French drain in your yard, including the tools you need, the math behind the slope, and the material choices that will ensure your drainage system lasts for decades.
Understanding the Mechanics of a French Drain
A French drain works on a simple principle: water will always follow the path of least resistance. By digging a trench and filling it with porous gravel and a perforated pipe, you create an artificial underground channel that is much easier for water to enter and travel through than the surrounding compacted soil. As groundwater rises or surface water percolates down, it enters the gravel bed, seeps into the perforated pipe, and is carried by gravity to a designated discharge area, such as a storm drain, a dry well, or a lower-lying daylight area on your property.
Tools and Materials Required
Before breaking ground, you need to gather the right equipment. Budget approximately $20 to $35 per linear foot for a DIY installation, depending on material choices and whether you rent power equipment.
Essential Tools
- Trenching Shovel and Spade: For digging and shaping the trench.
- Wheelbarrow: For moving excavated soil and heavy gravel.
- String Line and Line Level: Crucial for calculating and maintaining the correct slope.
- Tape Measure and Stakes: For marking the trench path and measuring depth.
- Tamper: For compacting the soil base if necessary.
- Utility Knife and Tin Snips: For cutting landscape fabric and pipe.
Core Materials
- Perforated Drainage Pipe: 4-inch diameter is standard for residential yard drainage.
- Washed Drain Rock: 3/4-inch angular gravel. Do not use crushed stone with 'fines' or pea gravel, as they can clog the pipe.
- Non-Woven Geotextile Landscape Fabric: This acts as a filter to keep soil and silt out of the gravel bed while allowing water to pass through.
- Topsoil and Sod/Seed: For finishing the surface after backfilling.
Choosing the Right Pipe: Corrugated vs. PVC
One of the most common debates in landscape drainage is whether to use flexible corrugated pipe or rigid PVC. Both have their place, but understanding their differences will save you from future maintenance headaches.
| Feature | Corrugated Pipe (Flexible) | PVC Pipe (Rigid SDR 35) |
|---|---|---|
| Cost | Low ($15 to $25 per 10ft section) | Higher ($30 to $45 per 10ft section) |
| Durability | Moderate (can crush under heavy soil loads or vehicle traffic) | High (rigid, handles heavy soil loads and driveway edges) |
| Flow Rate | Lower (interior ridges trap debris and slow water) | Higher (smooth interior allows rapid water flow) |
| Cleaning | Difficult to snake; ridges catch cleaning tools | Easy to snake and flush with a sewer jetter |
| Best Use | Shallow trenches, garden beds, low-traffic zones | Deep trenches, driveway edges, main discharge lines |
Pro Tip: For long-term reliability, especially if the drain will be buried deeper than 18 inches or located near a driveway, invest in rigid PVC with pre-drilled perforations.
Step 1: Planning and Utility Marking
Never put a shovel in the ground without knowing what lies beneath. Your first step is to call 811 (the national call-before-you-dig number in the US) at least a few days before your project begins. Utility companies will come to your property and mark underground gas, water, and electrical lines for free.
Next, plan your route. Identify the area where water pools (the catch basin) and determine where the water will exit (the daylight or discharge point). The discharge point must be lower than the catch basin and should safely divert water away from your home and your neighbor's property. If daylighting is impossible, you may need to construct a dry well at the end of the trench, which requires a larger excavation filled with gravel to allow water to percolate slowly into the surrounding soil.
Step 2: Calculating the Slope and Digging the Trench
Gravity is the engine of your French drain. Without the proper slope, water will sit stagnant in the pipe, leading to sediment buildup and system failure.
According to the Clemson University Cooperative Extension, subsurface drainage systems require a minimum slope of 1% (a 1-inch drop per 8 feet of pipe) to maintain adequate water velocity and prevent silt from settling inside the pipe. For a 50-foot drain, you need a total drop of at least 6.25 inches from start to finish.
To achieve this:
- Drive a stake at the starting point and another at the discharge point.
- Tie a string line between the two stakes.
- Attach a line level to the string and adjust the end stake until the bubble is perfectly centered.
- Measure down from the string at the discharge stake to calculate your required depth drop, adjusting the string to represent the bottom of your trench.
Dig your trench to be approximately 12 inches wide and 18 to 24 inches deep. Keep the bottom of the trench as flat and consistent as possible, following your string line guide.
Step 3: Lining the Trench with Fabric
Once the trench is dug, it is time to line it with non-woven geotextile fabric. This step is non-negotiable. Soil and silt are the enemies of a French drain; over time, they will wash into the gravel and clog the pipe, rendering the system useless.
Drape the landscape fabric across the trench, allowing at least 12 inches of excess fabric to hang over both sides of the trench. You will use this excess later to wrap over the top of the gravel. Pin the fabric to the soil walls using landscape staples to keep it in place while you work.
Step 4: Adding the Base Gravel and Pipe Placement
Add a 2-to-3-inch layer of washed drain rock to the bottom of the fabric-lined trench. This base layer provides a stable bed for the pipe and allows water to flow underneath it.
Next, lay your perforated pipe on top of the gravel base. Crucial Rule: Always place the pipe with the holes facing DOWN.
Many DIYers mistakenly believe holes should face up to 'catch' falling water. However, water does not fall directly into the pipe; it percolates through the gravel bed. When the holes face down, water enters the pipe from the bottom up through the gravel filter bed. This prevents soil and debris from falling directly through the holes into the pipe, significantly reducing the risk of clogs and extending the lifespan of your drainage system.
Connect your pipe sections using appropriate couplings, ensuring a tight fit. If using PVC, prime and cement the joints to prevent soil intrusion at the connections.
Step 5: Covering and Finishing the Drain
With the pipe in place, carefully shovel the washed drain rock over the top of the pipe. Fill the trench with gravel until you are about 2 to 3 inches below the ground surface. Do not use a metal tamper directly on the pipe, especially if using corrugated pipe, as you risk crushing it.
Once the gravel is in place, take the excess landscape fabric hanging over the edges and fold it over the top of the gravel bed, overlapping the seams like a burrito. This completely encapsulates the gravel and pipe in a protective fabric shell, ensuring that topsoil cannot wash down into the drainage aggregate.
Finally, cover the wrapped gravel with 2 to 3 inches of topsoil. You can then lay sod over the trench or plant grass seed to blend the repair seamlessly into your existing lawn. For areas where surface water needs to enter the drain rapidly, you can leave a small strip of the gravel exposed at the surface or install a catch basin grate connected to the main line.
Common Mistakes to Avoid
- Using the Wrong Gravel: Never use 'crusher run' or gravel with stone dust (fines). The dust will turn into mud and clog the pipe. Always insist on 'washed' drain rock.
- Skipping the Fabric: A French drain without landscape fabric is just a temporary gravel ditch that will fail within a few seasons due to siltation.
- Discharging Too Close to the Foundation: Ensure your daylight or discharge point is at least 10 feet away from your home's foundation to prevent water from looping back into your basement or crawlspace.
- Ignoring Roof Runoff: A French drain handles groundwater and surface pooling. It is not designed to handle the massive volume of water from a roof downspout. Always route downspouts into solid (non-perforated) PVC pipes that tie into the main drain line or daylight separately.
Maintaining Your French Drain
A properly installed French drain requires very little maintenance. However, it is wise to inspect the discharge point annually, especially after heavy autumn leaf falls or spring thaws. Ensure the exit pipe is free of debris, rodent nests, and ice dams. If you notice water pooling over the trench line years down the road, you may need to flush the pipe with a garden hose or a sewer jetter to clear out any accumulated biofilm or minor silt buildup.
By taking the time to calculate your slope, select the right washed materials, and properly encapsulate your system in geotextile fabric, your DIY French drain will protect your landscape and your home's foundation for decades to come.

