
Landscaping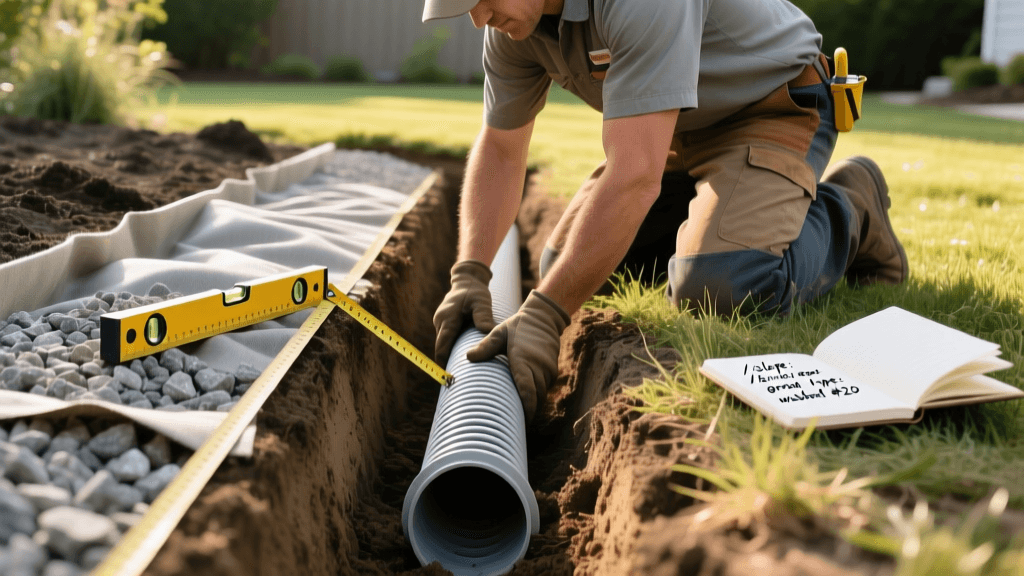
How to Install a French Drain: Expert Tips and Costs
Mastering Subsurface Drainage: The Expert Guide to French Drains
Standing water in your yard is more than just a nuisance; it is a direct threat to your home's foundation, your lawn's root system, and your overall landscape investment. When surface grading fails to move water away from your property, a French drain is the most reliable subsurface drainage solution available. However, a poorly installed French drain will fail within a single season, leaving you with a muddy trench and a flooded yard. In this expert guide, we break down the precise measurements, material specifications, and best practices required to install a French drain that functions flawlessly for decades.
The Physics of a French Drain
To understand installation best practices, you must first understand the physics of how a French drain operates. Unlike a solid gutter or downspout pipe that moves water from point A to point B, a French drain is a gravel-filled trench that acts as a subterranean reservoir. Water naturally follows the path of least resistance. When your yard's soil becomes saturated, hydrostatic pressure forces water into the highly porous gravel trench. Once the water level in the gravel bed rises to the level of the perforated pipe, it enters the pipe and is safely carried away by gravity.
Pre-Installation: Site Assessment and Utility Safety
Before breaking ground, proper planning is non-negotiable. The most common reason DIY French drains fail is improper slope or a poorly chosen exit point.
Step 1: Call 811
Always call your local utility locating service (811 in the United States) at least 48 to 72 hours before digging. Hitting a buried gas, water, or fiber-optic line can be fatal and financially ruinous.
Step 2: Determine the Exit Point
Water must have a logical place to go. You cannot simply bury a pipe and hope the water disappears. Common exit points include:
- Daylighting: Exposing the solid pipe at a lower elevation on your property, such as a street curb or a natural slope.
- Dry Well: An underground chamber (typically 50 to 90 gallons) filled with gravel that slowly percolates water back into the deep water table. Best for sandy or loamy soils.
- Storm Drain: Tying into municipal systems (requires local permits and code compliance).
Step 3: Calculate the Slope
Gravity is the engine of your drain. The absolute minimum slope required for water flow is a 1% grade (1/8 inch of drop per linear foot). However, expert landscapers recommend a 1-inch drop per 8 linear feet to ensure debris is flushed through the system and to account for minor soil settling over time.
Selecting the Right Materials
Using the wrong materials is the fastest way to guarantee a clogged system. Skip the big-box store shortcuts and source professional-grade materials.
- The Pipe: Use 4-inch SDR 35 PVC for heavy-duty applications (like under driveways) or rigid corrugated HDPE for standard yard runs. Avoid flexible black corrugated tubing with slits, as the interior ridges trap sediment and the tubing crushes easily under soil pressure.
- The Gravel: Use washed 3/4-inch crushed stone. The word 'washed' is critical; unwashed stone contains rock dust that turns into mud and clogs your pipe. Avoid pea gravel, as its round shape prevents the stones from locking together, leading to trench collapse.
- The Fabric: Use a non-woven geotextile fabric rated at a minimum of 4 ounces per square yard. Woven weed barriers will clog with silt within months, effectively waterproofing your trench and rendering the drain useless.
Step-by-Step Installation Best Practices
1. Digging the Trench
For a standard yard application, dig a trench that is 12 to 24 inches deep and 6 to 12 inches wide. Use a trenching shovel and a mattock for clay-heavy soils. Continuously check your slope using a laser level or a string line with a line level.
2. Lining the Trench
Drape the non-woven geotextile fabric over the trench, leaving at least 12 inches of excess fabric hanging over both sides. Do not staple or pin the fabric yet.
3. Adding the Base Gravel
Shovel 2 to 3 inches of washed 3/4-inch gravel into the bottom of the fabric-lined trench. Use a hand tamper to create a level, compacted base for the pipe.
4. Laying the Pipe (The 'Holes Down' Rule)
Place your perforated pipe on the gravel base. There is a massive debate among amateurs about which way the holes should face. The experts have a definitive answer.
According to Penn State Extension, perforated drainage pipe should be installed with the holes facing downward. This counterintuitive placement allows water to rise from the saturated gravel bed into the pipe, preventing soil and sediment from washing directly through the top holes and clogging the system.
Ensure all pipe connections are secured with couplings and hose clamps or PVC cement, depending on your pipe type.
5. Covering and Wrapping
Cover the pipe with another 3 to 5 inches of gravel, ensuring the pipe is completely buried in the stone bed. Fold the excess fabric over the top of the gravel, overlapping it by at least 6 inches to create a 'burrito' effect. This completely encapsulates the gravel, keeping topsoil and roots out of the drainage bed.
6. Backfilling
Top the fabric with 2 to 3 inches of coarse sand or native topsoil, followed by sod or seed to match the surrounding lawn.
Material Comparison Chart
Choosing the right components ensures longevity. Review this comparison chart to select the best materials for your specific soil and load-bearing requirements.
| Material | Pros | Cons | Best Use Case |
|---|---|---|---|
| Corrugated HDPE Pipe | Flexible, inexpensive, easy to cut | Prone to crushing, interior ridges trap sediment | Shallow garden beds, simple yard runs |
| SDR 35 PVC Pipe | Structurally strong, smooth interior flow | Requires fittings for turns, more expensive | Under driveways, deep trenches, heavy clay |
| Washed 3/4-inch Gravel | Excellent drainage, locks together tightly | Heavier to transport and shovel | All standard French drain applications |
| Pea Gravel | Readily available, aesthetically pleasing | Shifts easily, poor structural support | Decorative surface layers only (never in drain) |
| Non-Woven Fabric (4oz) | Allows water flow while blocking silt | More expensive than woven weed barrier | Subsurface drainage encapsulation |
Estimated Costs and Labor Timelines
Budgeting for a French drain depends heavily on soil composition, trench depth, and whether you hire a professional or tackle it as a DIY weekend project.
- DIY Material Costs: Expect to spend $4 to $8 per linear foot on high-quality PVC, washed gravel, and non-woven fabric. A 50-foot drain will cost roughly $200 to $400 in materials.
- Professional Installation: Landscaping contractors typically charge between $20 and $30 per linear foot for standard yard drains, and up to $75 to $90 per linear foot for deep foundation drains requiring heavy machinery or concrete cutting.
- Timeline: A 50-foot trench dug by hand in average loam soil will take two able-bodied adults approximately 10 to 14 hours to dig, lay, and backfill. Clay or rocky soils can double this time estimate.
Long-Term Maintenance and Care
While a properly installed French drain is largely passive, it is not entirely maintenance-free. To ensure your system lasts 30 years or more, implement these expert maintenance routines:
- Install a Catch Basin: At the starting point of your drain, install a 9x9 inch plastic catch basin with a grated top. This captures surface water and large debris before it enters the gravel bed.
- Annual Flushing: Once a year, preferably in early spring, use a garden hose with a high-pressure nozzle or a plumbing snake to flush out the catch basin and the first few feet of the pipe.
- Inspect the Exit Point: Ensure the daylighted end of your pipe or your dry well is free of leaves, rodent nests, and soil erosion that could dam the water flow.
By adhering to these precise measurements, material standards, and installation techniques, you will transform a soggy, unusable yard into a well-drained, healthy landscape that protects your home's foundation for decades to come.

