Tree Care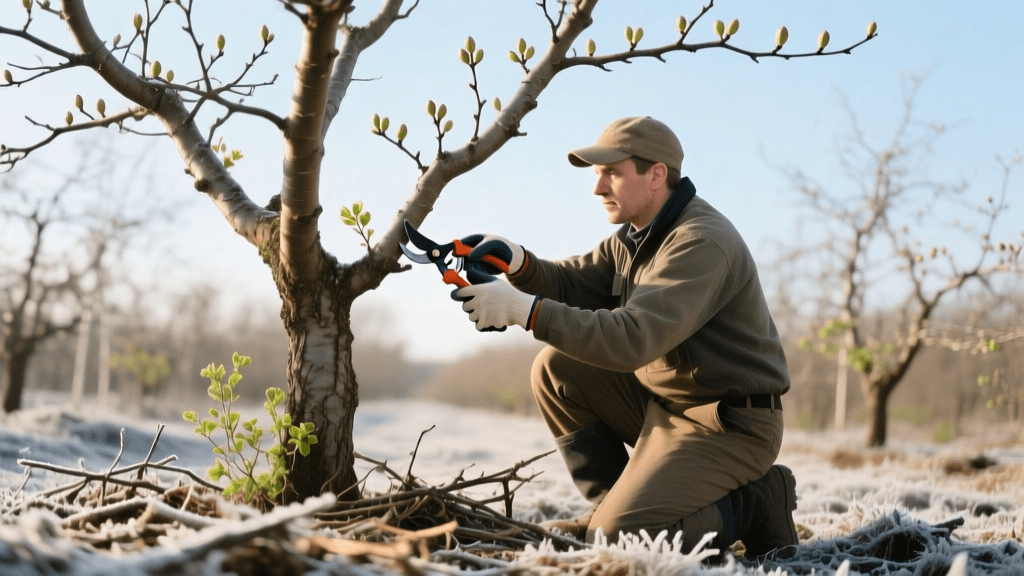
The Ultimate Late Winter Pruning and Spring Tree Health Guide
The Critical Importance of Late Winter Tree Care
As the calendar turns from late winter to early spring, homeowners and landscape professionals alike are presented with a narrow but crucial window of opportunity for tree maintenance. This transitional period, often occurring between late February and early March depending on your USDA Hardiness Zone, is the absolute best time to perform structural pruning and conduct baseline health assessments on deciduous trees. During this dormant phase, the tree's energy reserves are stored safely in the root system, and the absence of leaves provides an unobstructed view of the branch architecture.
Proper seasonal maintenance is not merely an aesthetic endeavor; it is a vital health intervention. Pruning during dormancy minimizes the risk of transmitting devastating pathogens, such as Oak Wilt (Bretziella fagacearum) or Fire Blight (Erwinia amylovora), which are highly active and easily spread by insects during the warmer spring and summer months. Furthermore, addressing structural weaknesses before the heavy foliage and spring storms arrive drastically reduces the likelihood of catastrophic limb failure.
Assembling Your Arboriculture Toolkit
Before making a single cut, you must ensure your tools are sharp, appropriate for the task, and rigorously sterilized. Dull tools crush the cambium layer rather than slicing it cleanly, leading to delayed wound compartmentalization and increased susceptibility to decay fungi.
- Hand Pruners (Bypass): Ideal for branches up to 3/4 inch in diameter. The Felco F-2 is an industry-standard choice, costing around $60, offering replaceable parts and a clean, precise cut.
- Loppers: Necessary for limbs between 3/4 inch and 2 inches. Look for models with a ratcheting mechanism or compound action to reduce hand fatigue.
- Pruning Saws: For branches over 2 inches. A curved blade with tri-edge teeth, such as the Silky Gomboy, slices through green and dormant wood effortlessly without binding.
- Sterilization Solution: A crucial but often overlooked tool. Keep a spray bottle filled with 70% isopropyl alcohol or a 10% household bleach solution. You must sanitize your blades between every single tree, and immediately after cutting any diseased wood, to prevent cross-contamination.
Executing the Dormant Prune: Strategy and Technique
When approaching a dormant tree, follow the universally accepted 'Three Ds' of pruning: remove Dead, Damaged, and Diseased wood first. This immediate clearance improves air circulation and removes overwintering habitats for pests like the emerald ash borer or tent caterpillars.
Once the Three Ds are addressed, shift your focus to structural integrity. Identify the central leader (the main upward-growing trunk) and remove any competing leaders that create weak, V-shaped crotches. V-shaped crotches trap moisture and bark, leading to included bark formations that are highly prone to splitting under the weight of snow, ice, or wind. Favor U-shaped crotches, which possess strong, interlocking wood grain.
Mastering the Three-Cut Method
For any branch larger than 1.5 inches in diameter, never attempt a single flush cut. The weight of the falling limb will strip the bark down the trunk, causing a massive, unhealable wound. Instead, utilize the three-cut method:
- The Undercut: About 12 inches away from the trunk, cut upward through the bottom third of the branch. This stops the bark from tearing when the branch falls.
- The Relief Cut: An inch or two further out from the undercut, saw completely through the branch from the top down. The bulk of the weight is now removed.
- The Collar Cut: Locate the branch collar (the swollen area where the branch meets the trunk) and the branch bark ridge. Make your final cut just outside the collar, angling slightly away from the trunk. Never cut flush with the trunk, as this destroys the tree's natural chemical boundary system (CODIT) designed to seal out decay.
Early Spring Health Assessment: Reading the Bark and Buds
As the threat of hard freezes wanes, transition from pruning to a comprehensive health assessment. The bare branches of early spring make it remarkably easy to spot anomalies that would be hidden by a full canopy in July.
- Cankers and Oozing: Inspect the trunk and primary scaffolds for sunken, discolored, or cracking areas known as cankers. If you observe dark, foul-smelling sap oozing from these wounds (a symptom often called slime flux or bacterial wetwood), the tree is fighting a localized infection. Do not drill holes to 'drain' the tree; instead, improve soil aeration and reduce environmental stress.
- Overwintering Pest Egg Masses: Look for the gray, foamy-looking egg masses of the Spotted Lanternfly or the silken tents of Eastern Tent Caterpillars nestled in branch crotches. Scrape these off into a bucket of soapy water before they hatch in mid-spring.
- Bud Swell and Vitality: Gently scratch a tiny sliver of bark on the tips of smaller twigs. The tissue underneath should be vibrant green. If it is brown and brittle, the branch has suffered winter dieback, often caused by extreme temperature fluctuations or late autumn dehydration.
Seasonal Maintenance Schedule and Cost Estimates
To maintain optimal tree health, a proactive, scheduled approach is vastly superior to reactive emergency care. Below is a structured breakdown of seasonal tasks, timing, and average costs for a standard residential property featuring 3 to 5 mature shade trees.
| Season | Primary Maintenance Task | Optimal Timing | Estimated DIY Cost | Estimated Pro Cost |
|---|---|---|---|---|
| Late Winter | Dormant Structural Pruning | Feb - Early March | $75 (Tool investment) | $300 - $800 |
| Early Spring | Soil Testing & Deep Root Fertilization | March - April | $30 (Test kit + fertilizer) | $150 - $300 |
| Late Spring | Pest Monitoring & Mulch Refresh | May - June | $40 (Mulch + organic sprays) | $100 - $250 |
| Summer | Canopy Inspection & Hazard Limb Removal | July - August | $0 (Visual inspection) | $200 - $600 |
| Late Autumn | Anti-Desiccant Spray & Winter Watering | Nov - Dec | $25 (Spray concentrate) | $100 - $200 |
Debunking the Pruning Sealant Myth
One of the most persistent and harmful myths in amateur tree care is the application of pruning paint or wound sealants over fresh cuts. For decades, commercial products containing asphalt or petroleum-based chemicals were marketed to 'protect' trees from rot and insects. Modern arboricultural science has thoroughly debunked this practice.
According to the International Society of Arboriculture (ISA) and extensive research published by the Cornell University College of Agriculture and Life Sciences, pruning sealants actually trap moisture and existing fungal spores against the exposed wood, accelerating decay rather than preventing it. Trees do not 'heal' wounds in the human sense; they compartmentalize them. A clean, precise cut left exposed to the air allows the tree's natural biochemical processes to form a callus roll and seal the wound efficiently. Save your money and leave the sealant on the store shelf.
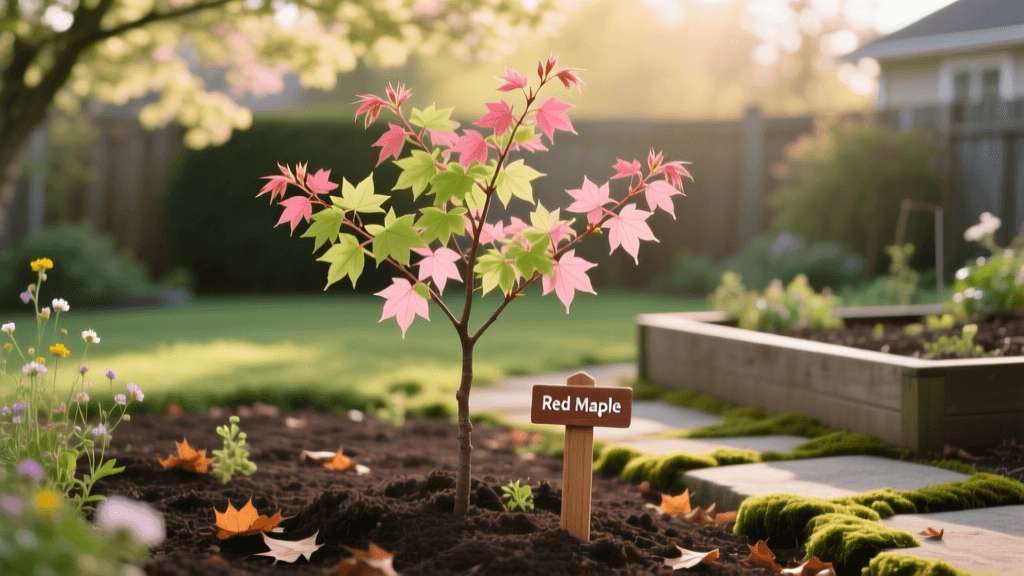
Spring Mulching and Moisture Management
As the soil begins to thaw and spring rains arrive, proper mulching is essential for retaining moisture, regulating soil temperature, and suppressing competing turf grass. However, improper mulching is a leading cause of urban tree decline. Follow the '3-3-3 Rule' for optimal results:
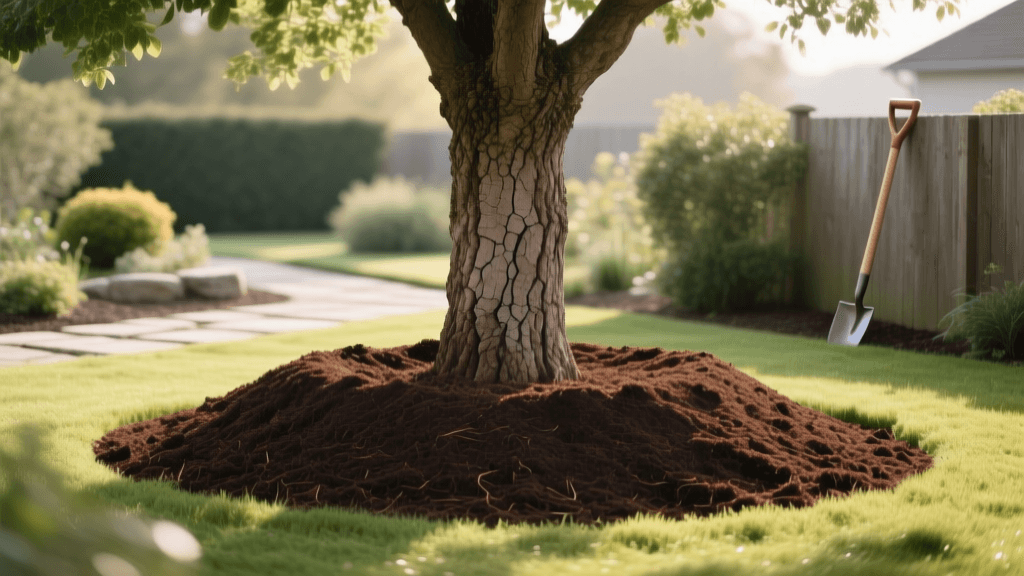
- 3 Inches Deep: Apply a layer of organic, double-shredded hardwood bark no deeper than 3 inches. Excessive mulch suffocates the fine feeder roots, which require oxygen exchange in the top 12 inches of soil.
- 3 Feet Radius: Extend the mulch ring at least 3 feet outward from the trunk in all directions. This protects the trunk from string-trimmer damage (weed whacker rot) and reduces competition from grass roots.
- 3 Inches Away: Keep the mulch strictly 3 inches away from the actual bark of the trunk. Piling mulch against the bark (creating a 'volcano' shape) keeps the root flare buried and moist, inviting opportunistic pathogens, secondary root growth (girdling roots), and rodent habitation during the winter.
Conclusion: Setting the Stage for a Vigorous Canopy
Trees are long-term investments in your property's ecosystem, shade profile, and structural value. By dedicating a few focused hours to late winter pruning and early spring health assessments, you dictate the trajectory of the tree's growth for the entire year. Armed with sharp tools, a solid understanding of tree biology, and a commitment to proper soil and mulch management, you can ensure your landscape remains resilient, safe, and breathtakingly beautiful through every changing season.