Lawn Care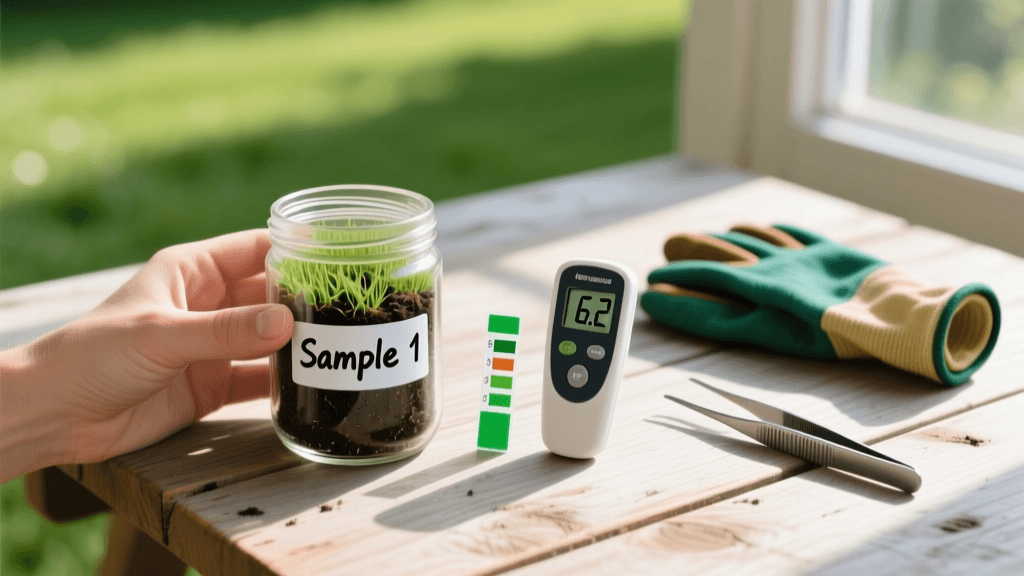
Lawn Soil Testing: Beginner Guide to pH & Amendments
The Hidden Foundation of a Thriving Lawn
Every beginner dreams of a lush, vibrant, and weed-free lawn, but many start their journey by blindly applying generic fertilizers from the local hardware store. This is a common and costly mistake. Without knowing what your soil actually lacks, you are essentially guessing, which can lead to nutrient burn, weakened grass, and increased susceptibility to disease. Welcome to your first foundational lesson in professional lawn care: soil testing. By understanding the chemical and biological makeup of your dirt, you can transition from a guessing game to a precise, science-backed lawn care routine.
Why Guess When You Can Test?
Grass requires 16 essential nutrients to thrive, ranging from primary macronutrients like nitrogen, phosphorus, and potassium, to crucial micronutrients like iron, zinc, and manganese. However, the soil in your yard is a unique ecosystem shaped by your local climate, construction history, and previous landscaping practices. A soil test acts as a diagnostic blood test for your lawn. It reveals the exact pH level and nutrient profile of your earth, allowing you to purchase only the specific amendments your grass needs. Not only does this save you money on unnecessary products, but it also prevents the environmental hazard of nutrient runoff into local waterways.
Tools You Need for Proper Soil Sampling
Before you dig, gather the right tools. You do not need expensive equipment to pull a highly accurate sample. Here is what you will need:
- Soil Probe or Clean Trowel: A dedicated soil probe is best, but a stainless steel hand trowel works perfectly for beginners.
- Clean Plastic Bucket: Avoid metal buckets, as they can skew micronutrient readings (especially iron and zinc).
-
Resealable Plastic Bags: Standard gallon-sized ziplock bags work great for holding your final mixed sample.
- Permanent Marker: For labeling your samples.
- Soil Test Kit or Mailer: Purchased from your local university cooperative extension office or a private lab like Waypoint Analytical.
The 5-Step Soil Collection Method
Collecting a representative sample is critical. If you only test one corner of your yard, you will not get an accurate picture of your entire lawn. Follow these steps for a perfect sample:
1. Map Your Lawn into Zones
Divide your lawn into distinct zones based on sunlight, drainage, and grass type. A front yard in full sun will have different nutrient needs than a shaded backyard. Test each zone separately.
2. Use the Zig-Zag Pattern
Walk your designated zone in a zig-zag or 'W' pattern. Stop at 8 to 10 random locations within that zone to collect your subsamples. Avoid taking samples near sidewalks, driveways, or areas where pets frequently relieve themselves, as these areas have artificially altered pH and nutrient levels.
3. Dig to the Proper Depth
For cool-season grasses (like Kentucky Bluegrass, Fescue, and Ryegrass), dig down 3 to 4 inches. For warm-season grasses (like Bermuda, Zoysia, and St. Augustine), dig 5 to 6 inches deep. Push aside the top layer of thatch and grass blades; you only want the root-zone soil.
4. Mix and Prepare the Sample
Place each subsample into your clean plastic bucket. Once you have 8 to 10 subsamples from a single zone, mix the soil thoroughly in the bucket. Break apart any large clods and remove rocks, roots, or earthworms. Let the soil air-dry in the shade for a few hours if it is overly wet.
5. Bag and Ship
Scoop about one to two cups of the mixed, dry soil into your resealable plastic bag. Label the bag clearly (e.g., 'Front Yard Sunny Zone'). Fill out the submission form provided by your chosen lab, noting the type of grass you are growing, and mail it off. Basic tests typically cost between $15 and $30 and take about one to two weeks to process.
Decoding Your Soil Test Report
When your results arrive, the terminology can feel overwhelming. Here is a beginner-friendly breakdown of the most critical metrics on your report.
The Magic of Soil pH
Soil pH measures how acidic or alkaline your soil is on a scale from 0 to 14. A pH of 7.0 is neutral. Most turfgrasses thrive in a slightly acidic environment, ideally between 6.0 and 7.0. Why does this matter? Because pH dictates nutrient availability. If your soil is too acidic (below 6.0) or too alkaline (above 7.5), essential nutrients become chemically locked in the soil. You could dump hundreds of dollars of fertilizer on your lawn, but if the pH is off, the grass roots physically cannot absorb it.
Understanding N-P-K Ratios
Your report will list levels of Nitrogen (N), Phosphorus (P), and Potassium (K).
- Nitrogen (N): The engine of leafy, green growth. Soil tests rarely measure nitrogen accurately because it fluctuates rapidly with weather and microbial activity. Labs usually provide a standard nitrogen recommendation based on your grass type.
- Phosphorus (P): Vital for deep root development and seedling establishment. Many soils already have excess phosphorus from decades of historical fertilizer use.
- Potassium (K): The immune system of your lawn. It helps grass withstand drought, cold stress, and disease.
Cation Exchange Capacity (CEC)
Think of CEC as the 'storage tank' size of your soil. It measures your soil's ability to hold onto positively charged nutrients (like calcium, magnesium, and potassium). Sandy soils have a low CEC (a small tank) and require frequent, light fertilization. Clay soils have a high CEC (a massive tank) and can hold nutrients for much longer.
Choosing the Right Soil Amendments
Once you know what your soil lacks, you must choose the right amendment to fix it. Below is a comprehensive comparison chart of the most common lawn amendments used by professionals and beginners alike.
| Amendment Type | Primary Purpose | Typical Cost (per 40lb bag) | Standard Application Rate (per 1,000 sq ft) |
|---|---|---|---|
| Pelletized Lime (Calcium Carbonate) | Raises soil pH (reduces acidity) | $15 - $25 | 20 - 50 lbs (based on lab recommendation) |
| Elemental Sulfur | Lowers soil pH (reduces alkalinity) | $30 - $45 | 5 - 10 lbs (slow acting, requires microbial activity) |
| Milorganite (Biosolid Fertilizer) | Adds slow-release Nitrogen and Iron | $20 - $30 | 32 lbs (provides 0.5 lb of Nitrogen per 1k sq ft) |
| Bone Meal | Adds organic Phosphorus for root growth | $25 - $40 | 10 - 15 lbs (best applied during overseeding) |
| Muriate of Potash (Potassium Chloride) | Adds Potassium for stress and disease resistance | $35 - $50 | 2 - 4 lbs (highly concentrated, do not overapply) |
Organic vs. Synthetic Amendments
As a beginner, you will quickly notice a divide between organic and synthetic products. Synthetic amendments (like Scotts Turf Builder or generic potash) are manufactured salts that dissolve quickly, providing an immediate but short-lived nutrient boost. They are excellent for rapid greening but can contribute to soil compaction and salt buildup over time.
Organic amendments (like Milorganite, compost, or bone meal) rely on soil microbes to break them down before the grass can use them. While they take longer to show results, they feed the soil food web, improve soil structure, and provide a slow, steady release of nutrients that won't burn your lawn. For long-term lawn health, a predominantly organic approach supplemented with targeted synthetics is highly recommended.
Application Best Practices for Beginners
Applying amendments incorrectly can damage your turf. Follow these golden rules for safe application:
- Use the Right Spreader: For pelletized lime and granular fertilizers, use a broadcast spreader for even coverage. For smaller, precise areas, a drop spreader prevents product from landing in your garden beds.
- Sweep Hardscapes: Always use a leaf blower or broom to sweep excess amendment off driveways and sidewalks. Iron-based products will stain concrete permanently, and nitrogen runoff harms local ecosystems.
- Water it In: Most granular amendments require a light watering (about 0.25 inches) immediately after application to dissolve the prills and wash the nutrients down into the root zone where they can be absorbed.
- Patience with pH: Adjusting soil pH is a marathon, not a sprint. Lime and sulfur take months to fully react in the soil. Never apply more than the lab recommends in a single application, as drastic pH swings will shock your turf.
Timing Your Soil Amendments
When you apply amendments is just as important as what you apply. For cool-season grasses, the best time to apply lime, sulfur, and heavy phosphorus/potassium amendments is in the early fall, right before or during your overseeding routine. The cool, moist weather helps the products break down and prepares the grass for winter dormancy. For warm-season grasses, target late spring just as the grass breaks dormancy and begins its aggressive summer growth phase.
Expert Insight on Soil Health
"A soil test is the only way to accurately determine the lime and fertilizer needs of a lawn. Guesswork often leads to over-application, which not only wastes money but can severely damage turfgrass and pollute surface and ground water. Regular testing every three years ensures your lawn care program remains efficient and environmentally sound."
— Penn State University Extension, Department of Plant Science
Conclusion: Your Next Steps
Soil testing removes the mystery from lawn care. By investing $20 and an hour of your weekend to pull proper soil samples, you arm yourself with the exact data needed to build a resilient, deep-rooted, and vibrant lawn. Stop guessing, start testing, and watch your turf transform from a patchy yard into the neighborhood showpiece. Head to your local university extension website today to order your first soil test kit, and take the first real step toward lawn care mastery.