
Tree Care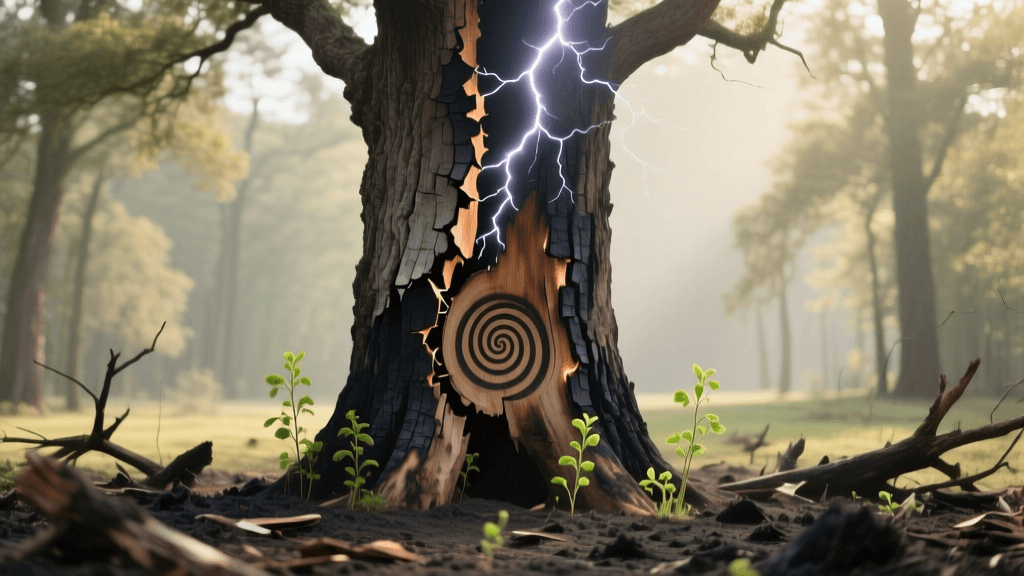
Lightning Strike Tree Damage: 2026 Photo Documentation & Recovery
The Intersection of Garden Photography and Arboriculture
Lightning strikes are violent, unpredictable, and leave a unique, often devastating signature on landscape trees. For garden photographers, landscape architects, and meticulous homeowners, documenting this damage is far more than just capturing a dramatic image for a portfolio. In 2026, high-resolution visual documentation is a critical first step in arboricultural assessment, insurance claims, and long-term recovery tracking. When a tree is struck, the superheating of sap and moisture creates explosive internal forces that strip bark, shatter wood, and disrupt the vascular system. Combining advanced mobile photogrammetry with traditional tree care protocols allows us to monitor a tree's compartmentalization process with unprecedented accuracy. This guide will walk you through the precise photographic techniques and recovery care schedules required to save and document a lightning-struck tree.
The Immediate Aftermath: Safety and Initial Documentation
Before you pick up your camera or approach the tree, safety must be your absolute priority. A tree that has just been struck can retain a dangerous electrical ground charge, and the surrounding soil may be energized. Furthermore, the structural integrity of the canopy is immediately compromised, making it prone to sudden, unannounced limb drops.
The 24-Hour Rule
Wait at least 24 to 48 hours after the storm has completely passed before approaching the strike zone. During this window, use a telephoto lens (200mm or longer) from a safe distance of at least 50 feet to capture the initial state of the canopy. Look for hanging branches, known as 'widowmakers,' which are a primary hazard. According to the International Society of Arboriculture (ISA), a tree that survives the initial strike is not necessarily safe; internal boiling of sap can create hidden spiral fractures that compromise structural integrity months later. Your initial telephoto shots will serve as a baseline for comparing future canopy dieback.
Photographic Assessment: Mapping the Strike Path
Once the area is deemed safe by a certified arborist or after the 48-hour waiting period, it is time to map the strike path. Lightning typically enters the tree at the highest point, travels down the trunk through the moisture-rich cambium layer, and exits through the root system into the soil. This path leaves distinct visual clues that must be meticulously documented.
Creating a Visual Map
Start with wide-angle context shots that show the tree's relationship to nearby structures, power lines, and other plantings. Then, move in to document the specific wounds. Look for spiral bark stripping, which occurs when the lightning follows the natural grain of the wood. Pay special attention to the root flare, where you will often find 'exit wounds'—areas where the soil has been blown outward and roots have been shattered as the electrical charge dissipated into the earth.
| Shot Type | Lens and Settings | Documentation Purpose |
|---|---|---|
| Full Canopy Context | 24-70mm (f/8, ISO 100) | Shows overall lean, branch loss, and proximity to structures. |
| Trunk Bark Stripping | Macro 90mm (f/4, ISO 400) | Reveals the exact lightning path, cambium scorching, and wood splintering. |
| Root Flare Exit Wounds | Wide Angle 16mm (f/11) | Identifies ground-charge dissipation points, root heaving, and soil displacement. |
| 3D LiDAR Scan | 2026 Smartphone LiDAR | Creates a volumetric model for insurance appraisals and structural analysis. |
Camera Settings for Bark Texture and Scorch Marks
To properly document the texture of shattered wood and scorched cambium, lighting and depth of field are paramount. Avoid using the built-in flash, as it will flatten the texture of the bark and wash out the subtle scorch marks left by the electrical discharge. Instead, shoot during the 'golden hours' of early morning or late afternoon when the raking side-light naturally enhances the deep grooves and splintered wood fibers.
For macro shots of the cambium layer, use an aperture of f/5.6 to f/8 to ensure the entire depth of the wound is in sharp focus. Focus stacking is highly recommended for extreme close-ups of the wound margins, allowing you to capture the exact boundary between living tissue and necrotic, heat-damaged wood. These high-resolution macro images are invaluable when consulting with remote arborists or plant pathologists who need to assess the viability of the remaining vascular tissue.
Recovery Care Protocols for Lightning-Struck Trees
Once the documentation phase is complete, the physical recovery process begins. A lightning-struck tree is essentially suffering from massive trauma, severe dehydration (due to vascular disruption), and extreme stress. Your goal in 2026 is to support the tree's natural defense mechanisms without overwhelming its compromised system.
Hydration and Mulching
The most critical step in the first six months is deep, consistent watering. The explosive heat of a strike often vaporizes the moisture within the trunk, leaving the tree severely dehydrated. Use a slow-drip root feeder or a soaker hose to deliver approximately 10 gallons of water per inch of trunk diameter at chest height, once a week during the growing season. Avoid overhead watering, which can promote fungal infections in the fresh wounds.
Apply a strict 'donut mulching' technique to retain soil moisture and regulate root zone temperatures. Spread a 3-inch layer of organic wood chips in a 3-foot radius around the trunk, but keep the mulch at least 3 inches away from the bark itself to prevent rot and rodent damage. Never use high-nitrogen fertilizers on a lightning-struck tree; forcing rapid, weak foliage growth will drain the tree's limited energy reserves, which it desperately needs for wound compartmentalization.
Delayed Pruning Strategy
Resist the urge to immediately prune away all damaged wood. Experts at the University of Minnesota Extension emphasize that delayed dieback is common, making long-term visual documentation an essential practice for any garden steward. Wait at least one full growing season before making major pruning cuts. This waiting period allows you to clearly see which branches have truly died and which are still pushing sap. When you do prune, make clean, precise cuts just outside the branch collar to facilitate the tree's natural healing process, and sterilize your tools with a 70 percent isopropyl alcohol solution between every single cut to prevent the spread of opportunistic pathogens.
Long-Term Visual Tracking and CODIT Monitoring
Trees do not 'heal' in the human sense; they compartmentalize damage. The Compartmentalization of Decay in Trees (CODIT) model explains how a tree builds chemical and physical barriers around a wound to isolate it from healthy tissue. As a garden documentarian, you can track this fascinating biological process over time.
Setting Up a Fixed-Point Time-Lapse Grid
Install a permanent, weather-proof marker in the ground exactly 10 feet from the trunk. Use this exact vantage point to take a photograph of the primary wound on the first day of every month for the next three years. By keeping your focal length, aperture, and vantage point identical, you will create a seamless time-lapse that visually demonstrates the tree's production of woundwood (callus tissue) as it slowly rolls over the damaged cambium. This visual data is not only scientifically fascinating but also provides undeniable proof of recovery (or decline) for property management records.
Insurance Claims and 2026 Photogrammetry
Mature landscape trees hold immense financial value, often appraising at tens of thousands of dollars. If your tree was struck and requires removal, or if it damaged adjacent property, your photographic documentation will be the cornerstone of your insurance claim. In 2026, insurance adjusters and consulting arborists heavily rely on 3D photogrammetry and LiDAR scanning.
Using a modern LiDAR-equipped smartphone or a consumer drone, walk a 360-degree perimeter around the tree to generate a dense point-cloud model. Applications like Polycam or DroneDeploy can instantly calculate the precise cubic volume of the timber and the exact dimensions of the canopy loss. Attach these 3D models, alongside your high-resolution macro shots of the root heaving and bark stripping, to your claim. This level of meticulous, tech-forward documentation drastically reduces claim disputes and ensures you receive a fair appraisal based on the current Council of Tree and Landscape Appraisers (CTLA) guidelines.
Making the Hard Call: Removal vs. Preservation
Not every tree can be saved, and part of responsible documentation is knowing when to let go. If your photographic timeline reveals that the callus tissue is failing to form, or if the canopy dieback exceeds 50 percent of the total crown after the first year, the tree is likely in irreversible decline. Furthermore, if your LiDAR scans reveal a severe spiral fracture that penetrates deep into the heartwood, the tree poses a catastrophic hazard to nearby targets. In these cases, use your comprehensive photo archive to obtain the necessary municipal permits for removal, and document the stump and root system post-removal to close out the tree's lifecycle in your garden records.
Conclusion
Lightning strike damage is a profound event in the life of a garden. By approaching the aftermath with the dual mindset of an arborist and a documentary photographer, you transform a moment of destruction into a valuable, long-term study of botanical resilience. Through careful safety protocols, precise photographic mapping, and disciplined recovery care, you give your tree the best possible chance at survival while building a rich, visual archive of your landscape's history. Whether the tree ultimately recovers to stand for another century or must be respectfully removed, your 2026 documentation ensures its story is accurately told, properly appraised, and deeply understood.

