
Gardening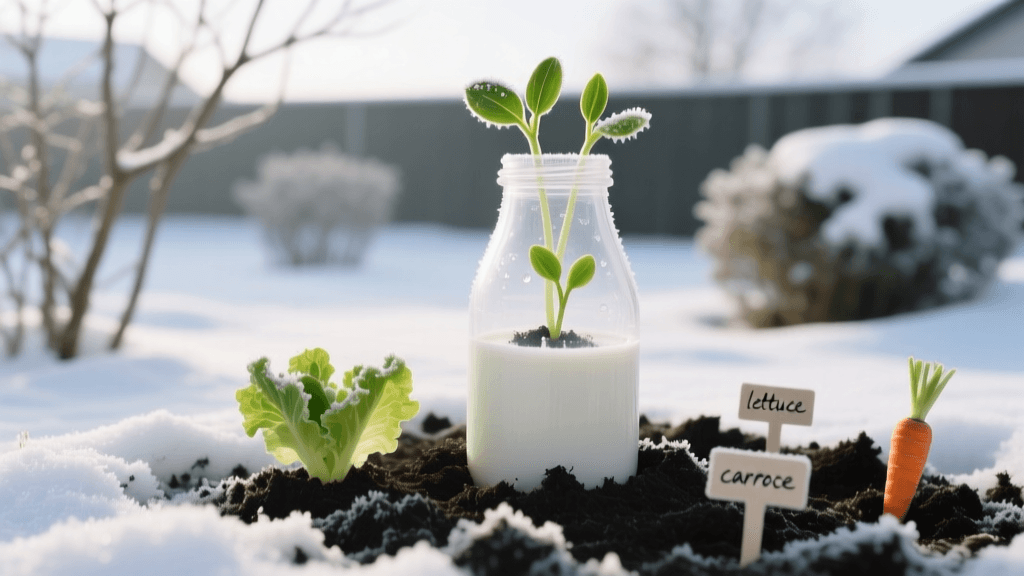
Mastering The Viral Milk Jug Winter Sowing Technique
The Viral Sensation Taking Over Gardening Social Media
Every January, gardening TikTok and Instagram Reels are flooded with a peculiar sight: hundreds of cut-up plastic milk jugs sitting in the snow. This is the viral milk jug winter sowing method, a brilliant, cost-effective hack that has taken the horticultural world by storm. But unlike many fleeting internet trends, this technique is deeply rooted in proven botanical science. Winter sowing involves using translucent plastic containers as miniature, unheated greenhouses to start seeds outdoors in the dead of winter. The method mimics nature's own germination cycles, resulting in robust, cold-hardy seedlings that are already acclimated to outdoor conditions by the time spring arrives.
Whether you are a seasoned master gardener or a beginner looking to maximize your yield without spending a fortune on indoor grow lights, mastering the milk jug winter sowing technique will revolutionize your garden planning. In this comprehensive guide, we will break down the science, the exact materials needed, precise measurements, and a step-by-step blueprint to guarantee massive spring garden success.
The Science: Cold Stratification and Natural Hardening
Why put seeds in the freezing snow instead of a warm indoor windowsill? The secret lies in a biological process called cold stratification. Many perennial flowers, native plants, and cold-hardy vegetables possess built-in germination inhibitors that prevent them from sprouting prematurely during a brief winter thaw. According to The Old Farmer's Almanac, these seeds require a prolonged period of cold, moist conditions to break dormancy. By placing seeds in milk jugs outdoors, you allow nature to provide the exact temperature fluctuations and moisture levels required to dissolve these inhibitors.
Furthermore, seedlings started indoors often suffer from 'damping off' (a fatal fungal disease) or become 'leggy' due to insufficient light and excessive heat. Winter-sown seedlings grow at a natural, slower pace under the full spectrum of the sun. Because they experience the freezing nights and windy days of early spring from the moment they germinate, they are naturally 'hardened off.' This eliminates the stressful, week-long transition period that indoor seedlings require before being planted in the garden.
Materials and Costs: What You Need
One of the primary reasons this method goes viral every year is the incredibly low barrier to entry. You can start hundreds of seeds for under $30. Here is your essential shopping list:
- Translucent Plastic Jugs (Free): Save your one-gallon milk or distilled water jugs. Avoid green-tinted or completely clear plastic; you need cloudy, translucent white plastic to diffuse harsh sunlight and prevent the soil from baking.
- High-Quality Seed Starting Mix ($12 - $18): Do not use heavy garden soil or standard potting mix, which can compact and harbor pathogens. A sterile, lightweight mix like FoxFarm Light Warrior or Miracle-Gro Seed Starter is ideal. For a DIY peat-free recipe, mix 40% coconut coir, 40% sifted compost, and 20% coarse perlite.
- Heavy-Duty Tape ($6 - $9): Standard duct tape degrades in UV light and snow. Invest in Gorilla Tape or a high-quality, weather-resistant acrylic tape to seal your jugs.
- Grease Pencil or Paint Pen ($4): Ink from standard markers will wash away in the rain. Use a grease pencil or an oil-based paint pen to label your jugs.
- 1/4-Inch Drill Bit or Soldering Iron: For creating precise drainage holes.
Step-by-Step: Building Your Mini Greenhouses
Follow these exact measurements and steps to construct your winter sowing jugs:
1. Clean and Prep
Rinse your jugs thoroughly with warm water and a mild bleach solution (1 part bleach to 9 parts water) to eliminate any residual bacteria or milk sugars that could attract pests or cause mold.
2. The Hinge Cut
Using a sharp utility knife or heavy scissors, cut horizontally around the jug, about one-half inch below the handle. Do not cut all the way through; leave a one-inch uncut section on the side opposite the handle to act as a hinge. This allows you to open the jug like a clamshell.
3. Drill Drainage Holes
Turn the bottom half of the jug upside down and drill or melt four to six 1/4-inch drainage holes. Proper drainage is non-negotiable; sitting water will rot your seeds before they ever sprout.
4. Add the Soil Mix
Moisten your seed starting mix in a large tub until it feels like a wrung-out sponge. Fill the bottom half of the jug with exactly 3 to 4 inches of soil. Gently tamp it down, but do not pack it tightly.
5. Sow the Seeds
Sprinkle your seeds evenly over the surface. For tiny seeds (like snapdragons or lettuce), simply press them into the surface. For larger seeds, cover them with a light dusting of soil according to the packet's depth instructions. Mist the surface gently with a spray bottle.
6. Tape and Label
Close the jug and seal the cut seam with two strips of heavy-duty tape. Leave the plastic cap off the jug permanently—this provides essential ventilation and allows rain and snow to enter. Label the outside and the inside of the jug with your grease pencil.
Pro Tip: Never use jugs that previously held chemicals, and avoid jugs with narrow necks that make it difficult to extract the soil block later. Standard square or circular gallon jugs work best.
Timing Guide by USDA Hardiness Zone
Unlike indoor sowing, which is dictated by frost dates, winter sowing is dictated by the natural calendar and your local climate. The goal is to put the jugs outside when the weather is consistently cold enough to prevent premature germination.
- Zones 3-5 (Harsh Winters): Begin sowing cold-hardy crops and perennials in late January through February.
- Zones 6-7 (Moderate Winters): Start your jugs in late December through January.
- Zones 8-9 (Mild Winters): You can begin as early as November or December, but you must monitor for unseasonably warm spells that might trigger early sprouting.
Top Seeds for Winter Sowing (Comparison Table)
Not all seeds are suitable for the milk jug method. Warm-weather crops with large seeds (like beans, corn, and squash) should be direct-sown or started indoors. Focus on cold-hardy vegetables, herbs, and perennials.
| Seed Category | Example Varieties | Ideal Sowing Window | Germination Trigger |
|---|---|---|---|
| Hardy Annuals | Snapdragons, Calendula, Sweet Alyssum | Jan - Feb | Natural freeze/thaw cycles |
| Perennials | Echinacea, Milkweed, Lavender, Black-Eyed Susan | Dec - Jan | Extended cold stratification (4-8 weeks) |
| Cold-Hardy Veggies | Kale, Spinach, Swiss Chard, Broccoli | Feb - Mar | Cool soil temps (40°F - 55°F) |
| Hardy Herbs | Parsley, Cilantro, Dill, Chives | Jan - Mar | Cool, moist soil conditions |
Maintenance and Troubleshooting
Once your jugs are assembled, place them in a location that receives bright, indirect light and is protected from harsh, drying winds. According to the experts at WinterSown.Org, the original pioneers of this method, the jugs act as self-sustaining terrariums. However, as spring approaches and the sun grows stronger, you must monitor them closely.
Watering and Venting
In the depths of winter, the condensation inside the jug will water the seeds. But once the seedlings emerge and daytime temperatures consistently rise above 50°F, you must remove the tape and open the jugs during the day to prevent the seedlings from cooking. Close them at night if a hard freeze is expected. If the soil surface looks dry and pale, water from the bottom by placing the jug in a shallow tray of water for 20 minutes, allowing the soil to wick up the moisture.
Dealing with Algae and Mold
A thin layer of green algae on the soil surface is normal and harmless. However, fuzzy white or gray mold indicates poor airflow. If you spot mold, immediately remove all tape, open the jug fully, and reduce watering frequency. Sprinkling a thin layer of fine horticultural sand or crushed charcoal over the soil surface can also inhibit fungal growth.
Transplanting Your Seedlings
By mid-to-late spring, your jugs will be packed with sturdy, vibrant seedlings. When it is time to transplant, do not pull the seedlings by their delicate stems. Instead, open the jug completely, slide out the entire soil block, and gently tease the root ball apart with your fingers or a clean fork. The University of Minnesota Extension notes that because these seedlings have already endured outdoor weather, they can be transplanted directly into the garden beds without the traditional hardening-off period, saving you weeks of labor.
Plant them at the same depth they were growing in the jug, water them in with a diluted liquid kelp fertilizer to reduce transplant shock, and apply a light layer of organic mulch to retain moisture. By leveraging the viral milk jug winter sowing technique, you bypass the need for expensive grow lights, eliminate the heartbreak of damping-off disease, and align your gardening efforts with the natural rhythms of the earth. Happy sowing!

